~*~ Alice ~*~
(Version française ici)


Translate this page:


This pointing hand is here to help you.
You can drag and drop it and use it as a marker to help with following the tutorial.
Martine


Tube(s) of your choice, free or not but the credit for all the tubes must be added to your tag. I used tubes from the scrapkit.

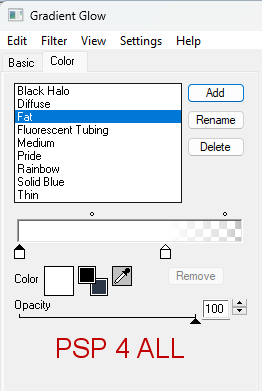
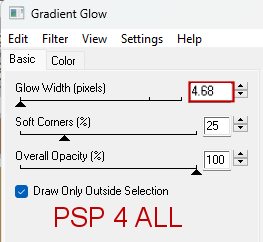
 Template: Lost in my Wonderland on Queen of Darkness blog. Download here.

AI Scrapkit Alice on Blaque Heart Designz blog. Download here.

Mask: Mask_DFly_0020.jpg by Dragonfly. Download here.

Plugins: Eye Candy 4000 > Gradient Glow.

Fonts: Alice in Wonderland for the text and Pixelette for the credits

******************************

Reminder: *** Method to color a layer or add a paper - To fill a layer with colour, Selections > Select All. Selections > Float > Selections > Defloat. Or click with the magic wand.

Add a layer > Fill with the new colour or paper, texture.

Apply plugin if needed.

Selections > Select None.

Or click on Selections and paste the paper or texture as a new layer.

Selections > Invert.

Delete.

Select None.

Delete the original layer.

*** Depending on the colors & tube you are going to use, feel free to change the mode and opacity of the layers.

*** Template: I work from the bottom to the top.


STEP 1 - Background

1. Open the template. Shift+D to duplicate.

2. Delete layer Raster2 - credits.

3. Raster 1: Selections and fill with BHD_Alice-Paper (29).

4. Select None.

5. Open  Mask_DFly_0020.jpg.

6. Layers > New mask layer > From an image and choose Mask_DFly_0020.

7. Click on OK.

8. Layers > Merge group.

9. Duplicate.

10. Image > Mirror.

11. Opacity of these 2 layers on 40%.

12. Copy the text layer above the Grey Circle layer.

13. Duplicate to have 4 copies in all.

14. Place a copy top right, another copy a bit lower on the right, another top left and another bottom left (see my tag).

15. BHD_Alice-El (147) - 30%, top right.

16. Duplicate.

17. Image > Mirror witth the copy on the right.

18Duplicate the copy.

19. And move it slightly down.


STEP 2 - Template

20. Top Dotted Circle et Bottom Dotted Circle - Apply Eye Candy 4000 > Gradient Glow : Fat and Blanc


21. Blue Rec 2 - Selections > Copy paper BHD_Alice-Paper (11) at 50% as a new layer.

22. Selections > Inverter > Delete.

23. Select None.

24. Apply the same Gradient Glow.

25. Blue Circle 2 - Repeat 21 à 24 but choose paper BHD_Alice-Paper (25).

26Blue Circle 1 - Repeat 21 à 24 but choose paper BHD_Alice-Paper (10).

27Red Rec 2 - Repeat 21 à 24 but choose paper BHD_Alice-Paper (3).

28. Blue Rec 2 - Repeat 21 à 24 but choose paper BHD_Alice-Paper (21).

29. Grey Circle - Repeat 21 à 24 but choose paper BHD_Alice-Paper (1).

30. Blk Circle 2 - Repeat 21 à 24 but choose paper BHD_Alice-Paper (17).

31. Blk Circle 1 - Close this layer.

32. Close Rect Back.

33. Red Rect - Repeat 21 à 24 but choose paper BHD_Alice-Paper (22).

34. Shapes 2 - Move to the left and apply the same Gradient Glow.

35. Shapes - Close this layer.

36. L Heart et R Heart - Repeat 21 à 24 but choose paper BHD_Alice-Paper (7).


STEP 3 - Tubes and Elements

38. There is a wide selection of tubes in the kit. I used BHD_Alice-El (8), BHD_Alice-El (21), BHD_Alice-El (23) and BHD_Alice-El (26).

39. BHD_Alice-El (106) - 30%. On the right and behind the Mad Hatter.

40. BHD_Alice-El (136) - 30%. Left of element 106 and bhind the Mad Hatter.

41
BHD_Alice-El (115) - 30%. Left of element 136 and behind the Mad Hatter.

42
. BHD_Alice-El (114) - 30%. Rotation 90°left. Under the Mad Hatter's feet.

43
. BHD_Alice-El (88) - 30%. Left.

44. BHD_Alice-El (110) - 30%. Left.

45. Le Wordart : Lost in my Wonderland. Text > Layers > Merge down (with text Outline).

46. Move this merged layer towards the bottom on the left so it is more visible.

47. Draw a thick white line with your paint brush on a new layer.

47. Apply Gaussian Blur on 25.

48. Move this layer under the WA to make the WA easier to see.

49. Write Alice  with the font Alice in Worderland, in small in black, same Gradient Glow added.

50. Duplicate several times and paste here and there.


STEP 4 - Credits

51. with a small font like Pixelette or any other small font.

52. Save.


Martine

15 May 2025

If you have any questions, don't hesitate to contact me