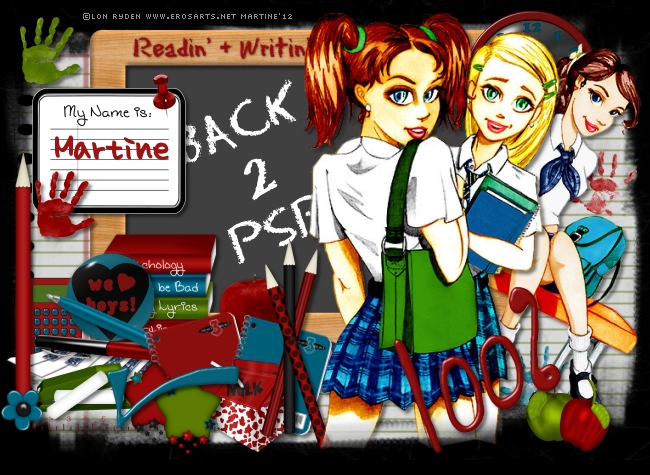
You can do pretty much what you like with your result: create signatures with name added, extras or stats, websets. Give all the credits that are required and for the tut to: Martine (http://chezmartine.com) for PSP 4 ALL ( http://psp4all.com).

Scrapkip: School of Rac by Randy's Sin of http://randyssin.blogspot.com/ - Download here. Mask: Mask WSL_Mask3 by WeeScotsLass at Weescotslass Creations. Fonts: Homework, Eraser and Pixelette for the name, text and credits. You can download my E-Book which will let you work without being connected. STEP 1: Mask Open a new transparent image 650x475 in PSP. Fill with black. Add a layer. Click on Selections > Select All. Open rs_paper2, delete the empty space around the paper. Just click on the image and copy paste it as a new image. That will remove the excess around the paper. Edtion > Copy > then click on your image and paste your paper in the selection. Selections > Select None. Open WSL_Mask3 and apply. Masks > New > From image - OK. Then Masks > Delete. In PSP 8 and above, it's under Layers > New Mask Layer > From Image. OK then Delete. STEP 2: Elements and tube(s) Once your element is resized, sharpen it: Adjust > Sharpness > Unsharp mask
Then add a drop shadow: I used
rs_framed1 - 40%. Place at the top, on the left. Your tube will go on the right. rs_clock1- 20%. Top, on the right. rs_calculator - 12%. Bottom left. rs_button1 - 15%. Bottom left. rs_piano - 45%. Bottom left. rs_pen1 - 20%. Bottom left. Image > Mirror. rs_pen2 - 20%. Bottom left. Image > Rotate Right 30°. rs_ruler - 45%. Bottom left. rs_stapler1 - 10%. Bottom left. rs_pencil2 - 40%. Bottom left. rs_notebook1 - 15%. Bottom left. Image > Rotate left 15°. rs_notebook2 - 15%. Bottom left. Image > Rotate right 15°. rs_milk - 15%. Bottom left. rs_stars1 - 12%. Bottom left. rs_stars2 - 12%. Bottom left. rs_chalk1 - 10%. Bottom left. Rotate Right 15°. Duplicate. Rotate this new layer to the left 35%. rs_name sticker1 - 22%. Top left. rs_pushpin1 - 7%. Top, on the right of the name sticker. rs_handprint1 - 10%. Bottom left of the name sticker. rs_handprint5 - 10%. Right at the top, on the left. rs_handprint2 - 10%. Top right. rs_handprint4 - 10%. Top right rs_apples1 - 12%. Top right. rs_checkmark1 - 18%. Bottom left. rs_pencils - 30%. At the bottom, towards the middle. Add your tube(s). rs_100 - 30%. Bottom right. STEP 3: Text With the Homework font, add your name on the rs_name sticker1, in red. Then click on the frame rs_framed1. Click once inside with the magic wand. Then selections > Modify > Increase by 5 pixels. Add a layer and fill with #404040. Click on the text tool, then select the Eraser font, create as vector and white, then write the text of your choice. Rotate your text slightly to the left. Click on Layers > Convert to Raster Layer. STEP 4: Credits Credits: with the font Pixelette or any other pixel font.
STEP 5: Finished tag |

