Plugins: Mehdi > Sorting Tiles Simple > Center Tile It@lian Editors Effect > Effetto Fantasma AP Lines > SilverLining MuRas's Meister > Copies Material: Narah's Mask_1450 here. Fonts: Eraser and Stick Figures for the board & Pixelette for the text and credits. Depending on the colors & tube you are going to use, feel free to change the mode and opacity of the layers. STEP 1 - Le fond Open an image 600x250. Fill with white. Make a gradient Sunburst with 2 colours of your tube = dark blue #38689C
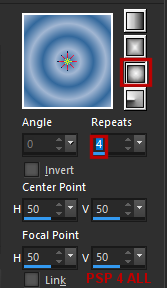
and light blue
#A1B6D2. Sunburst H&V =50 and Repeat on 4.
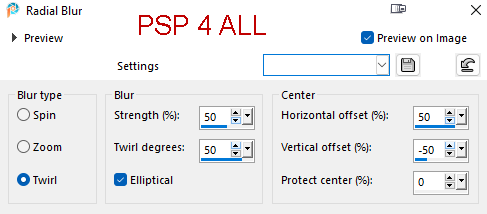
Adjust > Blur > Radial Blur
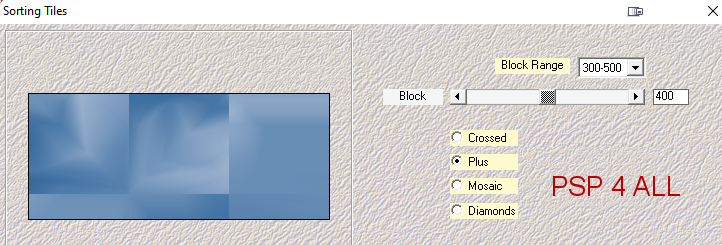
Mehdi > Sorting Tiles
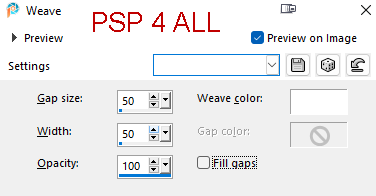
Effects > Texture Effects > Weave
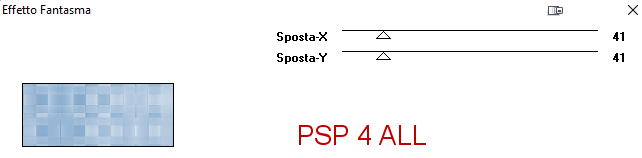
Effects > Simple > Center Tile. Edge Effects > Enhance. Duplicate > Image > Flip > Flip Vertical. On copy, properties --> Opacity on 50 and Blend mode on Screen. Italian Editors > Fantasma
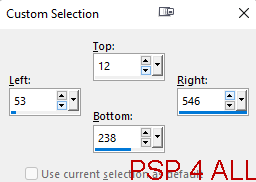
Layers - Add a layer > Fill with #FFFFFF (blanc). Open NarahsMasks_1450. Mask Layer > From an image and choose NarahsMasks_1450. Click on OK. Layers > Merge Group. Layers > Merge visible. Selection tool > Custom Selection
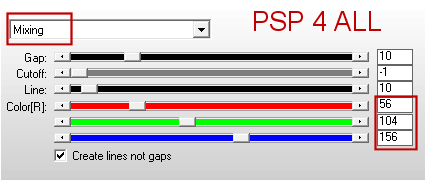
Selections > Promote Selection to Layer. Selections > Select None. Apply a Drop Shadow 3, 3, 75, 5 color #38689C and repeat but change H and V: -3, -3, 75, 5. Back to the original layer, apply AP Lines - SilverLining > Mixing. I used the RGB for the darker blue "#38689C" with Red on 56, Green on 104 and Blue on 156.
On the layer above - the promoted selection. Selection Tool > Custom Selection
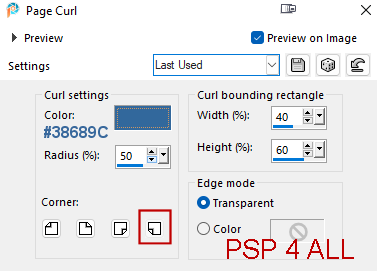
Selections > Promote Selection to Layer. Fill with #93624D. Selections > Modify > Contract 6 pixels. Delete. Fill with #3C3C3C. Selections > Select None. STEP 2 - Text, Tubes and Credits Text: Add a layer and write your text. I wrote Back to School with the Eraser font in white. I used the font Stick Figures to draw a few figures. Credits: with the font Pixelette or any other small pixel font. Tube: on the left ŕ gauche a close up of the tube. And a smaller version of the whole tube on the right. Add a Drop Shadow: 2, 2, 75, 5. STEP 3 - Corner and Border Corner: Edition > Copy special > Copy merged. Edition > Paste As New Image. Duplicate. On the copy: apply Effects > Image Effects > Page Curl
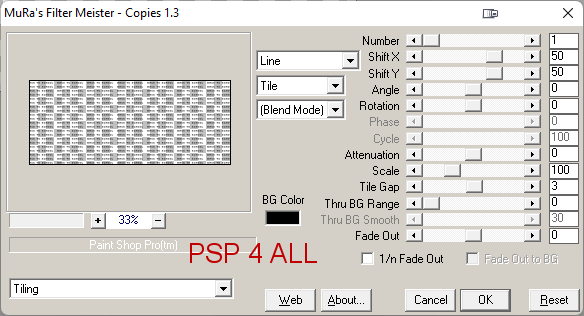
On the original layer: set the opacity around 30. Text: With the font Pixelette, in black, create as vector, write Back To School or the text of your choice. Objects > Align > Center in Canvas. Promote selection to layer. Apply MuRa's Meister > Copies
Copy paste this text as a new layer on your work. Lower the opacity. Set it around 35. Border: Add a layer. Selections > Modify and contract by 2 pixels. Fill with blue (#38689C). Selections > Delete. Selections > Select None. Credits: with a small font like Pixelette or any other small font. Merge visible and save. Martine 5 September 2022 If you have any questions, don't hesitate to contact me |