Supplies: My image - it is not empty, it has all the Alpha selections needed for the tut and masks. Download here. Masks: One sg_shaded-stripes from Essex Girl - http://www.essexgirl.uk.com/sg_masks_index.htm and 2 from Nikita 1250181664_nikita_masque and 1250181566_nikita_masque (site no longer available). Plugins : FU2 > &<BKg Designers sf10IV> > @Instant Tile Carolaine & Sensibility > cs_texture L en K landandksiteofwonders > Zitah Graphics Plus > Cross Shadow dsb flux > Linear Transmission Distortion Filters > Scanline Shifter Eye Candy 6 > Gradient Glow Font: Pixelette for the credits. ****************************** *** Depending on the colors & tube you are going to use, feel free to change the mode and opacity of the layers. Mes couleurs : #96157D (foncé) et #FBCFE5 (clair) ; #59156B (foncé) et #E5C7F3 (clair) STEP 1 - B
- Le fond
4. Duplicate and on the copy, apply &<BKg Designers sf10IV> > @Instant Tile
5. Open mask sg_shaded-stripes. 6. Layers > New mask layer > From an image and choose sg_shaded-stripes. 7. Click on OK. 8. Layers > Merge group. 9. Blend Mode on Multiply. 10. Layers > Merge Visible. 11. Apply Carolaine & Sensibility > cs_texture
12. Apply L en K landandksiteofwonders > Zitah
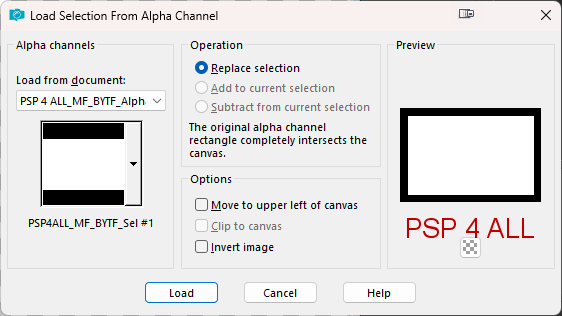
STEP 2 - Middle background 13. Selections > Load/ Save selection > Load Selection From Alpha Channel. Select PSP 4 ALL_MF_BYTF_Sel # 1. 14. Click on Load.
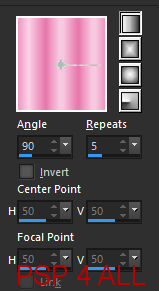
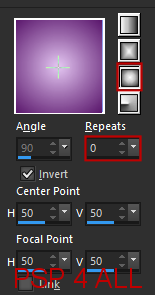
15. Add a layer and fill with #59156B. 16. Add a layer and fill with a gradient halo 2 colours - #59156B et #E5C7F3, Repeat on 0
17. Keep selected. Duplicate. 18. On the copy, apply mask 1250181664_nikita_masque. 19. Merge group and select Lighten for the Blend mode. 20. On the original, apply mask 1250181566_nikita_masque. 21. Merge group. 22. Go to the top of the pile and Layers > Merge Down. 23. Layers > Merge Down. The 3 top layers are now merged, background is separated. 24. Selections > Select None. 25. Apply Graphics Plus > Cross Shadow
26. Duplicate and on the copy, apply dsb flux > Linear Transmission
27. Blend Mode on Lighten. 28. Merge Down. 29. Selections > Select None. 30. Selections > Load/ Save selection > Load Selection From Alpha Channel. Sélectionner PSP 4 ALL_MF_BYTF_Sel # 2. 31. Click on Load. 32. Add a layer and fill with #59156B. 33. Selections > Select None. 34. Apply Distortion Filters > Scanline Shifter
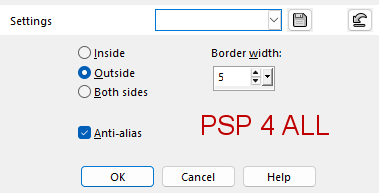
35. Blend Mode on Lighten. 36. Merge Down. 37. Apply Drop Shadow 3, 3, 100, 55. Colour #59156B. STEPE -Decos, WA and tube 38. Selections > Load/ Save selection > Load Selection From Alpha Channel. Sélectionner PSP 4 ALL_MF_BYTF_Sel # 3. 39. Click on Load. 40. Add a layer and fill with #FFFFFF (white). 41. Selections > Select None. 42. Add Drop Shadow 3, 3, 75, 8. Color #59156B. 43. Selections > Load/ Save selection > Load Selection From Alpha Channel. Sélectionner PSP 4 ALL_MF_BYTF_Sel # 4. 44. Click on Load. 45. Add a layer and fill with #59156B. 46. Add a close up of your tube in the 2 frames. 47. Selections > Select None. 48. Blend Mode on Luminance(Legacy). 49. Merge Down. 50. Repeat so the 2 frames are on the same layer. 51. Selections > Modify > Select selection borders
52. Fill with blanc. 53. Selections > Select None. 54. Add Drop Shadow 3, 3, 75, 8. Color = #59156B. 55. PSP 4 ALL_MF_BYTF_Sel # 5 - Add a layer, load the Alpha selection and fill with white. 56. Selections > Select None. 57. Add Drop Shadow 3, 3, 75, 8. Color = #59156B. 58. PSP 4 ALL_MF_BYTF_Sel # 6 - Add a layer, load the Alpha selection and fill with white. 59. Selections > Select None. 60. Add Drop Shadow 3, 3, 75, 8. Color = #59156B. 61. PSP 4 ALL_MF_BYTF_Sel # 7 - Add a layer, load the Alpha selection and fill with white. 62. Selections > Select None. 63. Apply Eye Candy 6 > Gradient Glow Click to make it bigger.
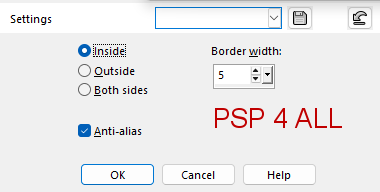
64. Add the tube on the left. 65. Add Drop Shadow 3, 3, 75, 8. Color = #59156B. STEP 4 - Borders and Credits 66. Borders - Activate the background at the bottom of the pile (Step 1) 67. Select All. 68. Selections > Modify > Select selection borders
69. Fill with white. 70. Select None. 71. Activate the middle background (Etape2) 72. Select All. 73. Add a layer. 74. Selections > Modify > Select Selection Borders
75. Fill with white. 76. Select None. 77. I have moved this border and placed it above
the sel #3 layer(the vertical white lines)
78. Credits: with a font like Pixelette or any other small pixel font. Martine 10 July 2025 If you have any questions, don't hesitate to contact me
|