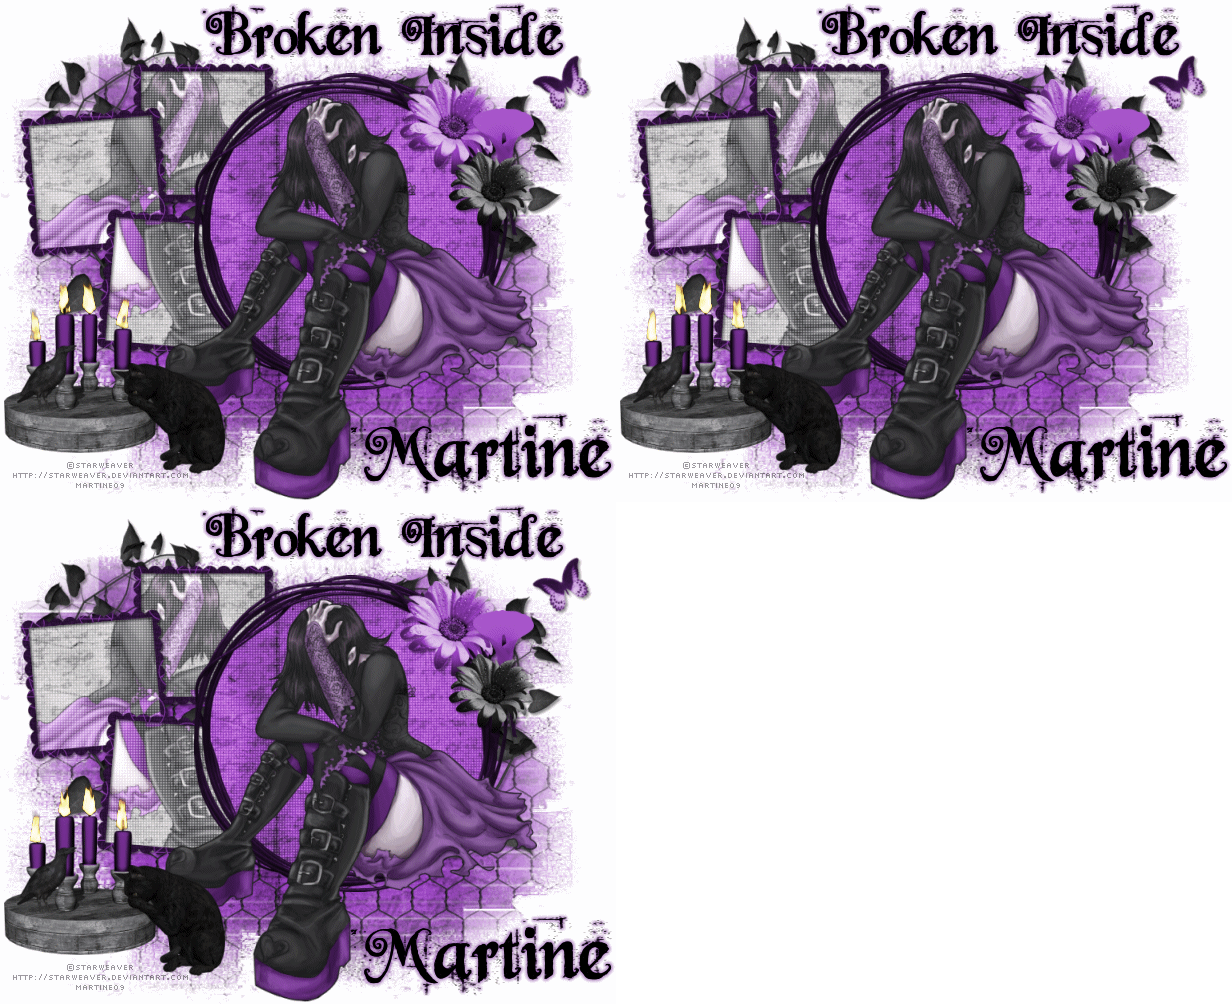
|
(Version française ICI) |
|
|
|
|
|
|
|
You can do pretty much what you like with your result: create signatures with name added, extras or stats, websets.
|
Martine |

Scrapkit: SBJ_GothicAbby_AddOn_Freebie par Scraps by Joeswife à http://scrapsbyj0eswife.blogspot.com/
Mask: One of Rachel at Enchanted by Darkness - site is unavailable at time of writing. EBD Mask 4
Plugins: Alien Skin Xenofex2 that you can buy here: Xenofex2 - Alien Skin Eye Candy 4000 available here: Alien Skin - Penta.com Color Dot filter to download here.
Fonts: Beyond Wonderland for the text; Pixelette for the credits.
You can download my E-Book which will let you work without being connected.
STEP 1
Background : Open a new image 800x650 - Fill with white, the colour for our Results' page.
STEP 2
Mask : New layer and fill with a colour of your choice - maybe a colour from your selected tube. I used #56236D. Then apply EBD Mask 4. Masks > New > From image - OK. Then Masks > Delete. In PSP 8 and above, it's under Layers > New Mask Layer > From Image. OK then Delete.
Chicken Wire : SBJ_Chicken Wire 1 resized to 70% then paste as e new layer. Re-apply EBD Mask 4.
STEP 3 - Frames
The three frames : - SBJ_Frame Cluster_7 resized to 40% and recolored if necessary. I used the same colour as before : #56236D. Adjust > Hue and Saturation > Colorize : Hue =199 and Saturation = 131(In PSP 7, it's under Colors) if using the same colour as me. Then Image > Mirror and paste as a new layer.
Click inside the three frames while keeping your finger down on the shift key on your keyboard - you selection the inside of all three frames at the same time. Then Selections > Modify > Expand by 4. Paste one of the papers: SBJ_Paper 12a and click on Selections > Invert then Delete on your keyboard.
Keep selected and add your tube. Click on your tube > Image > Mirror. Resize it if needed and then paste your tube as a new layer. Click on the delete key on your keyboard.
Deselect all.
Close the bakground layer, the mask layer, the Chicken Wire layer and the SBJ_Frame Cluster_7 layer and merge visible the other two layers: the paper layer and the tube layer.
Effects > Plugins > Penta Dot.com > Color Dot:
|
|
Duplicate this layer.
Click on the top layer the Layers > Properties > Blend Mode > Screen. Merge visible these two layers.
Move this merged layer under the SBJ_Cluster Frame layer.
The round frame : SBJ_Wire Circle Frame 2 resized to 70% then recolored as you did before. Add as a new layer on the right of the three frames.
Click inside then selections > Modify > Expan,d by 4. Paste one of the papers: SBJ_Paper 13a and click on Selections > Invert then hit the Delete key on your keyboard.
Apply the same Color dot effect as above.
Move this layer under the Wire Circle Frame layer.
Add your tube above the Wire Circle Frame layer.
STEP 4 - Elements
Flowers on the right: SBJ_Flower - the first one resized to 18% and the other one to 10%. Calla Lily, recolour first and then resize to 20%. Recolour the flowers too if you so wish.
Butterfly on the right: SBJ_Butterfly resized to 7% and recoloured if necessary.
Candelabra and candles: SBJ Candles resized to 35% then recolour the candles if necessary. Use the lasso tool to draw around the candles before recoloring.
Crow: SBJ_Crow resized to 18%.
Cat : SBJ_Cat resized to 25%.
Ivy: SBJ_Ivy 1 resized to 75%. Position on the left below the frames and above the Chicken Wire layer. There is some extra ivy at the bottom. Use the lasso tool to select what you want to remove. I have none showing there.
Duplicate this layer then Image > Mirror and place on the right under the flowers.
ST
EP
5
Resize all layers to 75% or 80% of the original
size. Add a drop shadow to these elements: flowers, butterfly, ivy and your main
tube
H: -2 and V: 0
O: 40 and B: 3
Text/ Name & Credits: Do not leave your tag with no text and/ or name.
Text
and name with the Beyond Wonderland font - Size 60 - #000000
for the name and size 48 for the Broken inside text. Check the anti alias.
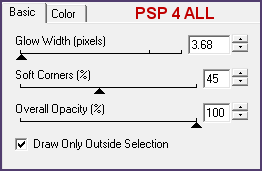
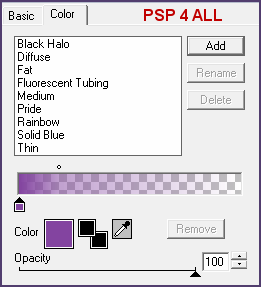
Then apply the Gradient Glow effect on the text and your name.
Effects >
Plugins > Eye Candy 4000 > Gradient Glow :
|
|
|
ST
Activate the Candles layer and duplicate twice to have three copies: Candles 1, Candles 2 and Candles 3.
Close the Candles 2 and 3 layers.
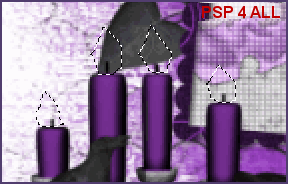
With the lasso tool - free hand - draw 4 flames.
|
|
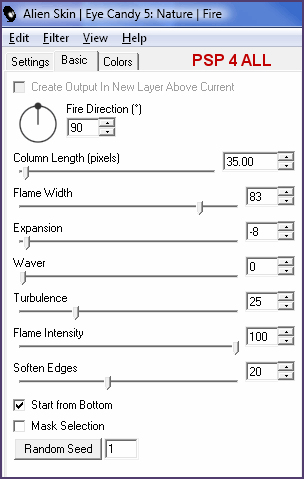
Then Effects > Plugins > Alien Skin Eye Candy 5: Nature > Fire.
Click on Settings and select Small Candle then configure Basic as below
|
|
Click on OK. Merge visible all the layers and paste this image in Animation Shop.
Go back to PSP. Click on Undo and activate the Candles 2 layer. Keep Candles 3 closed and close the Candle 1 layer. Apply the Fire effect again but click once on Random Seed.
Merge visible all the layers and copy paste this new image after the first frame in AS.
Go back to PSP. Click on Undo and activate the Candles 3 layer. Keep Candles 1 closed and close the Candles 2 layer. Apply the Fire effect again but click once on Random Seed.
Merge visible all the layers and copy paste this new image after the second one in AS
STEP 7 - Animation Shop
You have three frames.
Click on the first > Edit > Select All.
Right click on the first frame then choose Frame Properties - enter 35 or a suitable time for the Display time.
Save as a gif.
Martine
16 July 2009
If you have any questions, don't hesitate to contact me
