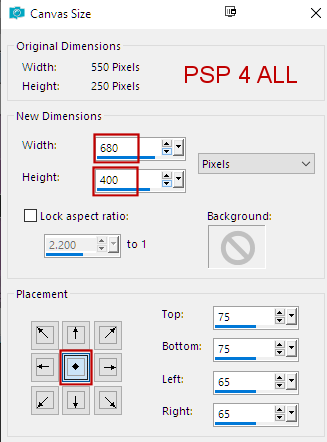
STEP 1 - Layer white background Open the template. Duplicate. Close the original. For each layer, do this: Selections > Select All. Selections > Float > Selections > Defloat. Add a layer > Fill with the new colour. Apply the plugin. Selections > Select None. Then either Delete or close the original layer. Then move on to the next layer. The template is 550x250. Increase. Click on Image > Canvas Size
Close these layers: info; frame and frame fill. White Background - Add a layer > Fill with #30983F(green). Duplicate twice in order to have 3 green layers. Fill with white the bottom layer white background. Bottom green layer - Apply Toadies > Blast'em
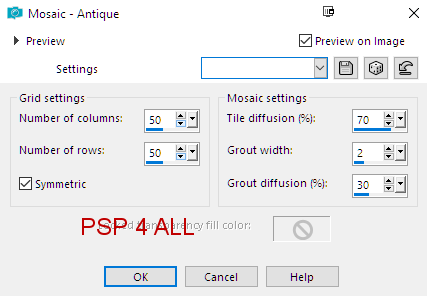
Middle green layer - Effects > Texture Effects > Mosaic - Antique
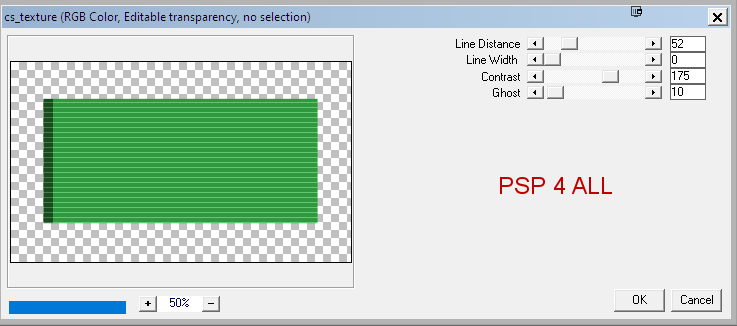
Top green layer - Carolaine and Sensibility > cs-texture
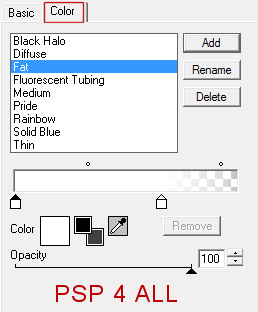
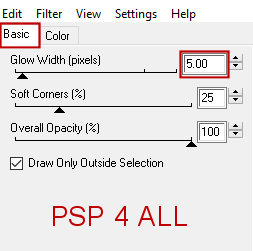
Then apply Eye Candy 4000 > Gradient Glow - Fat, White, Glow Width=5
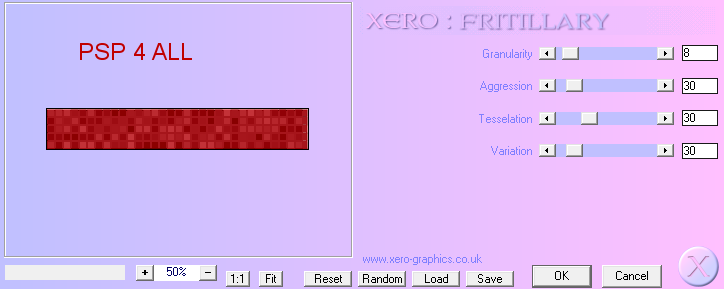
Select the Gradient Glow with the magic wand and fill with white. Selections > Select None. STEP 2 - The other layers rectangle2 background - Fill with white. rectangle2 - Fill with red #A6151B. Apply Xero > Fritillary
rectangle1 background - Fill with white. Rectangle1 - Fill with red #A6151B. Apply Xero > Fritillary square2 background - Fill with white. Apply Effects > Texture Effects > Blinds - color red #A6151B
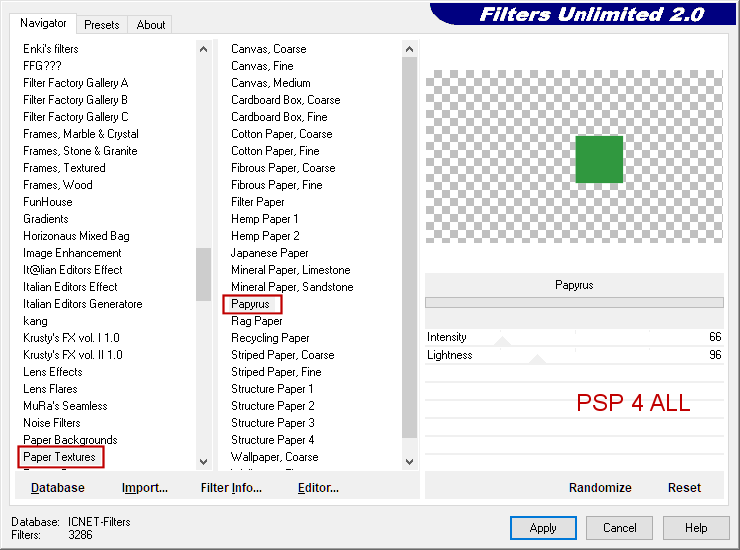
square2 - Fill with green #30983F. square1 background - Fill with white. Apply Effects > Texture Effects > Blinds - color green #30983F. square2 - Fill with green #30983F. STEP 3 - Tube and Elements Sampler 2 (12) - 14%. Rotate right 20°. Top right. Apply Gradient Glow - enter 3 fot the Glow Width. Sampler 2 (15) - 60%. Bottom. Sampler 2 (11) - 30%. Sampler 2 (10) - 50%. Image > Mirror. Add the tube on the left. Back to the 2 green squares: square1 and square2. Square2 - With the magic wand, select the green square and then apply FU2 > Paper Textures > Papyrus.
I have copied pasted as a new layer one of the gingerbread men into the selection. You can use one of the scrapkit elements if you prefer. Then Invert. Delete. Set the Blend Mode on Luminance or the mode best suited to your tube. Selections > Select None. Apply FU2 > Paper Textures > Papyrus. Repeat for square1. STEP 4 - Wordart and Credits Wordart: i'm Santa's FAVOURITE - 60%. Apply Gradient Glow. Credits: with a small pixel font like Pixelette or any other small font. Martine 9 December 2021 If you have any questions, don't hesitate to contact me |