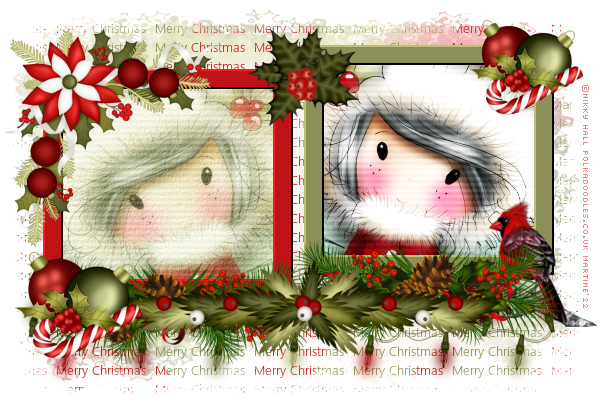
EP 1 - The 2 frames
Open an image 600x400 and fill with white.Add a layer. Selections >
Select All.
Copy paste MC_CC_ClassicChristmas_P09 Into Selection.
Selections > Select None.
Open mask WSL_Mask
533.
Layers > New Mask Layer > From Image and choose WSL_Mask 533.
Click
on OK.
Layers > Merge Group.
Add my text Merry Christmas
as a new layer.
Open mask WSL_Mask
469. Image > Flip > Flip Vertical.
Apply mask WSL_Mask
469.
Merge group.
Opacity on 33.
Add a layer. Click on
Selections > Load/Save Selection > Load Selection From
disk. Choose
PSP4ALL_MF_Xmas_Sel1_mf22.PspSelection.
Fill with
red #BE1217 or colour of your choice.
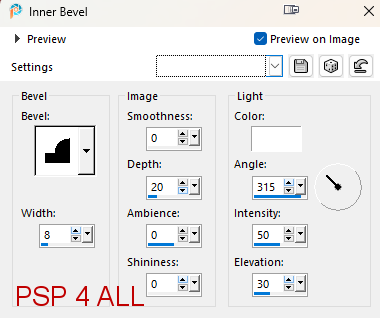
Apply Effects > 3D Effects >
Inner Bevel
Add a layer. Click on
Selections > Load/Save Selection > Load Selection From
disk. Choose
PSP4ALL_MF_Xmas_Sel2_mf22.PspSelection.
Fill with green #8c9058 or
colour of your choice.
Apply Effects > 3D Effects >
Same
Inner Bevel.
Click in the middle of the red
frame with the magic wand.
Selections > Modify >
Expand 5 pixels.
Add a
layer and copy paste MC_CC_ClassicChristmas_P09 in the
selection.
Keep selected and copy paste your tube as a new
layer.
Selections > Invert
> Delete.
Selections > Select None.
Duplicate the paper layer
and copy paste as a new layer in the green frame on the right.
Duplicate the tube and copy paste as a new layer in the
green frame. Image > Mirror Horizontal.
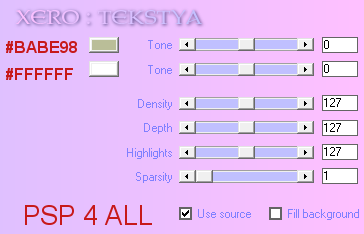
Back to the red frame. Apply Xero > Tekstya on the tube
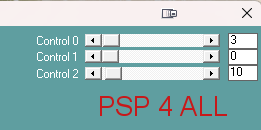
Then C&S_H-Lines
Duplicate the tube. Apply Gaussian Blur radius on 5. Set
the opacity of this layer on Overlay or a Blend mode that suits
your tube.
Tube on the right - Apply C&S_H-Lines.
Duplicate the tube. Apply
Gaussian Blur radius on 5. Set the opacity of this layer on
Overlay or a Blend mode that suits your tube.
STEP 2 - Elements
MC_CC_ClassicChristmas_E13 - 75%. Bottom.
MC_CC_ClassicChristmas_E04 - Image > Mirror Horizontal. 50%. Right,
bottom.
MC_CC_ClassicChristmas_E18 - 50%. Duplicate. Mirror on the
copy and move up to put in similar position.
MC_CC_ClassicChristmas_E14 - 40%.
MC_CC_ClassicChristmas_E01 - 40%. Top, left.
MC_CC_ClassicChristmas_E22 - 45%. Bottom, left.
MC_CC_ClassicChristmas_E22 - 40%. Top, right.
MC_CC_ClassicChristmas_E17 - 50%.
MC_CC_ClassicChristmas_E27 - 60%.
STEP 3 - Credits
Credits:
with a small pixel font like Pixelette
or any other small font.
Martine
6 December 2022
If you have any questions, don't hesitate to contact me