You can do pretty much what you like with your result: create signatures with name added, extras or stats, websets.
 One tube of your choice, free or not, but in either case, credit must
be given on the tag. I used a tube ©Jamie Kidd -
http://jamiekidd.com.
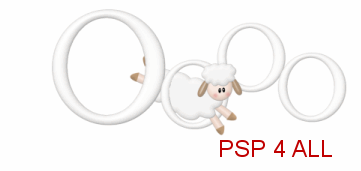
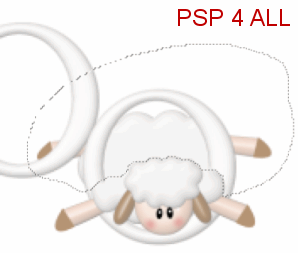
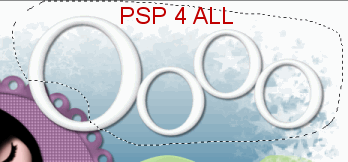
Fonts: Pixelette for the credits; Alcohol Licks, Starry Night and Tempus sans ITC.You can download my E-Book which will let you work without being connected. STEP 1 Open a new transparent image 650x500. Add a layer and fill with white. STEP 2: Animation Open E30. Resize to 53%. Copy paste towards the top, on the right - see my result. Then duplicate until you have 7 copies. Important: Name these layers 1, 2, 3, 4, 5, 6, 7. Close all layers except layer 1. Le mouton du calque 1: Open the sheep E2 and resize to 40%. Copy paste as a new layer under the first circle on the left. Rotate it 50° to the left. Place it so that the head and part of the body is in the circle.
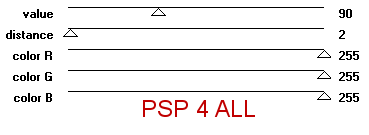
Close all layers except the sheep and 1. Merge visible and rename 1. Add a drop shadow:
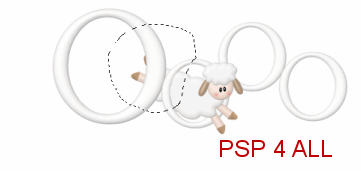
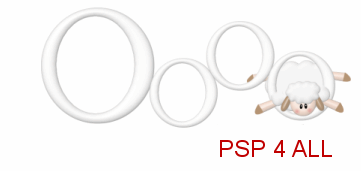
Close the 1 layer and open 2. Sheep on 2 layer: E2 at 40%. Copy paste as a new layer and position above the 2 layer in the 2nd circle. Duplicate and move the copy under the 2 layer. Activate the origianl sheep layer and with the lasso tool, select the bottom and back legs. Click on Delete. We want to give the impression that the sheep is jumping through the circle.
Merge visible the 2 sheep layers and the 2 layer and rename 2. Add the same drop shadow. Close this 2 layer and open 3. Sheep on 3 layer: E2 at 40%. Copy paste as a new layer above the 3 layer. Rotate the sheep 60° to the left. Duplicate and move this copy under the 3 layer. Activate the original sheep layer and select the head and front paws and the top part of the body and hit Delete. The sheep will now look as if jumping through the circle. Selections > Select none.
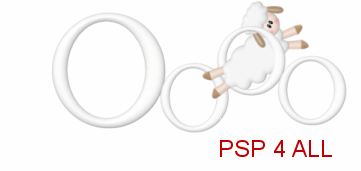
Merge visible the 2 sheep layers and the 3 layer and rename 3. Apply the same drop shadow. Close this 3 layer and open 4. Sheep on 4 layer: E3 at 40%. To be added to the 4th circle. Duplicate the sheep layer and move under the circle. With the lasso tool, select the bacl legs and the body right up under the front paws and Delete. Selections > Select none.
Merge visible the 2 sheep layers and the 4 layer and rename 4. Apply the same drop shadow. Close this 4 layer and open 5. Sheep on 5 layer: E2 at 40%. Image > Mirror. Merge visible the 5 layer and the sheep. Same drop shadow. Sheep on 6 layer: E1 at 40%. Image > Mirror. Merge visible the 65 layer and the sheep. Same drop shadow. Keep the 7 layer as is, without a sheep. Same drop shadow. STEP 3: Layers under the Sheep Animation Open the white background. The grass E26 at 50%. Add as a new layer on the right. The fence E4 at 25% to be added above the grass layer on the right. Duplicate and move the copy to the left. Image > Mirror on the first fence layer. Same drop shadow on both fences. Activate the white background. Add a layer and fill with a gradient in the tones of blue. I used #156593 for the abckground and white for the foreground but use whatever colours you like.
Mask: Open the Star Fade Border mask. Masks > New > From image - OK. Then Masks > Delete. In PSP 8 and above, it's under Layers > New Mask Layer > From Image. OK then Delete. Select the whole of the bottom part of the mask, the part below the grass and fences, then fill this whole area with a green to match the grass. Activate the grass layer and apply the same mask. STEP 4: Elements above the Sheep Animation The circular frame E19 at 68%. Place on the left as a new layer - see my tag. The first O, the first circle of the animation must be partly covered, just a tiny bit. My frame was then colorized. I used one of my tube colours #8E608A. Adjust > Hue and Saturation with the Hue at 215 and the saturation at 49. Click inside the frame with the magic wand and Selections > Modify > Increase by 5 pixels. Add a layer and fill with a colour of your choice or mine #8E608A. Apply penta.com> Color dot
Selections > Select none. Same drop shadow on the frame. Add the tube of your choice. Apply the same drop shadow. Duplicate the 7 layer of your sheep animation and move the copy above the E19 frame. Activate this copy and with the lasso tool select most of the circles as I have done below and hit Delete.
Keep just a tiny bit, crescent shape on the left. Add some little stars here and there. E13 - resized to 10%, 12% and 15%. Add the moon E12 at 40% Add the cloud E6 at 25%. Duplicate and resize the copy at 70%. STEP 5: One sheep... two sheep ... three sheep...etc.. text Trace a wavy line with the draw tool set as follows: Set your Foreground (stroke) colour to black and your Background (Fill) colour to Null. Choose free hand, vector, width of 1
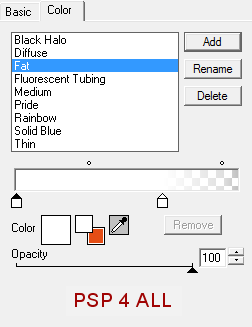
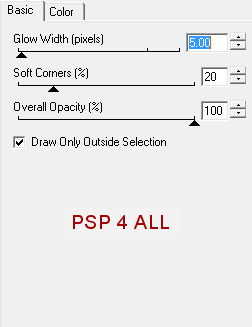
Place the mouse pointer right on the line and click once when you see this The text box will open and you can now write my text One Sheep ... two sheep ...three sheep ... four sheep ... five sheep ... or one of your choice, using the font Tempus Sans ITC with antialias on, vector, in size 16, black. Click on the + sign in the Layers Palette. Close the freehand layer and convert the vector layer to a raster layer. Apply Eye Candy 4000> Gradient Glow
And a drop shadow.
STEP 6: Good Night text or text of your choice New layer. Write Good with the Alcohol Licks font, size 55, Bold, colour #8E608A. Apply an Inner Bevel.
Then the same Gradient Glow. And the same drop shadow you used for the other text. If you have any questions, don't hesitate to contact me
|