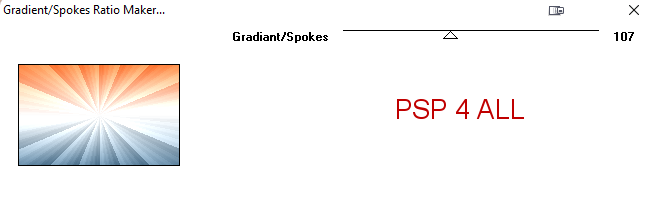
Tramages > Gradient/Spokes Ratio Maker BorderMania > Frame #2 Carolaine and Sensibility > CS-DLines, CS-LDots and CS-HLines Eye Candy 4000 > Gradient Glow Mehdi > Sorting Tiles It@lian Editors Effect > Effetto Fantasma Flaming Pear> Flexifly2 STEP 1 - Background Open an image white #FFFFFF, 800x500. Make a Linear Gradient with 3 colours (my gradient is in the material. You use it or you change the colours). I used #4C718D (bleu) and #FB722D (orange) and in the middle #FFFFFF (blanc). Add a layer and fill with the gradient. Tramages> Gradient/Spokes Ratio Maker
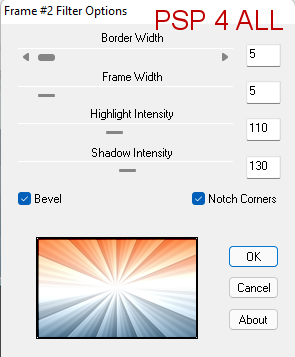
BorderMania > Frame #2
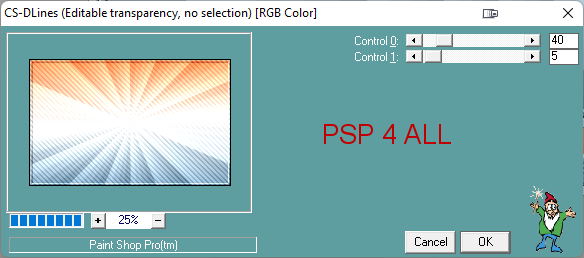
ApplyCarolaine and Sensibility > CS-DLines.
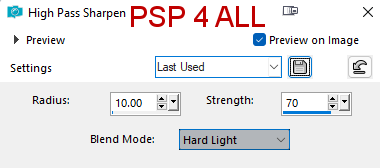
Adjust > Sharpness > High Pass Sharpen
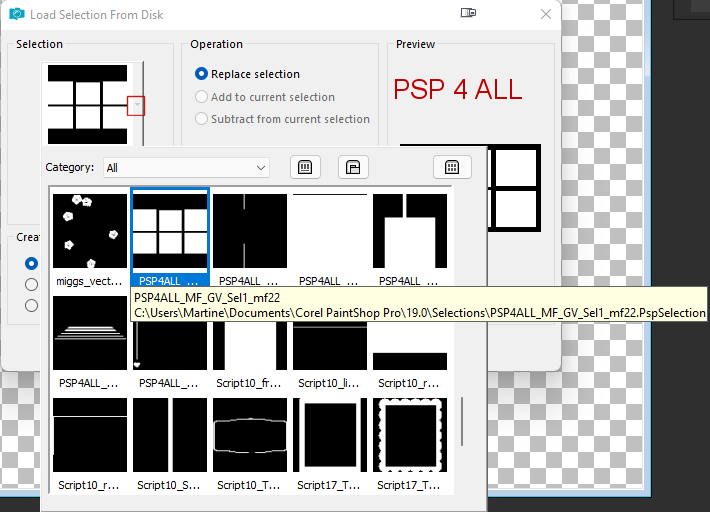
STEP 2 - Second layer Add a layer. Selections > Load/Save Selection > Load Selection From disk. Choose PSP4ALL_MF_GV_Sel1_mf21. PspSelection
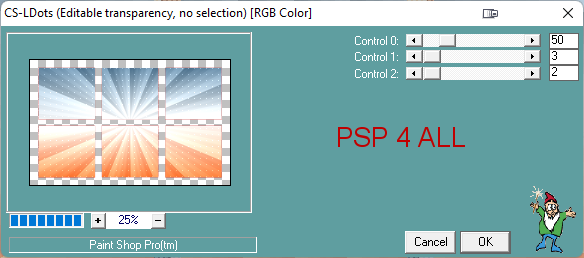
Invert the gradient and fill the selection. Select > Select None. Tramages> Gradient/Spokes Ratio Maker. Same settings. Apply Carolaine and Sensibility > CS-LDots.
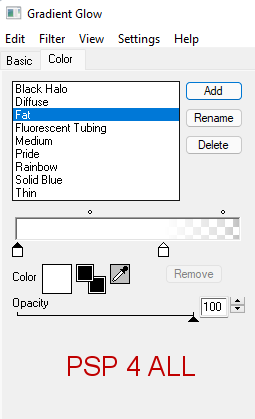
Apply Eye Candy 4000 > Gradient Glow.
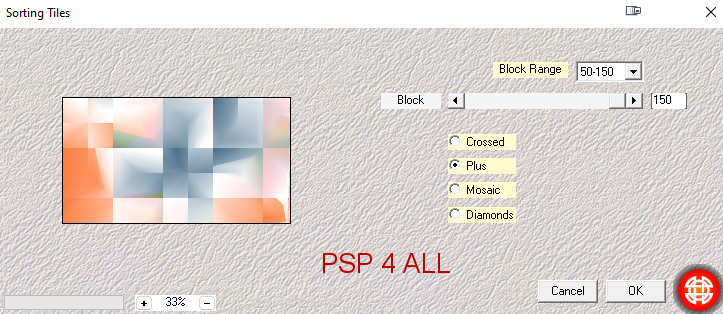
Apply a Drop Shadow: 4, 4, 40, 15. And repeat -4, -4, 40, 15. Then same High Pass Sharpen. Add a layer. Selections > Load/Save Selection > Load Selection From disk. Choose PSP4ALL_MF_Val_Sel2_mf22. PspSelection. Click on Invert the gradient and fill the selection with the gradient but choose Sunburst. Apply Carolaine and Sensibility > CS-HLines. Duplicate. On the Copy, apply Simple > Blintz. Then Mehdi > Sorting Tiles
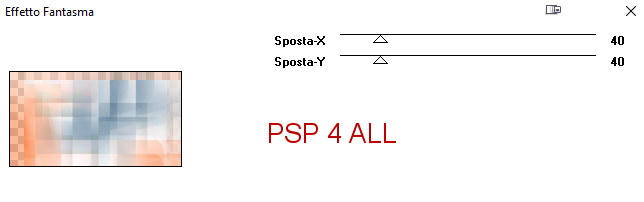
Italian Effects > Effetto Fantasma
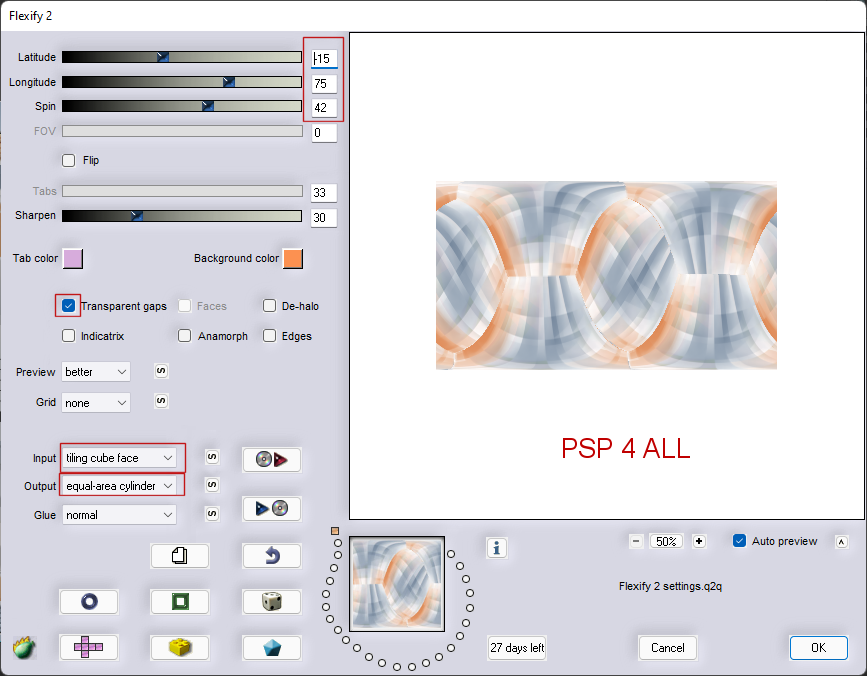
Flaming Pear > Flexify 2
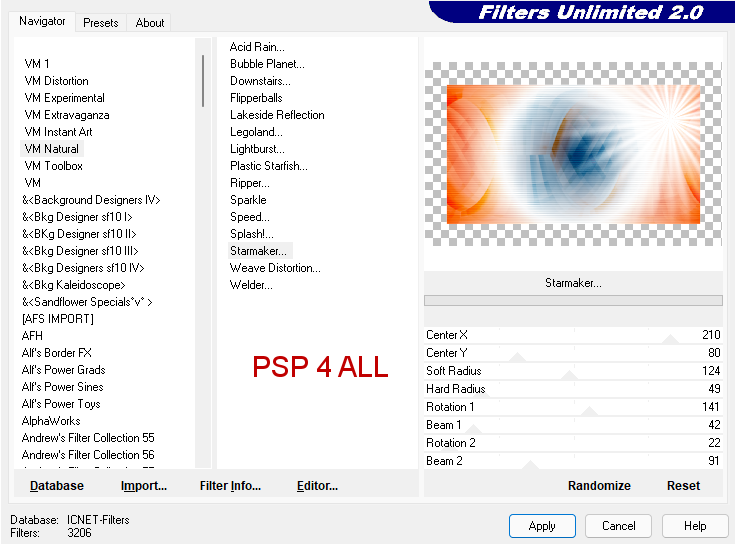
Blend Mode > Burn. Layers > Merge > Merge Down. Select > Select None. Apply FU2 > VM Natural > Starmaker
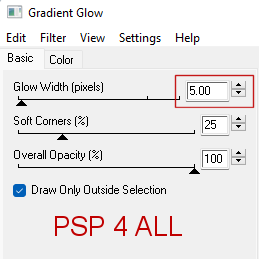
Apply the same eye Candy 4000 > Gradient Glow. Then the 2 ombres portées. Then the same High Pass Sharpen. STEP 3 - Tube and Elements Add a layer. Selections > Load/Save Selection > Load Selection From disk. Choose PSP4ALL_MF_Val_Sel3_mf22. PspSelection. Fill with white. Set the opacity on 65. Add element 1. Add element 2. Ajouter l'élément 3. Coloriser les pétales. Appliquer Eye Candy 4000 > Gradient Glow - Changer le Glow Width et mettre 3. Add element 4. Add my text or one of your choice. Add les tubes. Credits: with a pixel font like Pixelette or any other small font. Martine 22 February 2022 If you have any questions, don't hesitate to contact me |