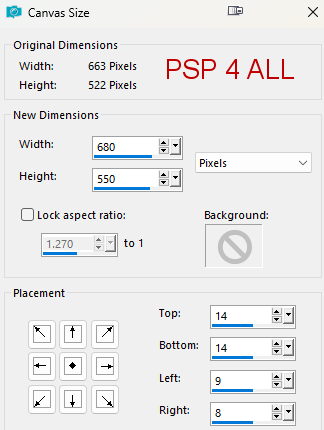
BCA/Halloween Templates - Creative Misfits. Download here - Spooktakular Halloween Template by Sylvie. Filters Unlimited 2.0 > Paper Textures > Japonese Paper and Canvas Fine Krusty's FX vol.I 1.0 >Radial Texturizer Xero > Fritillary Unplugged Tools > Light and Interlace Alien Skin Eye Candy 5 > Impact > Glass penta.com > Dot and Cross VM Extravaganza > Transmission Carolaine and Sensibility > CS-LDots Eye Candy 5 Impact Preset Glass: download here. Unzip the preset. To import it in Alien SKin Eye Candy 5: Double click on the preset and it will install itsef in Settings in Alien Skin Eye Candy 5. Fonts: Pixelette for the credits. Depending on the colors & tube you are going to use, feel free to change the mode and opacity of the layers. STEP 1 Open the template. Duplicate. Close the original. Pour each layer, if you need to change the color, do this: Selections > Select All. Selections > Float > Selections > Defloat. Add a layer > Fill with the new colour. Apply the plugin. Selections > Select None. Then either Delete or close the original layer. Then move on to the next layer. The template is 753x953. Image > Resize > 88%. Make it bigger. Click on Image > Canvas size
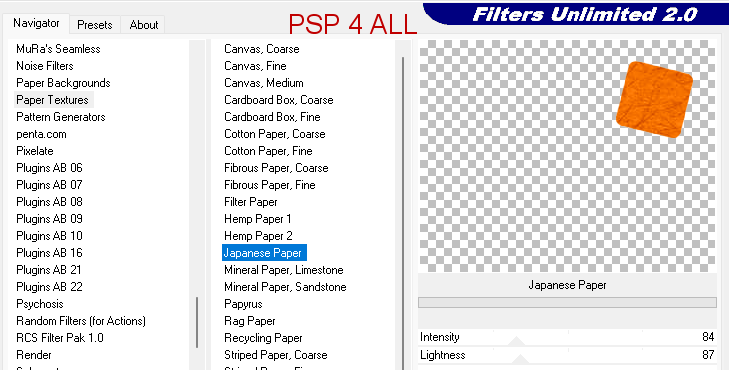
Close the watermark layer; the white rounded square - left layer and the white rounded square - right layer ;the orange rounded square - left layer and the calque orange rounded square - right layer. I kept all the orange layers but I colored all the purple ones in yellow. Orange and yellow are 2 colours in my tube. Yellow is #f9da28. Click on the bottom layer. We will work from the bottom to the top. Orange rounded rectangle - back right : FU2 > Paper Textures > Japonese paper
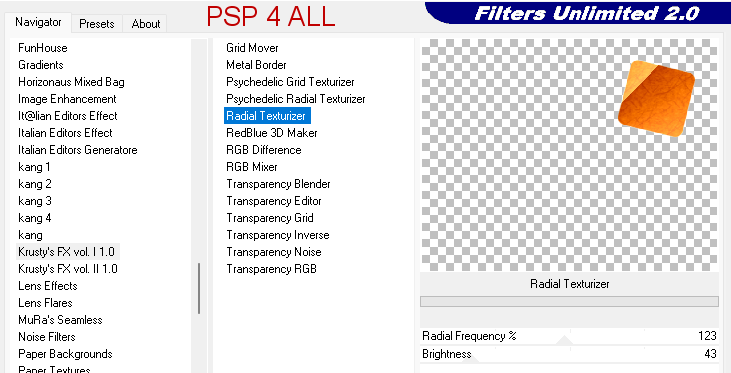
Then Krusty's FX vol.I 1.0 Radial Texturizer
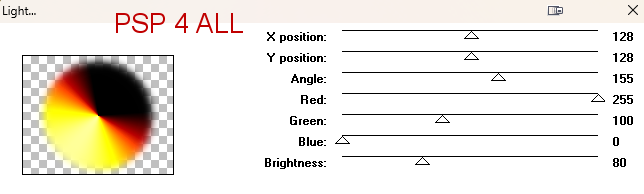
Selections > Float > Selections > Defloat. Add a layer. Fill with black. Selections > Modify > Contrac 7 pixels. Selections > Select None. Orange rounded rectangle - back left: Repeat what you have just done for layer on the right (Orange rounded rectangle - back right). White Circle: Fill with yellow. Adjust > Blur > Gaussian Blur 20. Apply Unplugged Tools > Light
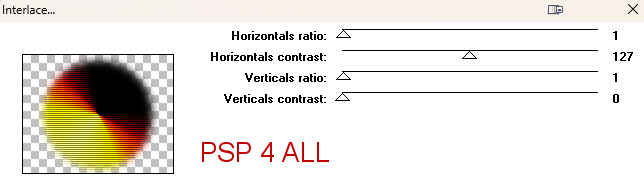
Apply Unplugged Tools > Interlace
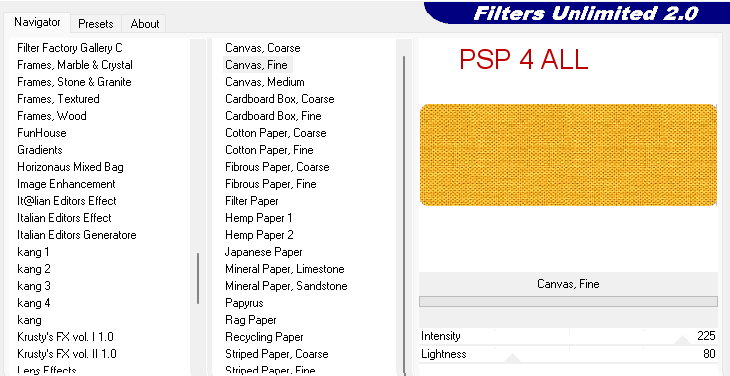
Adjust > Sharpen > Sharpen More. purple rounded rectangle: coloured yellow. Apply FU2 > Paper Textures > Canvas fine.
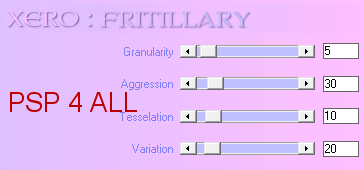
orange circle : apply Xero > Fritillary
purple circle: coloured yellow. Click inside with the magic wand. Selections > Invert. Selections > Float. Add a layer and fill with a gradient Orange-black - angle at 90° and Repaeat on 50. Apply Effets 3D > Inner Bevel
Apply Alien Skin Eye Candy 5 > Impact > Glass. Choose my preset PSP4ALL_MF_HalloweenW_mf22.f1s. Selections > Select None. Delete medium black circle. Back on purple circle: mine is now yellow. Apply penta.com > Dot and Cross
orange rectangle: apply VM Extravaganza > Transmission
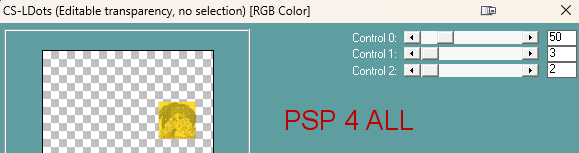
purple square: Colorer les 2 carrés en jaune. Click to select. Add the head part of your tube, resized if necessary. Invert. Delete. Blend mode on Multiply or what suits your tube. Layers > Merge > Merge down. Apply Carolaine and Sensibility > CS-LDots
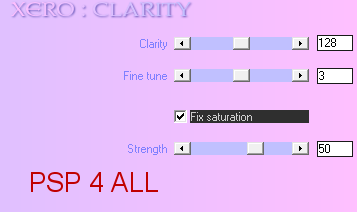
Effecs > Xero > Clarity
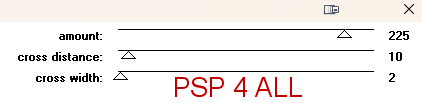
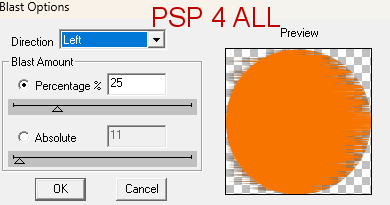
white square frame - right and white square frame - left: color both in black. small white circle: colorer en noir. small orange circle: Select with the magic wand and apply > Blast
Repeat but change the direction to Right. Selections > Select None. Merge down the text Spootkacular with the white layer under, that is text: spooktacular white border. I sat my witch tube on the text after moving it a bit down. Drop Shadow on the witch: 6, 6, 75, 10. STEP 2 - Text and Credits Layers Have a and Halloween: Apply Eye Candy 4000 to both > C Save. Martine 26 October 2022 If you have any questions, don't hesitate to contact me |