|
(Version française ICI) |
|
|
|
|
|
|
|
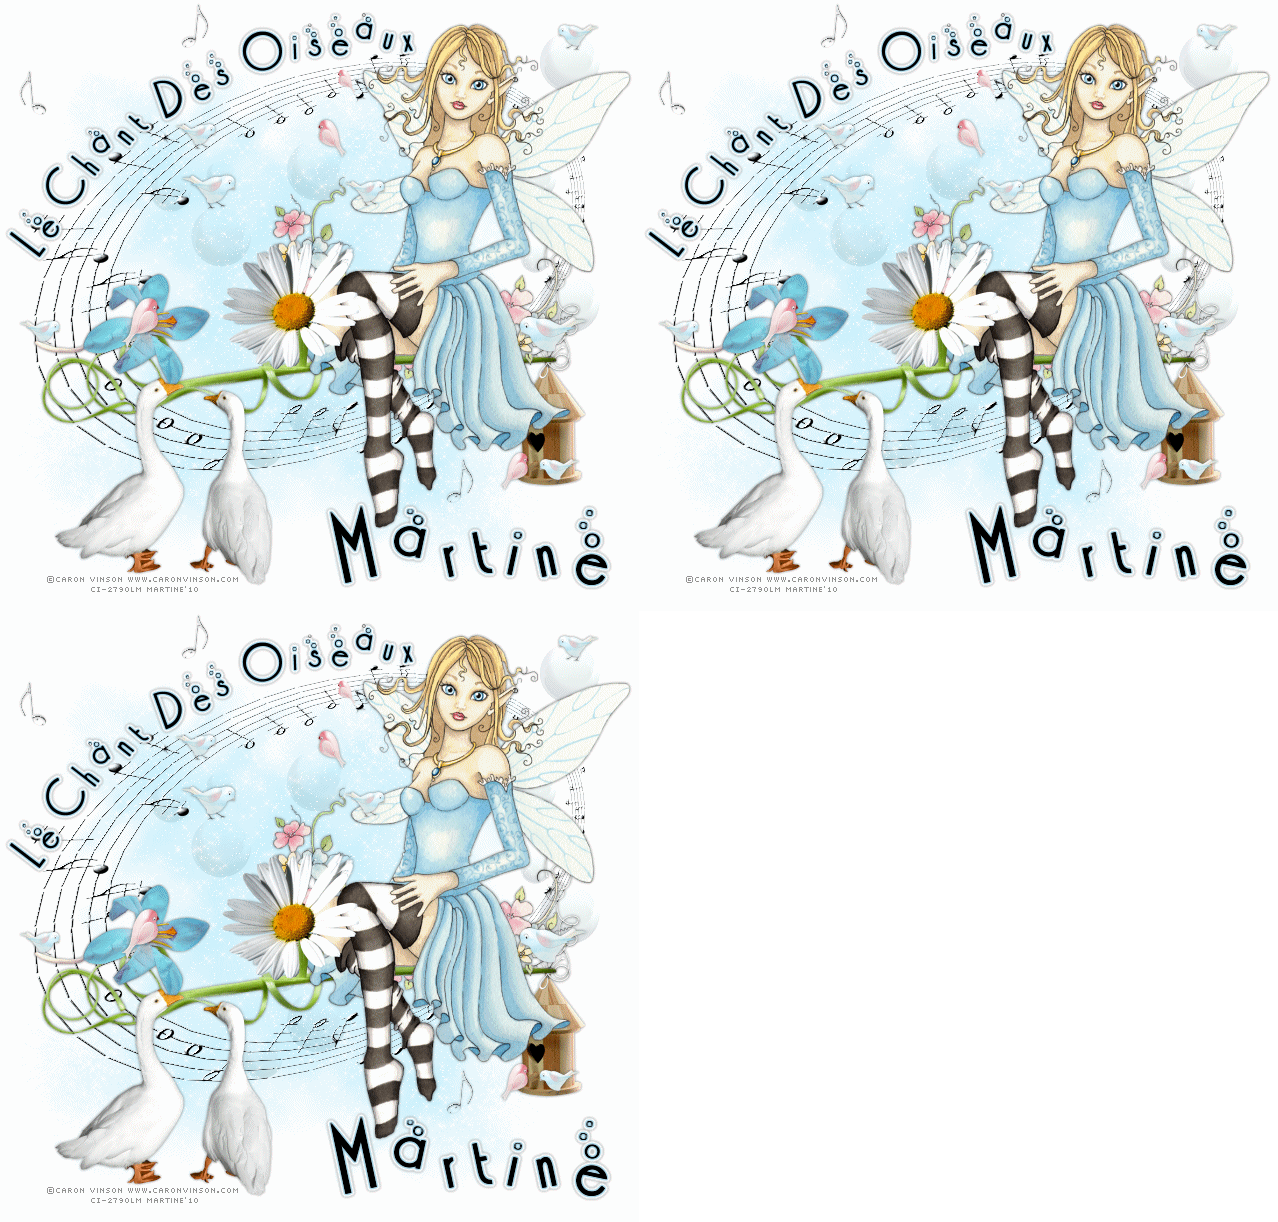
You can do pretty much what you like with your result: create signatures with name added, extras or stats, websets.
|
Martine |

Scrapkit: Le Chant des oiseaux a freebie offered by Fanfan Rue des Anges
Mask: Gems Mask 54 from Gems Tagging Tuts > Navigation > Downloads > Gems masks set2.
Plugins: Alien Skin Xenofex2 (Constellation) et Alien Skin Eye Candy 4000 (Gradient Glow) available here: Alien Skin
Fonts: Cocktail Bubbly for the text; Pixelette for the credits.
You can download my E-Book which will let you work without being connected.
STEP 1
Open a new image 650x650 and fill with white.
STEP 2: Mask
Add a new layer and fill with a colour of your tube. I used #81DCF9. Then apply gemsmask 54 de Gems Tagging Tuts. Masks > New > From image - OK. Then Masks > Delete. In PSP 8 and above, it's under Layers > New Mask Layer > From Image. OK then Delete. Lower the opacity of this layer if needed. I set mine at 70.
STEP 3: Elements
E6 - resize to 18% and Copy Paste as a new layer. Adjust > Sharpness > Sharpen.
E13 - resize to 20% and Copy Paste as a new layer. Image > Mirror and place towards the middle of E6. Then move this new layer and place under the mask layer. Duplicate and move the copy to the right and towards the top.
E32 - resize to 8% and place on the right, above the E6 layer.
E11 - resize to 20% then Image > Free Rotation > left and 7.
E23 - resize to 10% .
E28 - resize to 18% and place on the left towards the bottom of the tag.
E8 - resize to 3% et place on the right. Adjust > Sharpness > Sharpen. Duplicate and move this new layer to right and place at the bottom. Duplicate again > Mirror and place at the top on the left.
E18 - resize to3% and place where you want. Duplicate several times, change the size, use mirror so that you have several different blue birds.
E5 - resize to 3% and place where you want. Duplicate several times, change the size, use mirror so that you have several different pink birds.
STEP 4: Tube
Add your tube above the E11 layer.
STEP 5: Text
I used Le Chant Des Oiseaux.
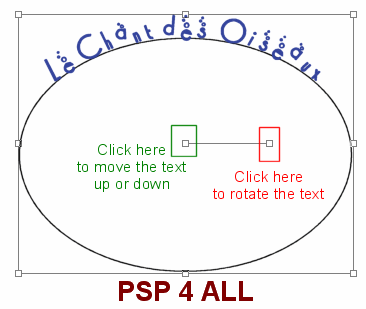
Click on the Prest Shape Tool and select the ellipse. In the options, check Create on Vector and Anti-alias.
Click oon the text tool: Font = Cocktail Bubbly ; Size 38; Colour = one from your tube; Anti-alias = sharpnet ; create as Vector.
Click back on your work and place the cross of the A which appears right on the curve of your ellipse. Click.
Type your text in the window that opens.
Now turn the text to align it with E6 and to place it on the left. And move the text to place it a bit higher.
|
|
On the layer palette, click on the + next to the ellipse and text layer. Close the Ellipse layer.
Click on the - and right click and select Convert to raster layer.
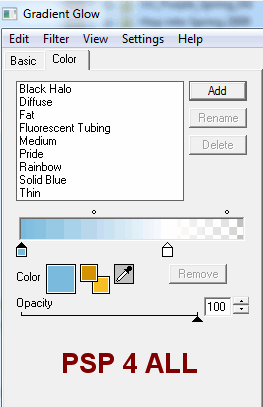
Apply Alien Skin 4000 - Gradient Glow on the text. Click on Color > Fat and then click on the first white white square and change the colour to one from your tube, blue in my case.
|
|
STEP 6: Name and Credits
Add your name with the same Cocktail Bubbly font and the credits with a small font like Pixelette in size 6 and antialias off.
STEP 7: Drop shadow
|
V = 0 |
O = 70 |
|
H = 0 |
B = 4 |
on the elements, the tube and the text and your name.
STEP 8: Effet Constellation
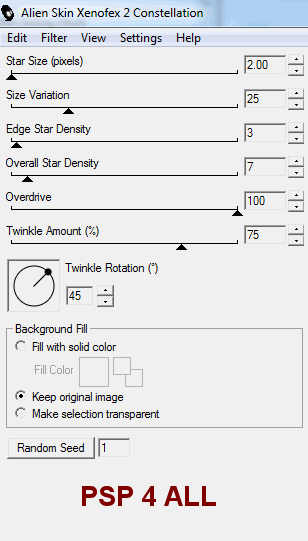
Click on the mask layer and then Effects > Plugins > Constellation with these settings:
|
|
Merge visible and Copy Paste in Animation Shop.
Go back to PSP and click twice on Undo Last Command. Re-apply the same Constellation effect but click on Random seed to change it. Merge visible and Copy Paste in Animation Shop after the first frame.
Go back to PSP and repeat. Don't forget to click on Random Seed to change it again. Merge visible and Copy Paste in AS after the second frame.
In Animation Shop, you now have an animation with 3 frames.
Click on File > Export and use the GIF Optimizer.
Martine
1 June 2010
If you have any questions, don't hesitate to contact me


