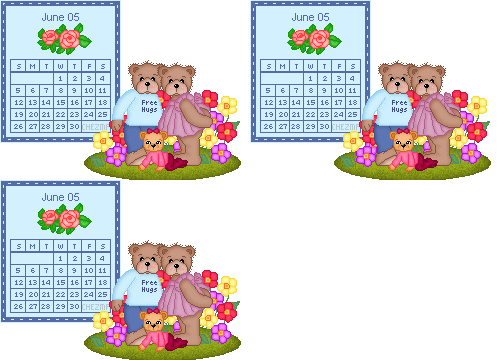
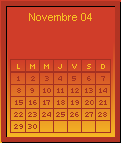
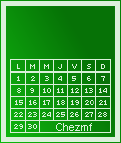
~~ Animated mini-calendar ~~
Image for this month HERE.
Version française de ce tutoriel ici.
This tutorial was written by
Martine for
PSP 4 ALL -
No selling or profit allowed!
The pixel tubes are from Tubes For ALL
|
This pointing hand is here to help you. You can drag and drop it and use it as a
marker to help with following the tutorial.
Martine

|

You can download my E-Book which will let you work without being connected.

Today we are going to work with the Alpha Channel. To find the Alpha
Channel, go to Selections. If you have never work with the Alpha Channel, you
will see how easy it is.
First click to save the image that you need. There are two
versions: a French version (with French-Canadian option)
and an English version.
Download the image for this month
HERE.
Your image is now open in PSP.
You don't see anything but the image is not empty. Look at your
layer palette. And then click on Selections > Load
from Alpha Channel and as you can see, we have loads to work with here.
Click
on the image and then go to Windows > Duplicate. Save the other image and close,
it's always better not to work on the original.
I am not going to give
you any colours for this tutorial because it's probably more interesting to let
your imagination run.
You are going to load these alpha layers one at a time. Here's the order:
- Background
- Add a colour: plain, a gradient
or a pixel pattern that you want to use for your background.
Border - Add another colour: plain, a
gradient or a pixel pattern that you want to use for your border. Choose
something that will contrast nicely with the background.
Grid - This time I would advise you to add a layer
first, just in case you don't want your grid to be in the same place I put
mine. Move it where you want after you have filled it.Days -
Yes, they need filling too! Your choice again, same colours as the numbers or
something different.
Month - This time again, best add a layer first as you may want to move
the month somewhere else. Fill with colour.
You should have something
which looks like my two images below. Note where I have added the name of my
site. If you want to add the name of your site, now is the time to do it.
Your calendar is now finished and all you have to do is add some little
pixel graphics. So new layer and add whatever you like on the calendar and
outside too. If you are adding outside, make sute it's a pixel graphic. You want
solid outside lines so you can save neatly.
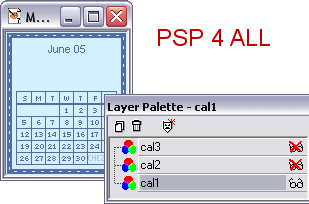
We are now going to animate our calendar. Layers > Merge > Merge Visible.
Click and rename this layer: cal1.
Click on cal1 and duplicate. Name this
new layer cal2.
Right click on cal1 and duplicate. Name this layer cal3.
On your Layer Palette, close cal2 and cal3. Make sure you are on cal1 layer
and go to selections > Load from alpha Channel and click on Blink1. you will
probably need to zoom before you fill in with the colour of your choice.
Selections > Select none.
Go back to your Layer palette and close cal1. Click on cal2 and repeat what you have done: go to selections > Load from
alpha Channel and click on Blink2. Fill with the same colour or a different one..it's up to you.
Selections > Select none.
And again go back to your Layer palette and close cal2. Click on cal3 and
repeat what you have done: go to selections > Load from alpha Channel and click
on Blink3. Fill.
Selections > Select none.
If you want to add some graphics outside the
calendar, now is the time to do it.
You must first increase the
size of your canvas. Go to Image > Canvas size. change the size. Add more space
at the top or bottom, on the left or right depending on where you are going to
add stuff.
Then go to your layer palette and add a new layer. Add your
graphics on this layer.
Now you nedd to duplicate this layer a couple
of time to end up with 3 identical copies. One for each layer of your calendar.
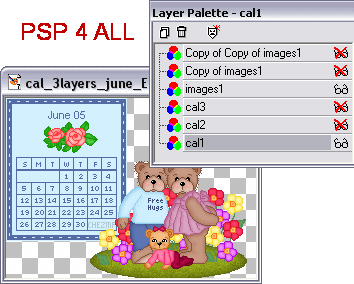
Now close cal 2 and 3 and Copy of images1 and Copy of Copy of Images1 . Then
click on cal1 and merge visible. Merge visible cal2 and Copy of images1. And
then cal 3 and Copy of Copy of Images1. You should now have three layers on your
palette. Make sure they are all open and save as a PSP file.
Open Animation Shop.
Click on the Animation wizard. And follow the
instructions. For how long you
want each frame displayed, put in 10. You can always change it after. Click on
View Animation and if you are happy with it, save.
I will do the other months as we go along.Martine
21 May 2005
If you have any questions, don't hesitate to contact me.


|

