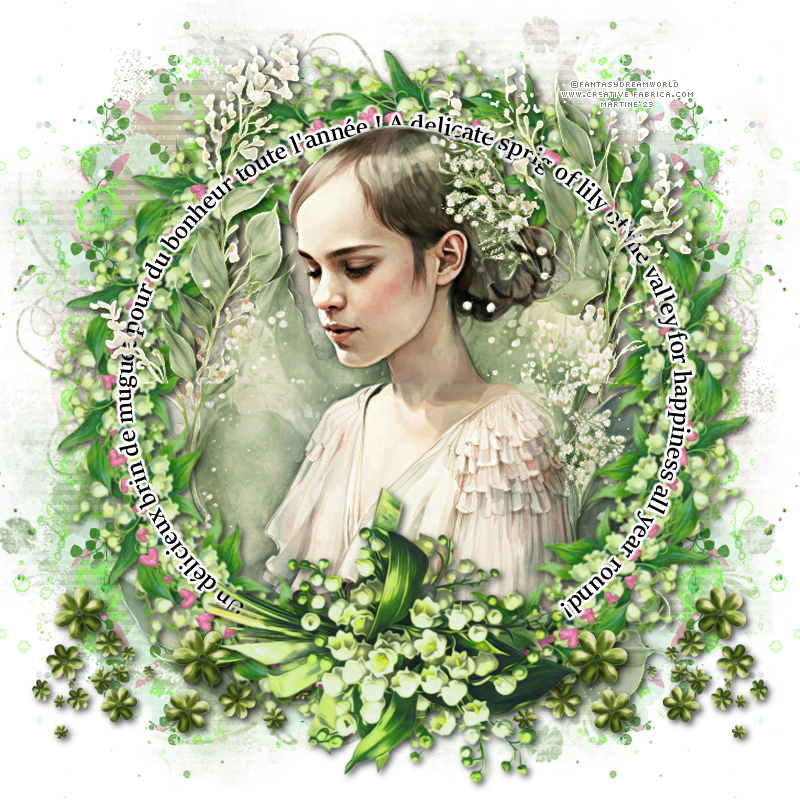
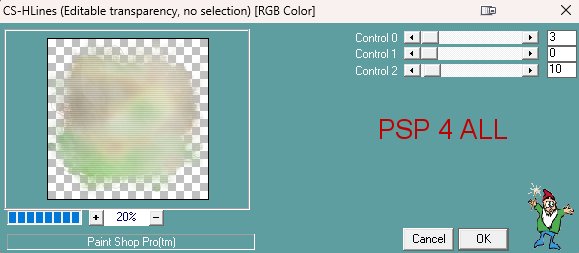
Scrapkit: Muguets freebie by Mariel of Mariel's Designs. Download here. Mask: Miz-Mask292. Télécharger ici. Do visit her website here= Mizteeques Masks. Plugins: Carolaine & Sensibility > CS-HLines Mura's Meister > Copies Eye Candy 4000 > Gradient Glow STEP 1 - Elements and Tube Open an image 800x800. Fill with white. Add a layer and fill with MD-PAPER 5. Open Miz_Mask292. Layers > New Mask layer > From an image and select Miz_Mask292. Click on OK. Layers > Merge group. Image > Resize 110%. Move a tiny bit downwards. Apply Carolaine & Sensibility > CS-HLines
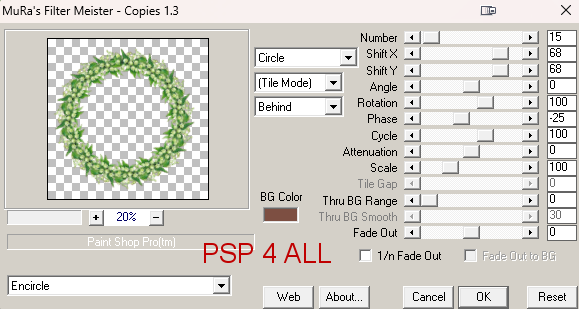
Open MD-2. 40%. Rotate right 25°. Objects > Align > Center on Canvas. Apply Mura Meister > Copies > Encircle.
Paste MD-FRAME 1 As New Layer. 105%. Objects > Align > Center on Canvas. Paste MD-24 As New Layer, top, left, above the white background. Duplicate > Mirror. Layers > Merge > Merge Down. Duplicate. Image > Mirror Vertical. Add the tube. Paste MD-3. 60%. Rotate right 130°. MD-34 - 50%. Right. Layerss > Arrange > Move Down. Duplicate. Image > Mirror Vertical. ETAPE 2 - Text and Credits *** Text - Un délicieux brin de muguet pour du bonheur toute l'année ! - A delicate sprig of lily of the valley for happjness all year round! or one of your choice. Font = SilkaBanner Semibold. Preset Shpe Tool. Select the Ellipse - anti-alias, create On Vector, width 2. Black for Foreground and Background and close the background.
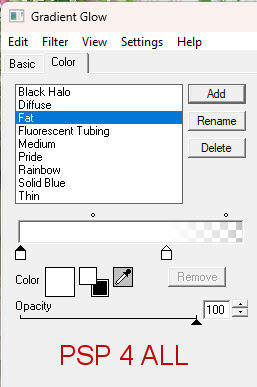
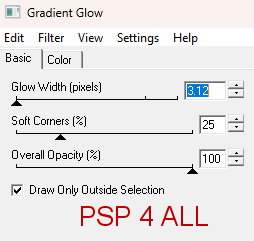
Draw a circle. Place it as close as you can to the middle of the Lily Of The Valley wreath - See my result above. Objects > Align > Center on Canvas. Text tool - font of your choice or SilkaBanner Semibold, anti-alias and on Vector. Open the background color and close foreground. Place your cursor at the top on the ellipse. It will change shape to become either this Click on the ellipse and write your text. The text will display along the path of the ellipse. In your Layers palette, open the vector layer. There are 3 layers. Close the circle. Right click on the vector text (top layer) and convert to Raster layer. Apply Eye Candy 4000 > Gradient Glow.
*** Credits: with a pixel font like Pixelette or any other small font. Martine 25 April 2023 If you have any questions, don't hesitate to contact me |