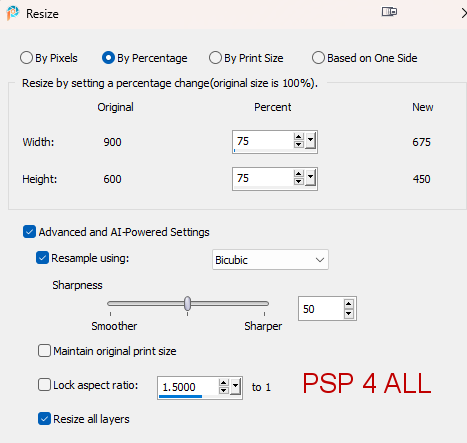
 Template: Template8-Certified, template by Sylvie - Sylly Creationz. Download here. Mask: 1250181713_nikita_masques - mask by Nikita - download here. Filtres : FU2 > Two Moon > Warm Cloth FU2 > VM1 > Mighty Maze FU2 > Willy > Tablet Lines VM Extravanza > Transmission Tramage > Starmaker Eye Candy 4000 > Gradient Glow Font: Pixelette for credits. My colours: #7E91E7 and #E07093. Gradient 1 = #7E91E7 and #E07093 Gradient 2 = #7E91E7 and #E4E8FE Gradient 3 = #E07093 and FEDEE9 Drop Shadow: 2, 2, 75, 10 for the mask and the template layer. 1, 1, 100, 1 and -1, -1, 100, 1 for the text 2, 2, 50, 2 for the tube. ****************************** *** How to colour the template layers for this tut - Selections > Select All. Selections > Float > Selections > Defloat. Or you can use the magic wand. Add a layer > Fill with the gradient. Apply mask or plugin. Original layer: Expand 2 pixels and fill with black. Apply a drop shadow:2, 2, 75, 10. *** Depending on the colors & tube you are going to use, feel free to change the mode and opacity of the layers. STEP 1 1. Open the template. Shift+D to duplicate. 2. Delete the Credits layer. 3. Image > Resize.
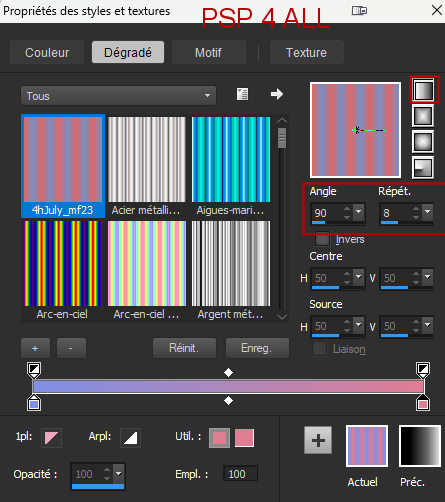
4. Delete the Credits. 5. *** Activate White Background. 6. Selections > Select All. Selections > Float > Selections > Defloat. 7. Fill with Gradient 1, linear: #7E91E7 foreground and #E07093 background. Angle on 90° and Repet on 8.
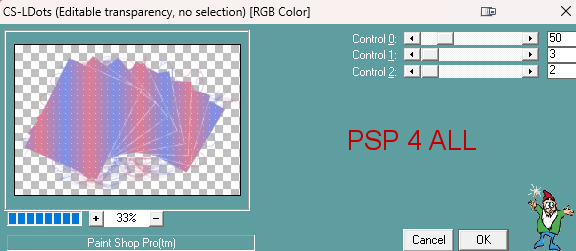
8. Selections > Select None. 9. Ouvrir le masque 1250181713_nikita_masques. 10. Layers > New mask layer > From an image and choose 1250181713_nikita_masques.jpg. 11. Invert mask data. 12. Click on OK. 13. Layers > Merge group. 14. Delete the original layer. 15. Apply CS-LDots
16. Adjust > Sharpen > Sharpen More. 17. *** Small Back Black Rectangle - Fill with Gradient 2, linear #7E91E7 and #E4E8FE (It's #7E91E7 but in much lighter.) Angle 90° and Répét 3.
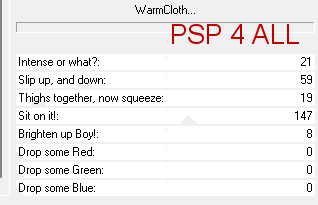
18. Apply FU2 > Two Moon > Warm Cloth
19. Back onto Small Back Black Rectangle. 20. Selections > Modify > Expand 2 pixels and fill with black. 21. Merge visible these 2 layers. Drop shadow. 22. *** Pink Back Rectangle - Fill with Gradient 3 - linear #E07093 and FEDEE9. (It's E07093 in very very light.) Angle 90° and Répét 3. 23. Apply VM Extravanza > Transmission
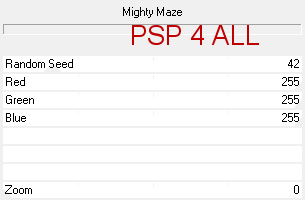
24. Back to Pink Back Rectangle. 25. Selections > Modify > Expand 2 pixels and fill with black. 26. Merge visible these 2 layers. Drop shadow. 27. *** Black Long Bottom Rectangle - New layer and fill with Gradient 2. 28. Apply Fu2 > VM1 > Mighty Maze
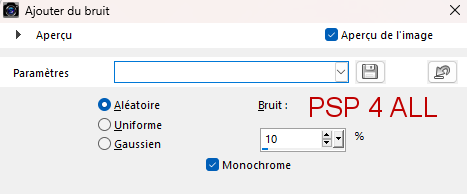
28. Expand 2 pixels Black Long Bottom Rectangle and fill with black. 29. Merge visible these 2 layers. Drop shadow. 30. *** Black Rectangle - New layer and fill with Gradient 2. 31. Adjust > Add/ Remove Noise > Add noise
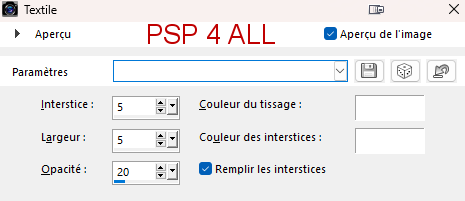
32. Expand 2 pixels Black Rectangle and fill with black. 33. Merge these 2 layers. Drop shadow. 34. Delete text: Pixel 'Certified'. 35. *** Gradient noisy rectangle - Add a calque and fill with black. 36. *** Pink rectangle - New layer and fill with Gradient 2. 37. Apply Effects > Texture Effects > Weave
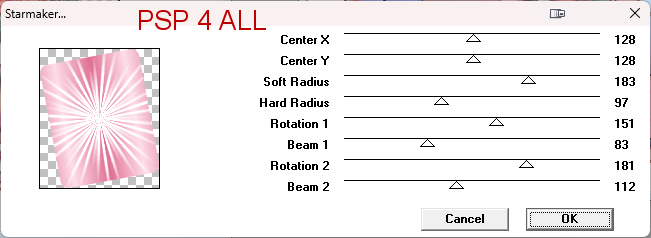
38. *** White Rectangle - New layer and fill with Gradient3. 39. Apply Tramage > Starmaker
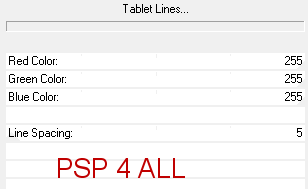
40. Add your tube and duplicate. 41. Original on Screen and copy on Luminance or blend modes of your choice. 42. Expand 2 pixels White Rectangle and fill with black. 43. Merge these 2 layers. Drop shadow. 44. *** Add tube. DS for tube. 45. Ajouter le tube. 46. *** Small Black Rectangle - I moved it sideways because of my tube. 47. Layer and fill with Gradient 2 48. Apply FU2 > Willy > Tablet Lines
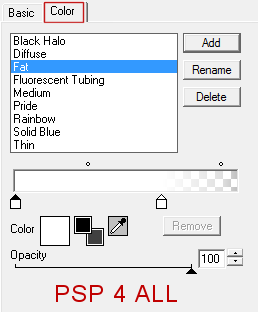
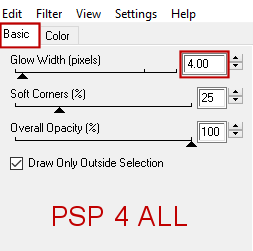
49. Expand 2 pixels Small Black Rectangle and fill with black. 50. Merge these 2 layers. Drop shadow. 51. *** Stars - Color with the 2 colors. I moved this layer towards the bottom because of the tube. 52. *** text Exclamation Back - Delete. 53. *** text Exclamation Mark - and fill with #E07093. 54. Apply Eye Candy 4000 > Gradient Glow.
55. Drop shadow. 56. *** text: PSP Addict_Tube Ho - and fill with #7E91E7. 57. Apply same Gradient Glow. Drop shadow for text. 58. *** text: ... - Delete. STEP 2 - Credits 59. Credits: with a small font like Pixelette or any other small font.. 60. Sauvegarder. Martine 20 July 2023 If you have any questions, don't hesitate to contact me |
