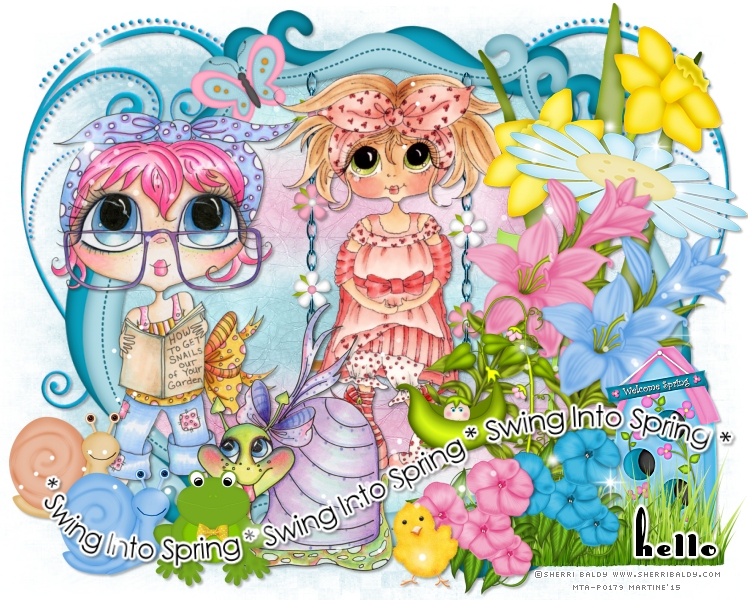
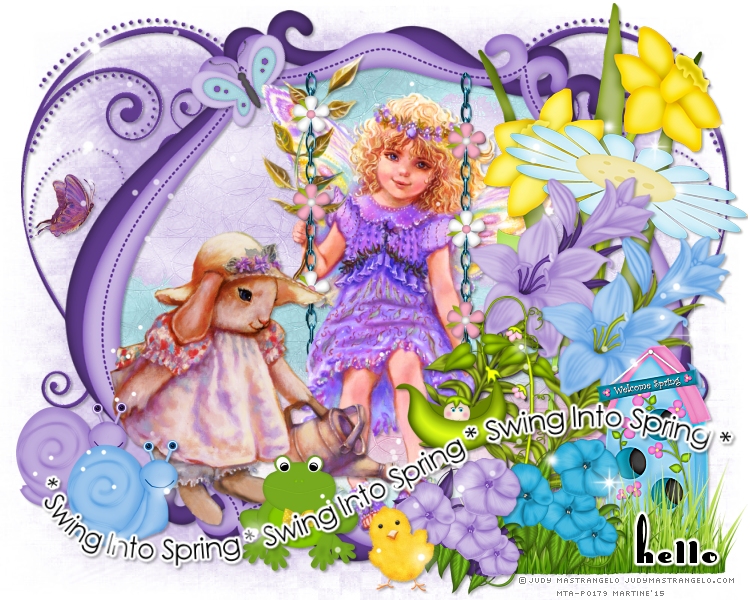
You can do pretty much what you like with your result: create signatures with name added, extras or stats, websets. Give all the credits that are required and for the tut to: Martine (link to http://chezmartine.com) for PSP 4 ALL (link to http://psp4all.com).
 Scrapkit: Swingin' Spring by Golden - Gold dust. Download here. Mask: Zuzzanna_mask05 by Zuzanna. Download ici. Fonts: Long Ears MF et Pixelette for the credits. You can download my E-Book which will let you work without being connected. STEP 1: Elements and Tubes Open an image 750 x 600. Fill with white. Drop Shadow: I used
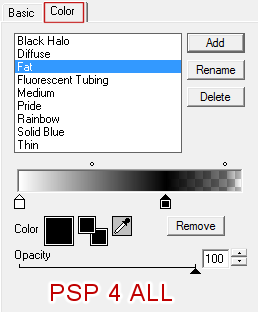
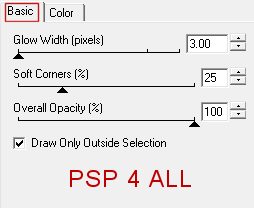
Add a layer and fill with #A4D1DC. Open Zuzzanna_mask05. Masks > New > From image - OK. Then Masks > Delete. In PSP 8 and above, it's under Layers > New Mask Layer > From Image. OK then Layers > Delete. GD-SS-Frame8 - 80%. Click inside the frame with the magic wand then Selections > Modify > Increase by 2 pixels. Choose GD-SS-Paper13 and copy paste as a new layer. Selections > Invert > Delete. GD-SS-Frame8 - Place on the left under GD-SS-Frame8. 80%. Rotate 90° right. Duplicate - Image > Mirror and place on the right, under GD-SS-Frame8. GD-SS-Butterfly5 - 30%. Rotate left 35%. GD-SS-Swing - 40%. Place in the middle of the frame, at the top. Add your tube on the swing. Add the second tube, on the left. GD-SS-Snail - 35%. On the left. Image > Mirror. Duplicate the snail and place in front. Colorize with colour used with the mask #A4D1DC - Hue at 135 and Saturation at 113. GD-SS-Frog - 40%. GD-SS-Daffodils1 - On the right. GD-SS-Flower1 - Still on the right, slightly below. GD-SS-Flowers6 - 80%. On the right. GD-SS-Flowers5 - 80%. On the right, slightly below. GD-SS-Birdhouse - 40%. On the left. Teh adjust the sharpness. Adjust > Sharpness > Sharpen More. GD-SS-Pea in a Pod - 40%. A gauche de GD-SS-Birdhouse. Image > Miroir. GD-SS-Grass2 - 40%. GD-SS-Flowers1 - 40%. On the right, slightly below. GD-SS-Flowers2 - 40%. GD-SS-Chick - 30%. In the middle, at the bottom. Add a layer. Selections > Select All. Copy paste GD-SS-Sparkle2 in the selection. Selections > Select None. ETAPE 2 : Wordart, Text and Credits GD-SS-Wordart3 - 85%. At the bottom. Apply Eye Candy > Gradient Glow
Text of your choice or your name. I just wrote Hello in black, with the Long Ears font. Then I applied the same Gradient Glow. Crédits with the Pixelette font or any other small pixel font.
|


