Cluster frame & Scrapkit: New Spring Day by Dee of Dee's Sign Depot. Direct link here for the cluster frame and here for the scrapkit. Mask: 192 by Gems at Gems Taggin' Scraps - Direct link Mask 192. Plugins: Eye candy 4000; Sqirlz Water for the rain. Fonts: FB Vintage, Aka Frivolity and Pixelette. You can download my E-Book which will let you work without being connected. STEP 1 - Mask Open a new image 650 x 600. Fill with #ECFCFE. Ooen Gems' mask 192. Add a layer and fill with #A5DAE4. STEP 2 - Cluster Frame & Elements Drop shadow on the Cluster, tubes and geese
Drop shadow on the elements and texts
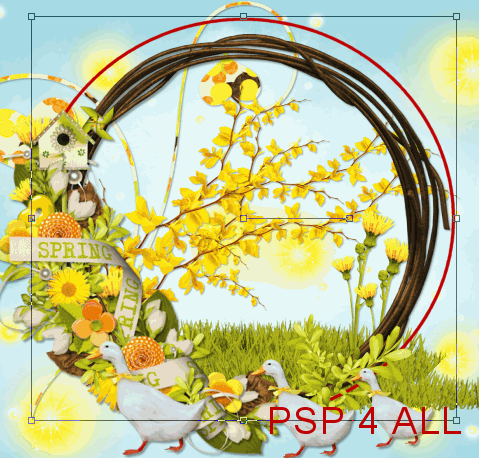
Open the cluster Cluster Frame DD_NSD_TSFrame - Resize to 70% and apply the first drop shadow. Open frame 22 DD_NSD_TS_Element_22 - resize to 65% and place exactly under the Cluster Frame. DD_NSD_TS_Element_28 - at 50% and duplicate. Place both under element 22. They must show inside the frame. DD_NSD_TS_Element_56 - duplicate several times to make the ground. And place one on the right, where I have my rabbit tube. See my tag. No drop shadow on the grass. DD_NSD_TS_Element_36 - above the grass layers but still under the frame. DD_NSD_TS_Element_33 - at 20% and duplicate. Click on the mask layer and add element DD_NSD_TS_Element_27. Duplicate, flip and mirror. DD_NSD_TS_Element_1 - at 75%, above element 27. The following elements must be placed above the Cluster Frame. DD_NSD_TS_Element_35 - on the right, towards the bottom. I deleted the stem. DD_NSD_TS_Element_28 - one at 25% and the other at 20%. STEP 3 - Text in a circle Click on the element 22 layer, the frame. Click on the Ellipse tool. Create on Vector. Width: 3.00. Draw a circle like mine around the frame.
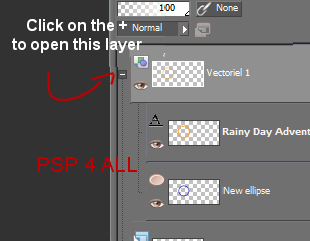
Click OK. Your text must now be all around the circle. On your layer palette, click on the small + on the left of the Vector 1 layer to open it and you will now see a -
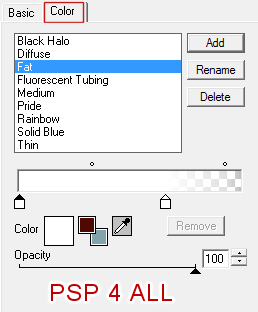
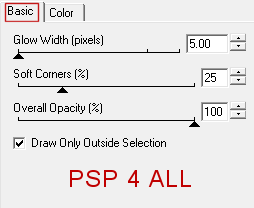
The layer opens.Close the New Ellipse layer at the bottom. Click on the layer Vector 1 and then go to Layers > Merge > Merge down.. Apply Eye Candy 4000 > Gradient Glow
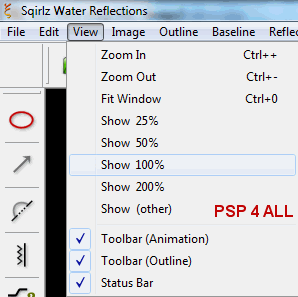
Apply the second Drop Shadow. STEP 4 - Tubes I have used 3. LThe 2 in the frame must be put under the frame, element 22. Apply the first Drop Shadow. The third tube goes above the Cluster Frame on the right. Apply the first Drop Shadow. STEP 5 - Name and Credits Name with the Buddy font. On the left. Add the same Gradient Glow and the second Drop Shadow. Credits with a small pixel font like Pixelette. STEP 6 - Animation in Sqirlz First close all the layers that are above the frame, element 22 - 22 DD_NSD_TS_Element_22 that is the Cluster Frame. Element 35 (the branch on the right at the bottom). The two elements 28 (the geese). The rabbit tube. The name layer. The credits layer. Merge visible all the other layers and save as a bmp. Open the Sqirlz program. Click on this icon
and open your image.
It is used like the lasso tool in PSP. Click every so often as you follow around the frame to draw your selection and then right click to close the selection
Then click on the icon
You will see this:
Select the third one Rain/ Snow Only. Then click on this icon
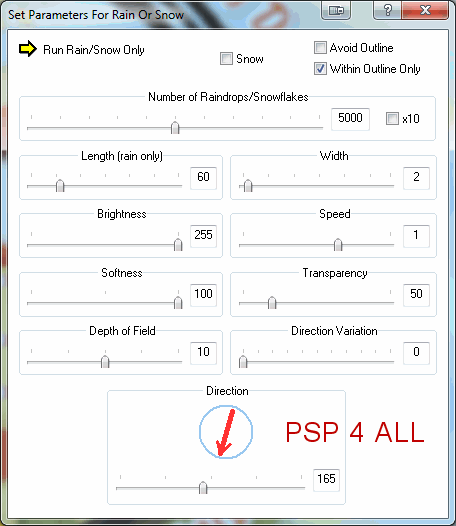
and set up like this:
Then click on this icon
to see your rain animation. And to finish off, click on the icon Gif
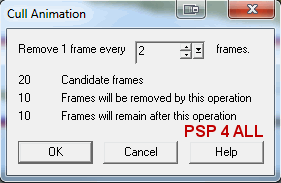
to save your animation. STEP 7 - Animation Shop First go back to PSP. Open all the layers that are abovr your merged image. Merge them visible and open this new merged image in Animation Shop. In Animation Shop, open also the animation you have created in Sqirlz. It has 20 frames and that will be rather heavy. So we will remove some of them. Clico on the first frame. Edit > Select All. Then click on Animation > Cull Animation
You now have 10 frames. Repeat and enter 3 this time instead of 2 to be left with 7 frames. That's what I did. Your animation with the rain has 7 frames. Your other image with the Cluster frame has only one. So duplicate it until you also have 7 frames. Then click on the first frame. Edition > Select All > Edition > Copy. Click on the first frame of the Animation with the rain. Edition > Select All > Edition > Paste into Selected Frame. Place the Cluster Frame exactly above the frame. If not right, undo and start again. I left the speed at 15. Save as a gif using the Optimization Wizard. Martine 26 April 2012 If you have any questions, don't hesitate to contact me |
