You can do pretty much what you like with your result: create signatures with name added, extras or stats, websets. Give all the credits that are required and for the tut to: Martine (link to http://chezmartine.com) for PSP 4 ALL (link to http://psp4all.com).
 Scrapkit: PDS_Nautical, FTU kit by Chassity on her blog Polka Dots Scraps. Download here. The 2nd one down. Mask: 20-20 mask - No credit. If you know the crator, I'll add the credit. Download here. Plugins: Mura Meister > copies. Eye Candy 4000 - Gradient Glow. Fonts: AgencyFB and Dominique for the texts and Pixelette for the credits. You can download my E-Book which will let you work without being connected. Drop Shadow: I used this when necessary
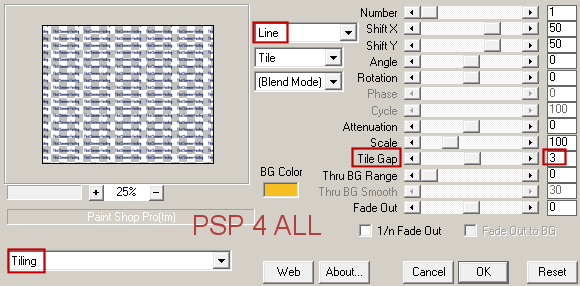
STEP 1: Mask Open the mask Mask 20-20. Then open a transparent image 680x550. Then click on Objects and choose Align > Center in canvas. Then click on Layer > Convert to raster Layer. Apply Mura Meister > Copies. Preset Menu bottom left - choose Tiling and on the right configure as below
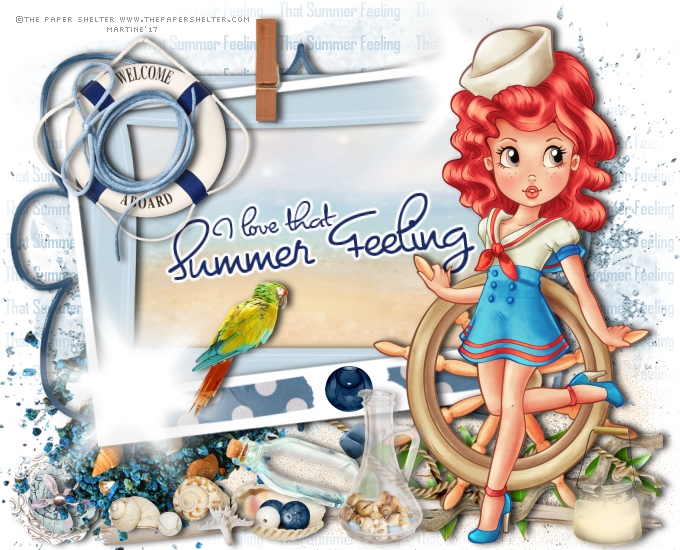
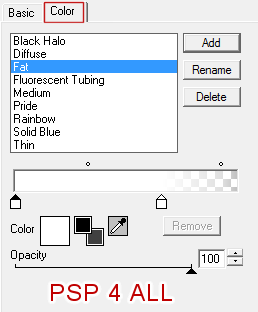
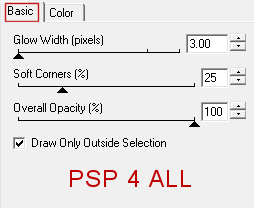
Apply Mask20 -20. Layers > New mask layer > From Image. OK. Add a layer, fill with white and slide this layer under the mask layer. Go back to the mask layer. ETAPE 2: Elements PDS_N- print - On the left. Duplicate and place the copy on the right, towards the bottom. Sand - Add a layer then select Corel Sand tube. Colorise if necessary. Spray at the bottom, on the right. PDS_N- leaves2 - 25%. Bottom right. Duplicate and move this copy towards the middle. PDS_N- glitter - 75%. Bottom left. Duplicate and place the copy on the right. PDS_N- driftwood2 - Bottom. PDS_N- driftwood1 - 5. Bottom, on the right. PDS_N- string5 - Bottom. PDS_N- flower3 - 25%. Left. PDS_N- flower2 - 25%. On top. PDS_N- flower1 - 25%. On top. PDS_N- rocks - 65%. On the left. PDS_N- frame4 - Middle on the left. PDS_N- frame5 - 75%. On top. Click in the middle with the Magic Wand. Selections > Modify > Increase by 5 pixels. Add a layer and fill the selection with PDS_N- paper8. Selections > Select None. Move the paper under PDS_N- frame5. PDS_N- frame2 - 85%. Above PDS_N- frame5. Texte I love that Summer Feeling - sse below under Text and Credits. PDS_N- tape - On the right. Duplcate. Image > Mirror. PDS_N- bead1 - 25%. In the middle. PDS_N- starburst - On the right, at the top in the corner of the frames. Duplicate and place at the bottom, on the left, in the corner. PDS_N- parrot - 30%. On the frame, left. PDS_N- shell2 - 15%. Bottom left. PDS_N- shell3 - 15%. Bottom left. PDS_N- shell1 - 25%. Bottom. PDS_N- starfish - 15%. Bottom. PDS_N- bottle3 - 35%. Bottom.. PDS_N- bottle2 - 40%. Bottom, in the middle. PDS_N- lamp - 35%. Bottom, on the right. PDS_N- welcomeaboard - 40%. Top left. PDS_N- string3 - 40%. On top. Add your tube, on the right. STEP 3: Text and Credits Texte: of your choice or mine I love that Summer Feeling with the font Dominique in blue #1A2A63. Apply Eye Candy > Gradient Glow
Image > Rotate 7° left. Credits: with the Pixelette font or any other small pixel font. Save your work. Martine 15 June 2017 |


