You can do pretty much what you like with your result: create signatures with name added, extras or stats, websets. Give all the credits that are required.
 Scrapkit: hpd_Seashells&SandCastles_AddOn by Bev ofHorsePlay's Pasture Designs. Download here. Template: Facebook Timeline Template 6 by Allison of Allison's Addictions. Download here. Masks: Narah's masks. 1231 & 1359 & 1364 - download here. Plugins: Filter Factory Gallery H - Jumble; Unplugged Tools - Interlace; Eye Candy 4000; penta.com - Jeans; AAA Frames - Texture Frames; AAA Filters - Good Vibrations. Police: Aulyars for the text; Pixelette for the credits. I used this Drop Shadow H 2, V 2, O 45, F 5. You can download my E-Book which will let you work without being connected. STEP 1 Open the template. Maj D Duplicate and work on the copy. Delete the Credits layer and the following layers: avatar position; copyright; all layers raster 8; raster 9; raster7; raster 1 and border. Activate Copy (5) of Raster 10. Click on Layers > Merge > Merge Down. Repeat Merge Down down to layer Raster 10 in order to have one only layer with all the small white dots. STEP 2 With the Magic Wand, click inside background. Copy Paste hpd_S&SAddOn_P5 as a new layer. Delete background. Apply Filter Factory Gallery H > Jumble - Default configuration.
Duplicate this layer. STEP 3
STEP 4 Raster 10 - Selections > Select All. Selections > Float. Selections > Defloat. Add a layer and fill with #004F5F. Selections > Select None. Duplicate. Layers > Merge > Merge Down. Delete the original layer. STEP 5
Add a layer. Fill with paper hpd_S&SAddOn_P4. Selections > Select None. Delete the original layer. STEP 6
Add a layer and fill with #E4846F. Selections > Select None. Delete the original layer. STEP 7
Add a layer and fill with #6ECEDE. Apply UnPlugged Tools > Interlace - Default configuration.
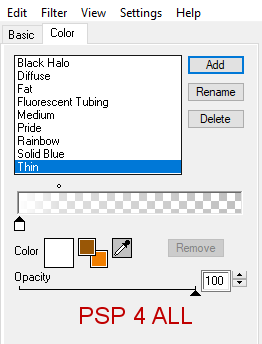
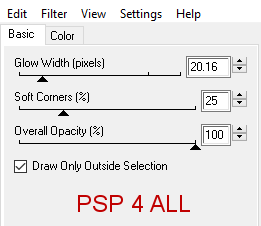
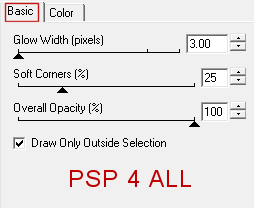
Selections > Select None. Then apply Eye Candy 4000 > Gradient Glow > Thin
Delete the original layer. STEP 8
Add a layer and paste paper hpd_S&SAddOn_P5 in the selection. Colorize with the Hue at 38 and Saturation at 162. Effects > Edge Effects > Enhance More. Selections > Select None. Delete the original layer. STEP 9 With the Magic Wand, click on Raster 2. Add a layer and fill with #0045F5. Apply penta.com > jeans - Default configuration.
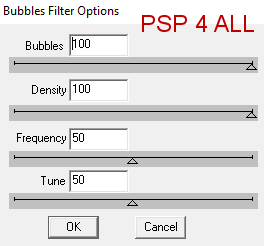
Selections > Select None. Delete the original layer. STEP 10 With the Magic Wand, click on Copy of Raster 2. Add a layer and fill with #F3EFC9. Add a layer and copy paste paper hpd_S&SAddOn_P5 in the selection. Apply DSB Flux > Bubbles
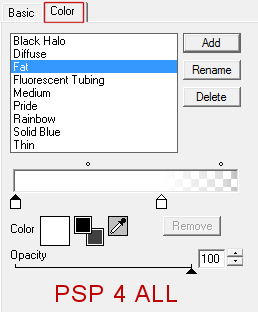
Selections > Select None. Delete the original layer. STEP 11 Add the following elements. hpd_S&SAddOn_el2 - 42%. In the middle of Copy of Raster 2. Opacity at 36%. lhpd_S&SAddOn_el15 - 60%. Adjust > Hue and Saturation > Colorize with the Hue at 38 and Saturation at 162. hpd_S&SAddOn_el3 - 60%. Left. Colorize with the Hue at 7 and Saturation at 174. hpd_S&SAddOn_el3 - 40%. Left. Coloriser with the Hue at 38 and Saturation at 162. hpd_S&SAddOn_el3 - 75%. Left. hpd_S&SAddOn_el4 - 75%. Left. lhpd_S&SAddOn_el5 - 75%. Left. lhpd_S&SAddOn_el14 - 85%. Right. lhpd_S&SAddOn_el17 - 65%. Colorize with the Hue at 7 and Saturation at 174. lhpd_S&SAddOn_el16 - 50%. lhpd_S&SAddOn_el17 - 60%. Duplicate this layer. lhpd_S&SAddOn_el17 - 75%. Right, see my tag. ETAPE 12 Text - Seashells & Fish or the text of your choice or your name, using Aulyars as the font in blue #004F5F. Apply Eye Candy > Gradient Glow > Fat
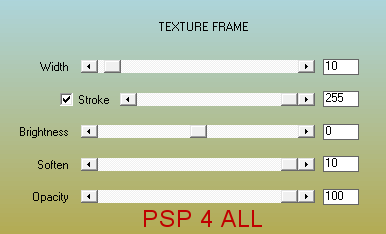
Apply a Drop Shadow. This time: 1, 1, 55, 1. STEP 13 Credits: with a pixel font like Pixelette or any other small pixel font. STEP 14 Layers > Merge > Merge Visible. Apply AAA Frames > Texture Frame
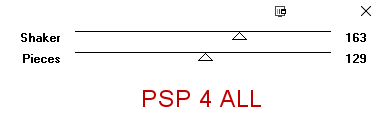
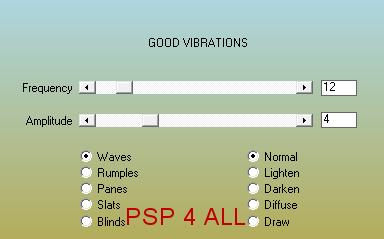
Edit > Copy - Edit > Paste As New Image. On the original, apply AAA Filters > Good Vibrations
Place the copy on the original. Image > Resize the copy to 98%.
Save your work. |

