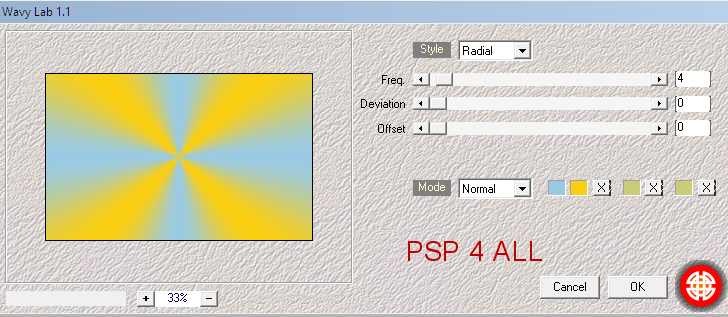
STEP 1 - Background and Middle layer Open an image couleur #FFFFFF, 800x500. Foreground = #FBCF11 and Background = #A3D5F1. Apply Mehdi Wavy Lab 1.1.
Rename Background 1. Add alayer. Invert the 2 colours and apply Mehdi Wavy Lab 1.1. Resize to 90%. Rename Middle Layer. Selections > Select All. Selections > Float. Selections > Defloat. Selections > Modify > Select Selections Borders
Add a layer anf fill with #fbcf11. Adjust > Sharpen > Sharpen. Selections > Select None. Rename Border 2. Click on the Middle Layer. Selections > Select All. Selections > Float. Selections > Defloat. Apply Mehdi > Sorting Tiles...
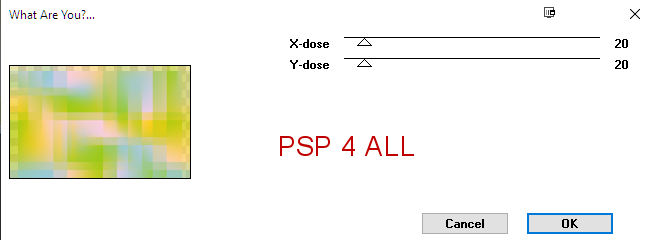
Toadies > What Are you?...
Duplicate. On the copy, apply Mura's Meister > Perspective Tiling.
Adjust > Sharpen > Sharpen. Selections > Select None. Selection > Custom Selection
Fill with yellow #fbcf11. Selections > Select None. Adjust > Sharpen > Sharpen. Back onto the original layer - Middle Layer. Selections > Select All. Selections > Float. Selections > Defloat. Apply Filters Unlimited > Sapphire 09 > Sapphire 0890
Apply L en K landksiteofwonders > L en K's Katharina
Selections > Select None. ETAPE 2 - Back to the top of all the layers. Selection Tool > Custom Selection.
Add a layer. Fill with white. Blend Mode on Soft Light . Layers > Arrange > Move Down. Click on Background 1. Apply AFS Import > sqborder2
Adjust > Sharpen > Sharpen. STEP 2 - Tube, Elements and Word Art Tube: Add the tube in the middle. Elements: Add the sun on the right. Please the deco element on the left. Word Art: I split the word art in 2 and resized to 20%. I placed the word Summer on the left of the tube and on the other side of the tube, i added sand-sun-beach-vacation. See my tag. Add the other Word Art, resized to 19%, at the bottom. STEP 3 - Credits Credits: with a small pixel font like Pixelette or one of your choice. Martine 29 June 2021 If you have any questions, don't hesitate to contact me |