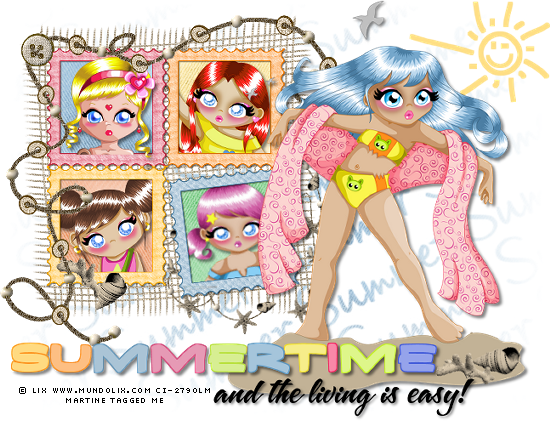
|
(Version française ICI) |
|
|
|
|
|
|
You can do pretty much what you like with your
result: create signatures with name added, extras or stats, websets. Don't
forget to give credit.
|
This pointing hand is here to help you. You can drag and drop it and use it as a
marker to help with following the tutorial. |

Tubes of your choice, free or not, but the credit for the tubes must be added
to your tag. I am using 5 tubes © Lix -
www.mundolix.com. If you use the same tubes, you need a license and you can
get it here:
CILM.
The mask is by Vix : n°38 -
http://www.freewebs.com/vixpsp/.
Wordart by Yvette - her blog is here :
Essence of Creativity. Wordard was put online on Saturday, 12 July 2008
with the title: Summer Wordart Template.
Scrapkit is by Heike of Grafix-Dreams
http://grafik-dreams.user.li/
Supplies
here.
Vou can download my E-Book which will let you work without being connected.
![]()
Open your supplies in PSP: scrapkit, tubes, mask and Wordart
New image 650x550.
And save! Don't forget to save your work regularly by clicking on
![]() .Fill
with white.
.Fill
with white.
New layer and fill with one of the papers. I used hg_05.
Then apply your mask : Vix n°38. Puis appliquez le masque de Vix. Masks >New >
From Image - OK. Then Masks > Invert. And finally Masks > Delete. In PSP 8 and
more recent versions of PSP, go to Layers > New Mask Layer > From Image. OK.
Then Delete.
Add the net nets_02 and the stamps frame stamps_05. Resize the net to 43 %
and the frames to 20%.
You can leave the frames as they are or recolour
them. You can recolor all 4
the same - Click on Colors > Colorize > Coloriser. PSP 8 and above: Adjust >
Hue and Saturation > Colorize. There you fill in the Hue and Saturation. Choose
the colour you want to use and in the Colr Window opening up, make a note of
the numbers next to Hue and Saturation. You enter these numbers when you want
to colorize.
For my yellow #FFDC7A , the hue is 30 and saturation is 255.
in a different colour. Select the first frame with the Lasso tool: Selection
type = Point to Point, and then click on Colors > Colorize. PSP 8 and above:
Adjust > Hue and Saturation > Colorize.
You repeat for each frame, changing
the Hue and Saturation each time.
Selet the inside of the first frame with the Magic Wand then Selections > Modify > Expand by 5 . Add a layer and fill with one of the papers scaled down to 20-25%. Keep selected, choose the first tube to go in your frame, resize it and place it in the selection. Then selections > Invert and hit Delete on your keyboard.
Move those two layers under the frame.
Repeat for each frame. For the 4th frame, use the Deform tool or the tool of your choice to slightly turned the tube in the frame as the frame is not straight.
Leave your main image and go back to the net image nets_02. Make sure you are on the resized copy. I removed all the net to keep just the trimming because I wanted to put the trimming on top of the frame in the main image, so we could see it better. See my result above. Again use the Lasso tool - Selection Type: Point to Point; Antialias(anticrénelage) checked and Feather at 1. You must remove the net from one side of the trimming. I started with the inside. Follow the edge of the trimming and left click as you go along. When you reach the bottom, select as much of the net as you can and go back to your starting point. Right click and Hit Dlete on your keyboard. I work by sections because it is easier. It's too frustrating to make a mistake when you try to do the whole lot in one go and make a mistake as you are near the end!
Now clean up the other side. Follow the decoration and remove all the net. Again work section by section if it is easier.
Once you have removed all the net, position the decoration on your frame, exactly where the other one is, just this time, it's on top of the frame.
Add the Sun element and recolour it yellow. I used the Color Replacer tool with the sun color as the background colour and yellow, mine is #FFDC7A for the foreground colour.
Add your tube, resized. Add the same Dropped Shadow as before.
Add the Wordart. I recoloured each letter, one at a time. Select the first letter with your Lasso tool: Selection type = Freehand; unchek Antialias and Feather at 0. No need to be accurate here, all you want is to select the letter, separate it from the others. Click on Colors > Colorize. PSP 8 and above: Adjust > Hue and Saturation > Colorize. There you fill in the Hue and Saturation. Repeat for all the letters, changing the Hue and Saturation if you want to have letters in different colours. Add a Dropped Shadow.
I added other elements after first resizing them and placed them on the sand.
If you want to resize your tag, do this now. First save your tag as is, with all the layers. I then resized mine down to 85% with all layers checked. Save this new image with a different name as you don't want to replace the full-sized original.
Add your credits and save.
Voilŕ! You are done!
Martine
16 July 2008
