;
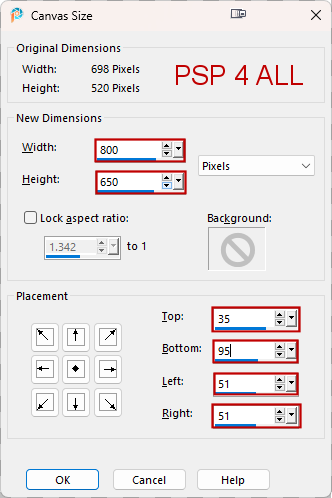
 Pbs-Template84 by Punky Butts - Punky Productions. Download here. Scrapkit: Give Thanks, AI scrapkit by Elfairy on her site Elfairy Tubes. Download here. Plugins : AP(Lines) > Silverlining L en K landksiteofwonders > Katharina Eye Candy 4000 > Gradient Glow Carolaine and Sensibility > CS-HLines< Xero > Clarity Mask: Mask 65 MB and SW de Moonbeams and Spiderwebs - Download here. Supplies: download here. Fonts: Pixelette for the credits ****************************** Reminder: *** Method to color a layer or add a paper - To fill a layer with colour, Selections > Select All. Selections > Float > Selections > Defloat. Or click with the magic wand. Add a layer > Fill with the new colour or paper, texture. Apply plugin if needed. Selections > Select None. Delete the original layer. *** Depending on the colors & tube you are going to use, feel free to change the mode and opacity of the layers. STEP 1 - Template 1. Open the template. Shift+D to duplicate. 2. Delete the Credits right at the top: Pbs Credits. 3. Image > Canvas Size
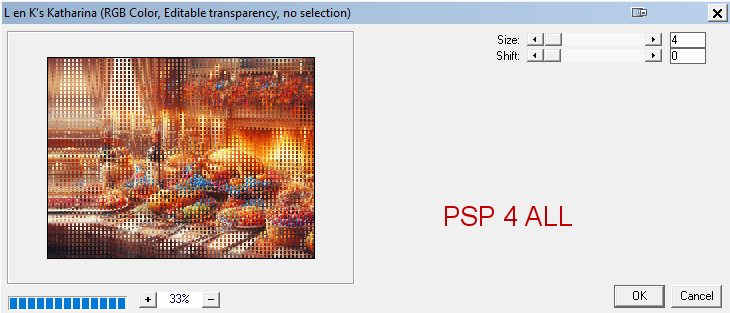
4. background - Fill with black #000000. 5. Add a layer. 6. Select All and paste paper_EF (19) Into Selection. 7. Selections > Select None. 8. Open Mask 65 MB and SW. 9. Layers > New Mask Layer > From an image and select Mask 65 MB and SW. 10. Click on OK. 11. Apply L en K's > Katarina
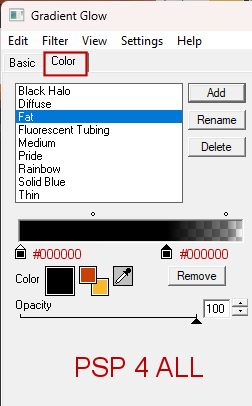
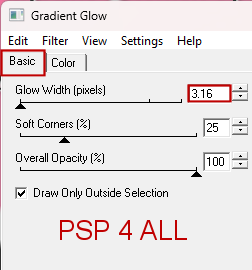
12. left frame circle, right frame circle, center circle frame, left square frame, right square frame, film strip frame (all the white frames/ borders) 13. Apply to all these frames the same Eye Candy 4000 > Gradient Glow
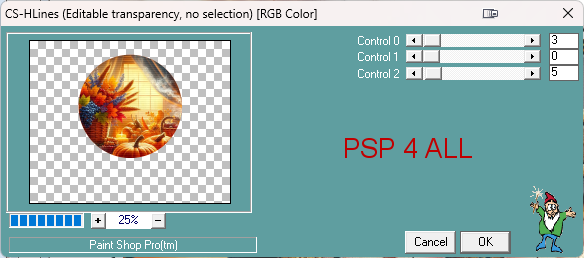
14. left diamond line circle and right diamond line circle - Select All and add a layer. 15. Fill with #F8e070. 16. Selections > Select None. 17. left circle - Select All and add a layer. 18. Fill with #F06B0A. 19. Ajouter un gros plan de votre tube en nouveau calque. 20. Selections > Invert. 21. Click on Delete. 22. Selections > Select None. 23. Set this layer on Hard Light or the Blend mode that suits your tube. 24. right circle - Répéter ce que vous venez de faire pour le left circle - 17 ŕ 23. 24. center circle - Select All and add a layer. 25. Fill with #F06B0A. 26. Add lhe image mask_paper_EF (11).pspimage (in the supplies). 27. Selections > Invert. 28. Click on Delete. 29. Selections > Select None. 30. Apply Carolaine and Sensibility > CS-HLines
31. Apply Xero > Clarity
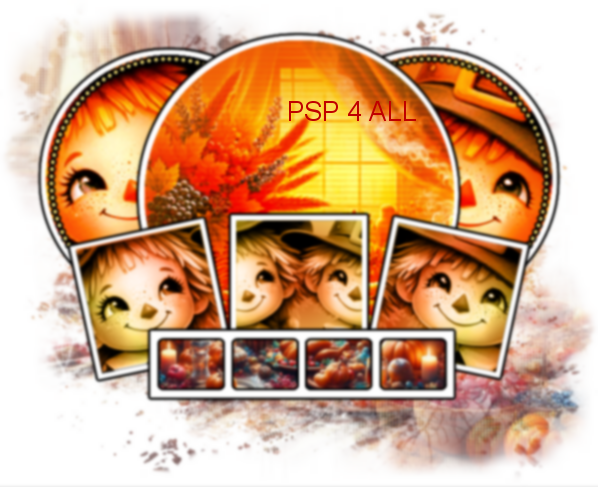
32. Put this layer on Hard Light. 33. right square - Select All and add a layer. 34. Fill with a gradient 2 colours #F8E070 in background and #C84208 in foreground. 35. Settings: Sunburst with Repeat on 2; Center and Focal Points all on 100. Invert checked. 36. Add a close-up of your tube as a new layer, a bit smaller this time. 37. Select > Invert. 38. Click on Delete. 39. Selections > Select None. 40. Blend mode of this layer on Luminance (Lagacy) or the Blend mode that suits your tube. 41. middle square - Repeat 33 to 40 for the middle square but change the gradient. 42. Configuration : Halo with Repeat on 0; Centre and Source all on 50. Invert checked. 43. left quare - Repeat 33 to 40 for the left square but change the gradient and mirror the tube. 44. Configuration : Sunburst with Repeat on 2; Center and Focal Points all on 100. Do not check Invert. 45. Tube - Image > Mirror. 46. Open paper_EF (15) and resize to 60%. 47. film strip frame - Selections and paste paper_EF (15) Into Selection. 48. Select > Invert. 50. Click on Delete. 51. Selections > Select None. 52. And your result should be similar to this
STEP 2 - Elements 53. element_EF (17) - 55%. Click on the mask layer at the bottom above Background. Place element_EF (17) at the top and on the left. 54. Place my WA on the right. Opacity on 80-85%. 55. Back to the top of the pile. 56. element_EF (72) - 30%. On the left. Duplicate > Mirror. 57. element_EF (63) - 30%. On the left. 58. element_EF (76) - 15%. On the left. 59. element_EF (59) - 30%. A gauche. Rotation 30° droite. 60. element_EF (37) - 15%. On the left. 61. element_EF (64) - 20%. On the right. 62. element_EF (74) - 17%. On the right. 63. element_EF (42) - 20%. On the right. 64. element_EF (21) - 20%. On the right. 65. Ma dinde ( avec le matériel) - In the middle. 66. element_EF (53) - 5%, 6% et 7%. In the middle. 67. element_EF (50) - 10%. A gauche. Duplicate > Mirror. 68. element_EF (42) - 20%. On the right. 69. element_EF (100) - 55%. I colored this WA with my gradient: linear, angle on 90° and Repeat on 10. 70. Apply the same Eye Candy 4000 > Gradient Glow. 71. Apply Xero > Clarity (same config). STEP 3 - Credits 72. with a small pixel font like Pixelette or any other small font. 73. Save. Martine 14 November 2024 If you have any questions, don't hesitate to contact me |