Supplies: my colours, masks, WA, my script and the text version for those not wanting to use the script. All in this zip.
Plugins: Simple > Top Left Mirror. FunHouse > Loom Italian Editors Effect - Picture in Picture (for the script). Masks: Two masks by Sandra - Essex Girl Artwork in the Supplies folder. Font: Pixelette for the credits. ****************************** *** Depending on the colors & tube you are going to use, feel free to change the mode and opacity of the layers. My colours : #D0999D et #908476.
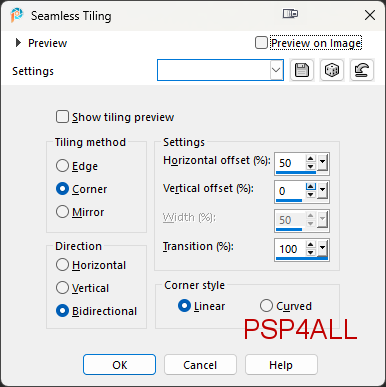
*** Add the script in the Scripts-Trusted folder (See below - STEP 3). STEP 1 - Background 1. Open an image 850x550 white. 2. Add a layer and Selections > Select All. 3. Add the tube. 4. Selections > Select None. 5. Effects > Image Effects > Seamless Tiling.
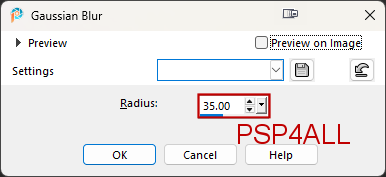
6. Appliquer Réglage > Flou > Flou gaussien
7. Effets > Simple > Top Left Mirror 8. Duplicate. 9. Opacity on 50% et le Blend mode on Burn. 10. Merge Down. 11. Apply Distortion Effects > Pixelate
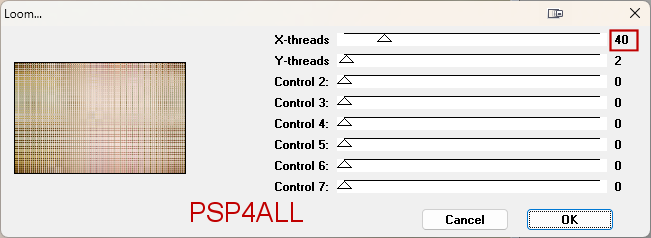
12. Edge Effects > Enhance 13. Apply Funhouse > Loom
STEP 2 - Masks and WA *** Les masques *** 14. Add a layer and fill with white. 15. Open the mask sg_double-sweetheart-frame. 16. Layers > New mask layer > From an image 17. Select the mask sg_double-sweetheart-frame. OK 18. Layers > Merge > Merge group. 19. Repeat the steps for the second mask: sg_valentine8. *** Le WA *** 20. Paste the WA as a new layer in the left frame. 21. Press K on your keyboard to activate the Pick tool
22. Modify Position X. et Position Y
23. Press M on your keyboard to desactivate the Pick tool. STEP 3 - Borders 24. Do not merge before running the script. 25. To make the borders, I used this script: PSP4ALL_Val_mf26. 26. Check that you have this plugin installed: Italian Editors Effect - Picture in Picture. 27. Take the script PSP4ALL_Val_mf26 in the supplies. 28. And place it in the Scripts-Trusted of your PSP. 29. To find this folder, have a look under File > Preferences > File Locations and then look for Scripts-Trusted. 30. Note the location and navigate to it and place my script PSP4ALL_Val_mf26 in folder. 31. Let's check that the Script toolbar is visible. 32. If it isn't visible, right click in the grey area of your toolbar at the top, and select Toolbars > Script
33. Then you will have this. Click on the first arrow pointing downwards and select the script: PSP4ALL_ValCouple_mf26
34. If you are going to use my pink #D0999D for the borders, check that the button Toggle Excution Mode is not pushed in. 35. If you are going to use a different colour, then push in Toggle Excution Mode before starting.
36. Then click on the second arrow- the arrow pointing right, to execute the script. 37. If you prefer, or if there is a problem you can do the borders manually using the info in the txt file PSP4ALL_MF_ValCouple_Borders_mf26, in the supplies. STEP 4 - Tube and Credits *** Tube *** 38. Add the tube on the left. *** Credits *** 39. Credits with a small font like Pixelette or any other small font. 40. Save.
If you have any questions, don't hesitate to contact me
|