|
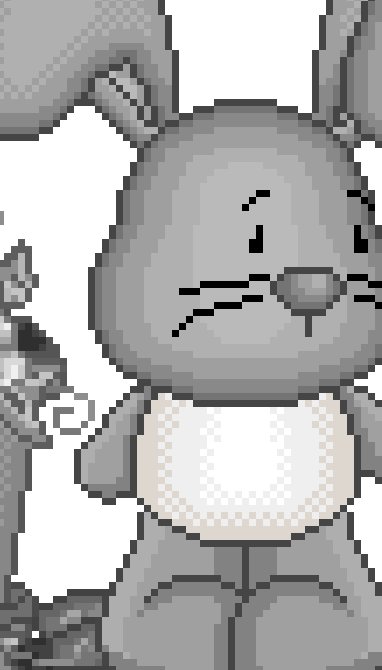
We are using a greyscale
rabbit*
here.
Zoom on your outline. Quick way... Click on your Magic wand and set like this
If using PSP 7, then select one pixel of the outline with your Magic wand (Tolerance and Feather on 0) then Selections > Modify > Select Similar. The whole of the outline is selected. Fill with your darkest colour. We work from the outside to the inside that is from darkest to lightest. Now select the second grey colour in the same way. You click on one pixel > Selections > Modify > Select Similar (tolerance at 0). The whole of the same colour is selected. Fill with your second darkest colour, it will be a bit lighter. And carry on until the whole face is coloured. If there are other parts with the same shade of grey, they will get coloured at the same time. Then move onto other areas like the nose, the trunk etc... until the whole rabbit is coloured. -*-*-*-*-*-*-*-*-*-*-*-*-
* This rabbit is an AS IS Outline offered
by Debbie of
My Doodles and
Vivi owner of Vivi's Pixel Area.
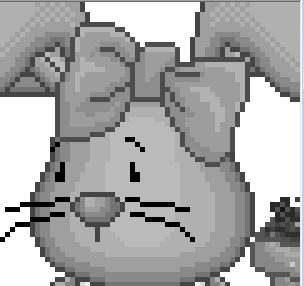
This also works well - however only if the element you want to colour is on a layer on its own. I will colour the bow on the rabbit's head because the bow is on a layer on its own.
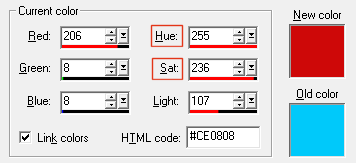
Choose a colour - I will use #CE0808. Now click on your colour palette and enter #CE0808. And make a note of the Hue and Saturation.
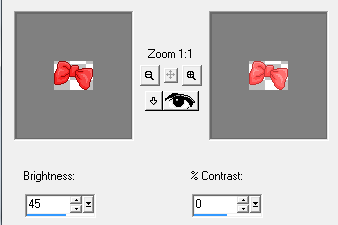
Go to Adjust in the Menu and then Hue and Saturation > Colorize and enter 255 for the Hue and 236 for the Saturation. Lower the saturation to lighten. Or click back on Adjust > Brightness & Contrast > Brightness and Contrast and increase or lower the brightness and keep the Contrast low. Play with the numbers until you find something you like.
-------------------------------------------- |