This tutorial was written by me 20/02/07 any resemblance to any other tut is purely coincidental I am using the artwork of Dean Yeagle you can get his tubes from CILM however you can use any tubes you like... |

|
tubes and a mask of choice.... I used a heart shaped one 'VIX_MASK13 from here thanks Vix hun x... again you really could use any shape you like, once you know how... |
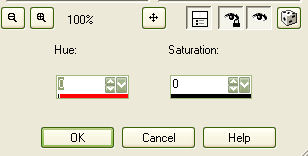
Open raster a new canvas 500x 500 I added the the middle tube last so it was on the top layer and placed it slightly lower than the other 2 now go to Adjust - hue and saturation - colourise adjust the hue and saturation both to '0' on for all tube layers
all tubes should now be grey... X out your white background layer * Important - now make your white filled layer visable again *
|
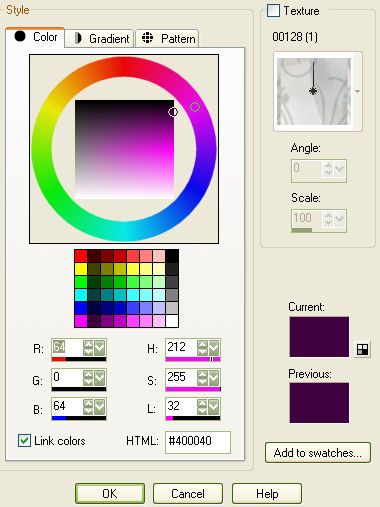
Add a new layer and flood fill with a colour or Gradient of your choice IF YOU ARE NOT SURE HOW TO MAKE A GRADIENT TRY HERE FOR A GOOD TUT ON IT I used Foreground HTML no:#400040 and Background HTML no: #e1cfb7
|
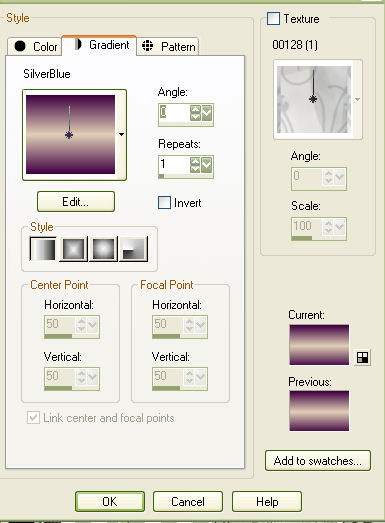
now you have your gradient colours choose these settings for your gradient
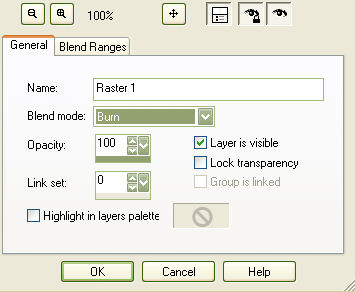
floodfill your canvas then change the blending node to Burn by going to Layers - Properties - Burn
|
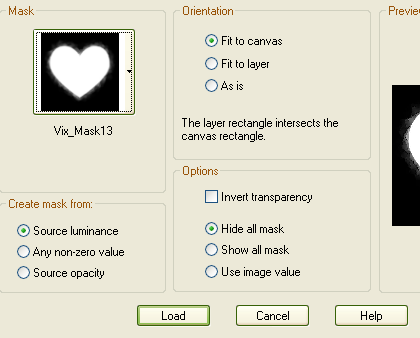
MERGE ALL Layers - lOAD/SAVE MASK- Load mask from disk
Click OK Right click on your layers and merge group. below is what you should have… |
|
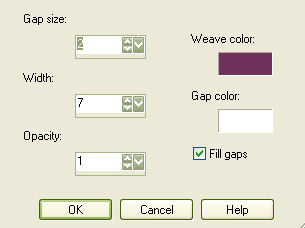
now go to Effects - Texture effects– WEAVE
|
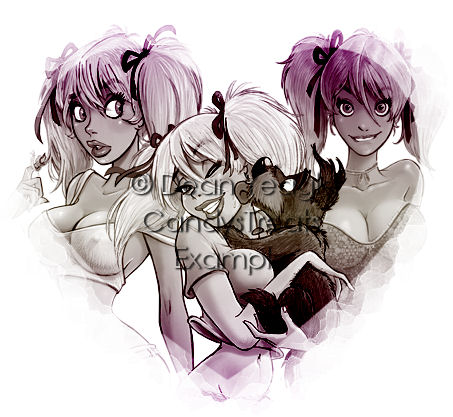
Merge all again Using the Crop Tool select just
the head shots - copy
and paste as a new image |
|
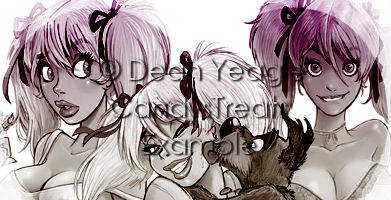
Select this as your fill for your text in the pattern section of background fill instead of a colour and make the foreground the dark purple you used before. Add your text using a chunky font and stretch out to a nice size so that you see the faces in your words. I used Berlin Sans FB Demi on the folowing settings
Add a drop shadow I used v2 h2 opacity 60 blur 3 colour #3a283a |
Add your copyright thanks for trying my tutorial Diane at Candy's Treats: http://www.candystreats.co.uk/ |