STEP 1 Open an image 600x250. I used colours from my tube: #86AF85 in foreground and #c72c2e in background.
Left click and fill. Duplicate. Apply Texture > Texturizer
Adjust > Sharpness > Sharpen. Duplicate. Image > Resize 87%. Back to the original layer and apply L en K Landksiteofwonders > L en K's Jeffrey
STEP 2 Back to the copy. Apply penta.com > VTR2
Apply Visual Manipulation > Transmission
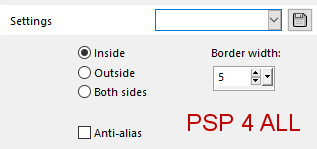
Selections > Select All> Modify > Select Selections Borders.
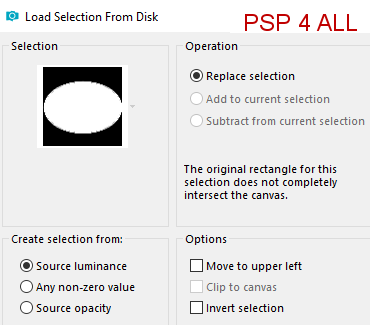
Right click and fill with the background colour. Selections > Select None. STEP 3 Click on Selections > Load/ Save Selection > Load Selection From Disk. Select the Ellipse PSP4ALL_MF_Xmas_Ellipse_mf19
Add a layer and right click to fill with the background colour. Selections > Modify > Contract by 4 pixels. Rename this layer Border. Add a layer and left click to fill with the foreground colour. Add a layer. Rename Image. Click on your Winter background image. Edit > Copy. Back on your working canvas and Edit > Paste Into Selection. Properties > Layer Properties > Blend Mode on Soft Light. Add a layer and name it Glass. Apply Eye Candy 5 Impact > Glass. Click on Settings and choose PSP4ALL_MF_Xmas8Ellipse_mf19. Then OK. Or enter these coordinates yourself.
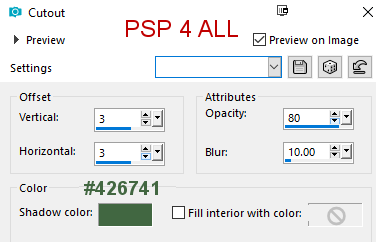
STEP 4 Click on Selections > Load/ Save Selection > Load Selection From Disk. Select the 2 lines PSP4ALL_MF_Xmas_Lines_mf19 Right click and fill with the background colour. Selections > Select None. Click on Border and then Layers > Arrange > Bring to Top. Layers > Merge > Merge Down. Rename Border. With the Magic Wand - Mode: Replace/ Tolerance = 0 and Contiguous checked, click in between the 2 lines. Add a layer and fill with white. Slide this layer under the Border layer. Set the Opacity at 50. With the font Script MT Bold, write my text or one of your choice - Anti-alias on Sharp and Create as on Floating. With the text still selected, click on Selections > Load/ Save Selection > Save Selection To Alpha Channel. Rename Text. Click on Delete. Click back on Selections > Load/ Save Selectio > Load Selection From Alpha Channel. Click on the Text selection. Apply 3D Effect > Cutout
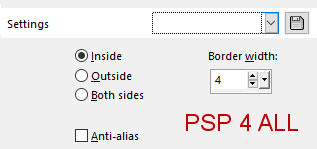
Adjust > Brightness and Contrast > Brightness / Contrast - Brightness on 20 and Contrast on 0. Add a Drop Shadow: H=4; V=2; O=80; B=5. Selections > Select None. Add your tube on the left. Add a Drop Shadow: H=4; V=4; O=80; B=5. STEP 5 - Snow Open the Snow animation Neige_Snow in Animation Shop. Edit > Select All. File > Export Frames > To Paint Shop Pro. In AS, right click on the Neige_Snow animation and choose Break Link With Exported Frames. Return to Paint Shop Pro. Activate the layer under the Glass layer. You are on the Image layer. Selections > Select All. Selections > Float > Selections > Defloat. Snow Animation: click on Frame1. Edit > Copy. And on your working canvas, Edit > Paste as New Layer. Name it Snow 1. Repeat with Frame2 of the Neige_Snow animation. Rename Snow 2. And repeat with all the snow frames up until Frame10. You will have 10 layers Snow numbered Snow 1 to Snow 10. To delete the excess Snow outsize the frame. Selections > Invert. Activate the Snow 1 layer. Click on Delete. Activate Snow 2. Click on Delete. Repeat with all the Snow frames. Selections > Select None. STEP 6 - Animation Click on Snow 1. And close all the other Snow layers. Edit > Copy special > Copy Merged. Open Jasc Animation Shop: Paste As New Animation. Back to PSP. Close Snow 1 and open Snow 2. Edit > Copy special > Copy Merged. Return to AS: Paste After Current Frame. And repeat for all the Snow layers until Snow 10. STEP 7 - Credits Credits: with a font like Pixelette or any other small font, in white. Apply Eye Candy 4000 > Gradient Glow of 3, Thin, 425941. STEP 8 - Top Border Selections > Select All. Add a layer. Selections > Modify > Select Selection Borders.
And fill with the background colour. Selections > Select None. Martine 10 December 2019 If you have any questions, don't hesitate to contact me |