Tube(s) of your choice, free or not but the
credit for all the tubes must be added to your tag. I use a tube
©Jan Mahew -
www.janmahew.com.
-
Plugins
Mehdi > Copies &
Perspective Tiling
Toadies > What are you?
FunHouse > Loom
Carolaine & Sensibility >CS-LDots
&<Bkg Kaleisdocope > Cake Mix
AP 01 [Innovations] > Lines - SilverLining
VM Toolbox > Grid
AAA Frames > Foto Frame
- Material: Mask 20/20 & Texts. Download
here.
-
Font: Pixelette for the credits.
STEP 1
Open an image colour #FFFFFF, 800x500.
New layer and fill
with #44b7df.
Add your tube.
Mura's Meister > Copies
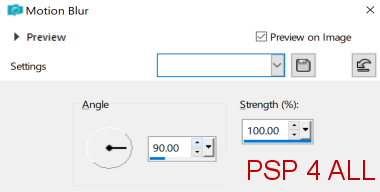
Adjust > Blur> Flou de mouvement deux fois.
Repeat twice more but change the angle to 270.
Effects > Toadies > What Are you?
FunHouse > Loom.
Sharpness > Sharpen More.
Carolaine & Sensibility > CS-LDots
&<Bkg Kaleisdocope > Cake Mix
Layers > Merge Down. Rename Background.
Duplicate
the background twice to have 3 copies in all.
On the middle copy - rename Middle Copy - apply Mura's Meister > Perspective Tiling
Sharpness > Sharpen More.
On the copy at the top - rename Top Copy, apply Mask 2020.
Layers > New Mask Layer > From Image and choose
Mask2020.
Click on OK.
Layers > Merge group.
Apply AP 01 [Innovations] > Lines - SilverLining
For the colour, click on color to get this blue colour.
Move the Middle Copy above the Top Copy Layer. Your Layers Palette
should look like this.
Duplicate the background layer. Close the original
background.
On the duplicate copy of the Background, click
and Merge visible. Rename Background 2.
Image > Resize 90%. Resize all layers unchecked.
You now have 2 layers : Background and Background 2.
STEP 2 - Background
Open the bottom layer Background.
Blur > Gaussian Blur 20.
VM Toolbox > Grid
AAA Frames > Foto Frame
Note the change of colours - I used colours RGB - 68*183*223
for the blue that I am using #44B7DF.
STEP 3 - Background 2
Activate Fond 2.
Duplicate. Change the Blend Mode to
Overlay.
Layers > Merge > Merge Down.
Selections >
Slect All. Selections > Float. Selections > Defloat.
Apply Foto Frame, same settings.
Selections > Select None.
Apply a Drop Shadow 0, 0, 80, 20.
Do not check Shadow on new layer.
With your Magic Wand, draw a rectangle 700x90 and fill with white
and reduce the opcity to 72.
Same Drop Shadow.
Add the text Get Well Soon, 3 times in all.
Add my other text above.
Add the tube. Objects > Align > Horizontal - center.
Adjust > Sharpness > Sharpen More.
Same Drop Shadow.
Credits: with a small pixel font like Pixelette
or one of your choice.
Martine
20 August 2021
If you have any questions, don't hesitate to contact me