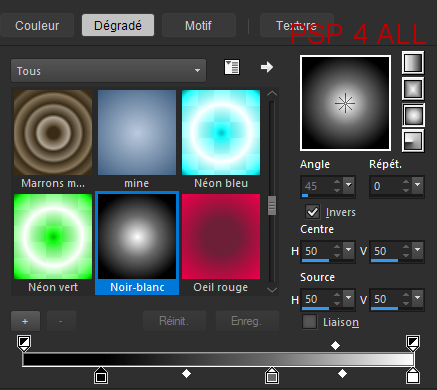
STEP 1 Open an image 820x312. Fill with this gradient
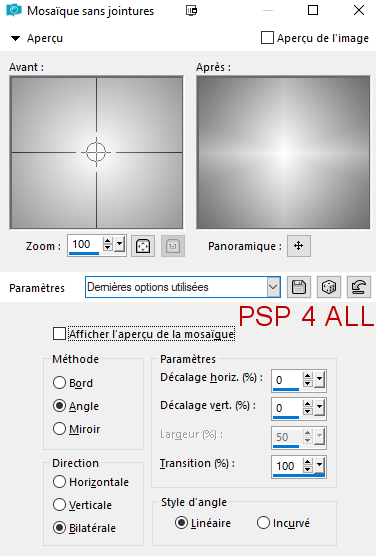
Effects > Image effects > Seamless Tiling
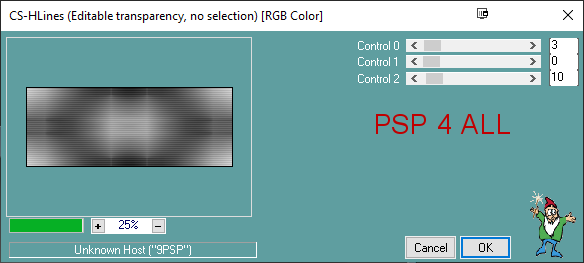
Carolaine and Sensibility > CS-HLines
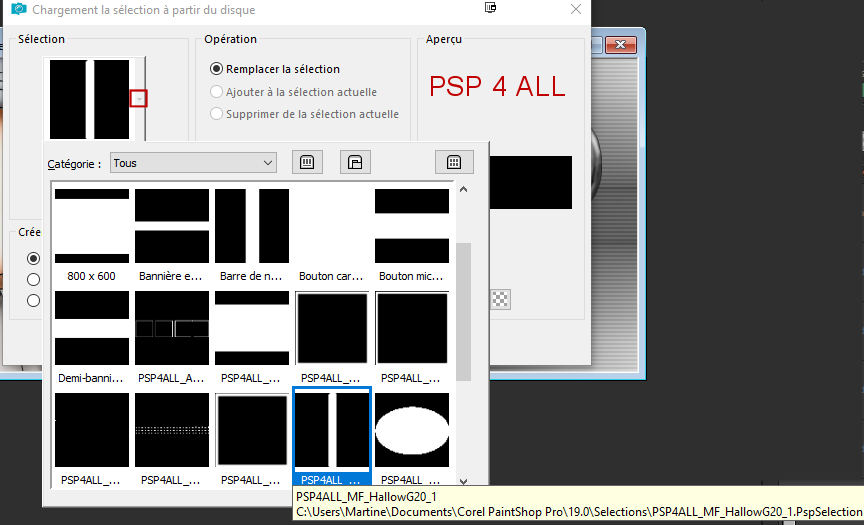
STEP 2 - Tube, horizontal border and glass with elements Add the tube on the left. Add a layer. Selections > Load/Save Selection > Load Selection From disk. Choose PSP4ALL_MF_HallowG20_1. In the little window, click on the small arrow to open the scrolloing menu and you will see PSP4ALL_MF_HallowG20_1. Click on it
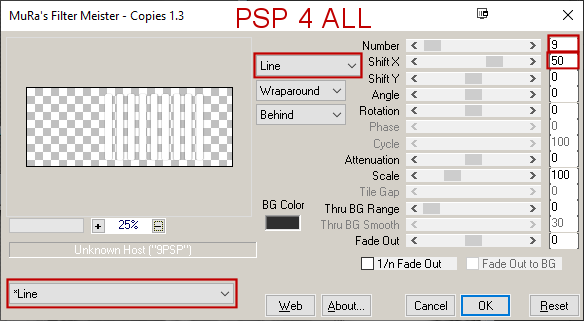
Click on OK. Fill with white. Selections > Select None. Apply Mura's Meister > Copies
Add a layer. Selections > Load/Save Selection > Load Selection From disk. This time select PSP4ALL_MF_HallowG20_2. Click on OK. Selections > Invert > Delete. Selections > Select None. Set the opacity on 38 and the Blend Mode on Soft Light. Apply Eye Candy 4000 > Gradient Glow - Medium - Noir
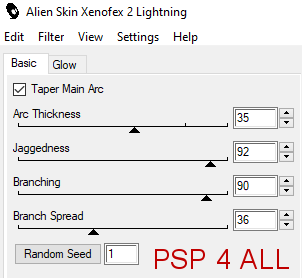
Add the Ghosts element as a new layer. Then Vampire Bats - 70%. On the left. Layers > Merge > Merge Down. Layers > Merge > Merge Down. Lightning: Duplicate this layer several times to have 6 layers in all. Rename Lightning 1, Lightning 2, Lightning 3, Lightning 4, Lightning 5, Lightning 6. Close all Lightning layers except Lightning 1. Activate Lightning 1. Adjust > Sharpness > Sharpen more. Close Lightning 1 and activate Lightning 2 and open this layer. Apply Alien Skin Xenofex2 > Choose Lightning. Under Settings, click on Reset to Factory default then still under Settings, select Old Horror Movie. Click on Basic and enter 35 for Arc Thickness.
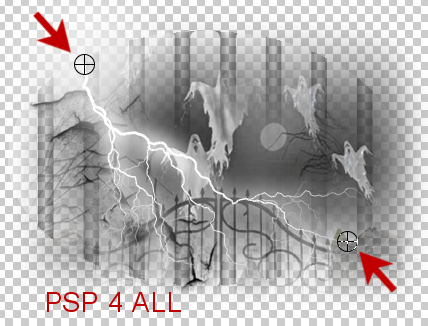
On the right, in the preview window, you can see your lightning and two circles with a cross in the middle. Move each cross so it is exactly on the edge of your circle.
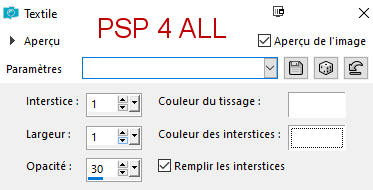
Click on OK. Adjust > Sharpness > Sharpen more. Close Lightning 2 and move onto the Lightning 3 layer. Open this layer 3. Repeat the Lightning effect and click on Random Seed until you get a lightning effect you like. OK. Adjust > Sharpness > Sharpen more. Close Lightning 3 and move onto the Lightning 4 layer. Open this layer 4. Repeat the Lightning effect and click on Random Seed. OK. Adjust > Sharpness > Sharpen more. Close Lightning 4 and activate Lightning 5. Répéter l'effet Lightning mais changer le Random Seed. OK. Adjust > Sharpness > Sharpen more. Fermer le calque Eclair 5 et activer et ouvrir le calque Lightning 6. Repeat the Lightning effect and click on Random Seed. OK. Adjust > Sharpness > Sharpen more. To make sure the lightning is inside the ellipse, click on Lightning 2 and open, then load selection 2 PSP4ALL_MF_HallowG20_2. Selections > Invert and Delete. Do the same for all the other lightning layers: Lightning 3, Lightning 4, Lightning 5, Lightning 6. Horizontal border: Add a layer and click on Selections Load/Save Selection > Load Selection From disk. This time select PSP4ALL_MF_HallowG20_3. Fill with the same Black-White gradient. Apply Effects > Texture > Weave
Then apply Eye Candy 4000 > Gradient Glow > Medium > Noir - same configuration as before. Glass: Add a layer and click on on Selections > Load/Save Selection > Load Selection From disk. This time select PSP4ALL_MF_HallowG20_2. Effecs > Eye Candy 5 Impact > Glass and under Settings, select PSP4ALL_MF_HallowG_Glass_mf20. Add a layer and fill with black. Selections > Contract 4 pixels. Delete. Selections > Select None. Duplicate and apply Gaussian Blur - radius 4. Layers > Merge > Merge Down. ETAPE 3 - Autres éléments et 2čme tube Leaves 1 - Apply Effects > Photo Effects> Black and White Film. Resize 13%. Place on the right et duplicate several times. Halloween Banner - Apply Effects > Photo Effects> Black and White Film. Resize 70%. At the bottom of the glass. Spider - 18%. Adjust > Sharpness > Sharpen more. Spider 1 - 10%. Adjust > Sharpness > Sharpen more. Add a smaller version of your tube, on the right, on the leaves. Add a Drop Shadow 5, 5, 55, 15 on the 2 tubes and the elements. STEP 4 - Credits Credits: with a small pixel font like Pixelette or any other small font. STEP 5 - Animation Close all the Lightning layers. Click on Lightning 1 and open. Edition > Copy Special > Copy Merged. Edit > Paste as new image. Apply Alien Skin Xenofex 2 > Burnt Edges on this new image.
Edit > Copy. Open Animation Shop. Edit > Paste As New Animation. Back to PSP. Close Lightning 1. Open Lightning 2 and repeat what you did at the beginning of Step 5: Edition > Copy Special > Copy Merged. Edit > Paste as new image. Apply Alien Skin Xenofex 2, same configuration, on this new image In AS, Edit > Paste After Current Frame. Back to PSP. Close Lightning 2 and open Lightning 3. repeat what you did at the beginning of Step 5: Edition > Copy Special > Copy Merged. Edit > Paste as new image. Apply Alien Skin Xenofex 2, same configuration, on this new image In AS, Edit > Paste After Current Frame. And you do this for all the Lightning layers: Lightning 4, and Lightning 4 and finally Lightning 4. You now have 6 frames in your animation in Animation Shop. Edition > Select All Edit > Paste After Current Frame. Animation > Reverse Frames . Click on frame 7 and Edit > Delete. Click on frame 11(the last one) and Edit > Delete. There are now 10 images. Cliquer click on View Animation. You like what you see? Then save your work as a gif, using the optimizer. Martine 18 October 2020 If you have any questions, don't hesitate to contact me |