STEP 1 - Background Open an image, color #FFFFFF, 800x500. I cropped a bit of my tube, the flower and a bit of the tube because I wanted the main colour of my tag to be pink. I did not want the bow not the color of the other pig. Appliquer Mura's Meister > Copies
If you have some gaps, then duplicate and move the copy about to cover the holes. Layers > Merge visible. Filters Unlimited > &<Background Designer IV> > THE TWIST TUT
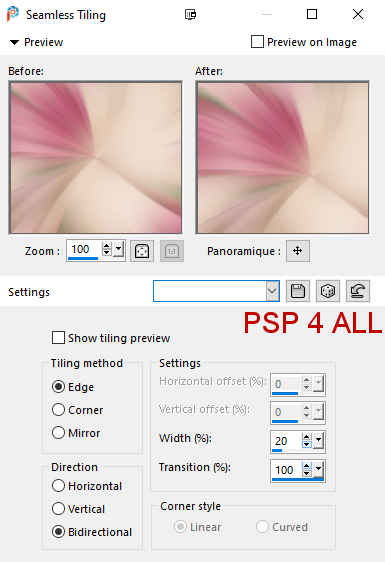
Effets > Effets d'Image > Seamless Tiling
Duplicate. Image > Resize 85%. Apply penta.com > color dot - configuration par défaut. Close this background layer. STEP 2 - Second layer Click on theopy. Selections > Select All. Selections > Float > Selections > Defloat. Van Der Lee > Unplugged-X > Defocus
Duplicate this layer and on the copy apply Mura's Meister > Perspective Tiling.
Layers > Merge Down. Add a layer and fill with #efddcc. Layers > New Mask Layer > From Image and choose Narah_Mask_1241. Click on OK. Layers > Merge Group. Layers > Merge Down. Selections > Modifier > Expand 5 pixels. Add a layer and fill with #AF4564. Move this layer - Layers > Arrange > Move Down. Selections > Select None. Layers > Merge Down. Add a Drop Shadow: 2; 2; 100; 30 colour #AF4564. STEP 3 - Tube and the rest Place the tube on the left. Drop Shadow: 3; 3; 35; 5 in black. Add the wordard. Love is... great when you find someone special to give it to. See my tag. I recolored the wordart with #AF4564 and then I separated into 3 layers so I could place it where I wanted. Add the Deco on the left - see my tag. Make it pink #AF4564. Drop Shadow: 1; 1; 35; 1. Objects > Align > Horizontal Center. Open the bckground layer and add a layer. Fill with #AF4564. Selections > Select All. Selections > Contract 5 pixels and Delete. Selections > Select None Back to the Top layer. Edit > Copy Special > Copy Merged. Add a layer. Click on Selections > Load/ Save Selection > Load Selection From Disk. Choose PSP4ALL_MF_Val21_1.PspSelection
Fill with #AF4564. Sélections > Modify> Contract 20 pixels. Click
on
Delete. STEP 4 - Credits Credits: with a small pixel font like Pixelette or any other small font. Martine 2 February 2021 If you have any questions, don't hesitate to contact me |