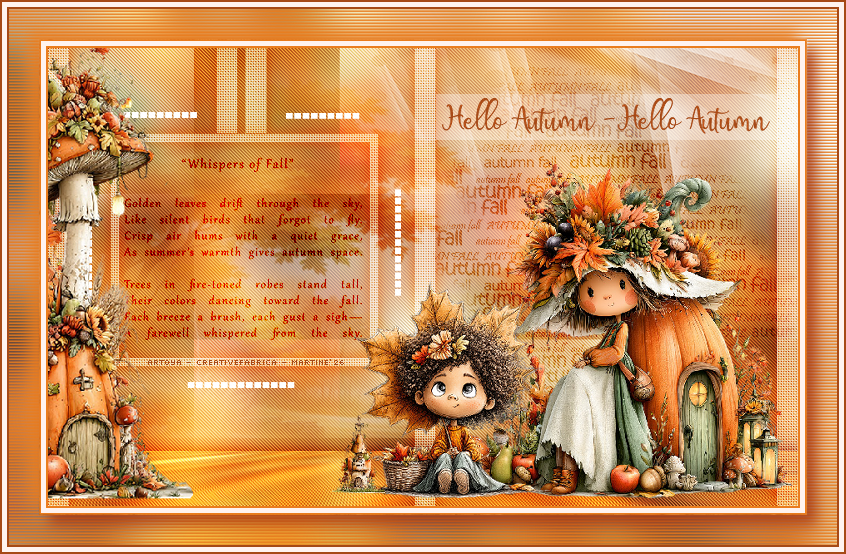
Supplies: my selections, my misted Scenery Mist, text tube, my Cloud Word ( I used a script made to order by Cassel), my text= Hello Autumn, my script and the text version for those not wanting to use the script. All in this zip.
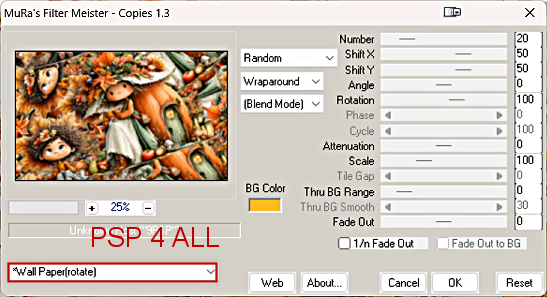
Plugins: Mura Meister > Copies et Perspective Tiling. penta.com > Jeans Mehdi > Wavy Lab 1.1. AP01 > Lines > SilverLining. Mask: Mask Narah_Mask_1330 by Narah - Narah's Designs in the Supplies folder. Font: Pixelette for the credits. ****************************** *** Add the tube in the Picture tubes of your PSP. *** *** Add the script in the Scripts-Trusted folder (See below - STEP 4). *** *** Depending on the colors & tube you are going to use, feel free to modify the mode and opacity of the layers. STEP 1: Background 1. Open an image 900x550. 2. Fill with white. 3. Add a layer. Selections > Select All. 4. Edit > Paste the tube into selection. 5. Selections > Select None. 6. Apply Mura's Meister > Copies > Wallpaper(Rotate)
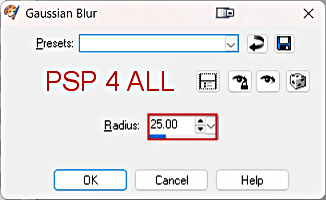
7. Adjust > Blur > Gaussian Blur
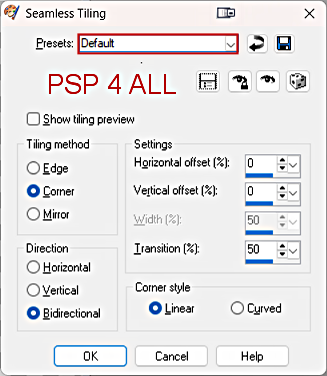
8. Effects > Image effects > Seamless Tile
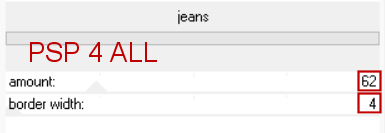
9. Duplicate. 10. On original layer, apply penta.com > Jeans by default.
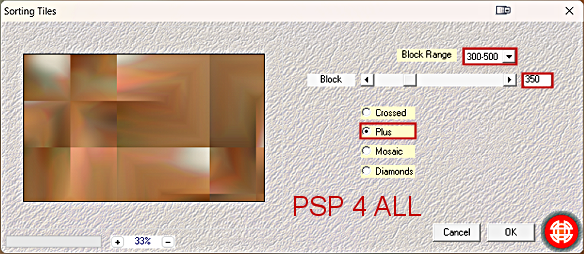
11. On copy, apply Mehdi > Sorting Tiles.
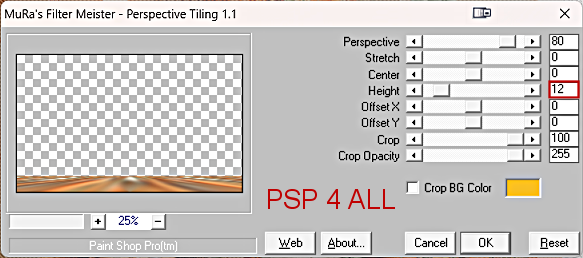
12. Layers > Properties > Blend mode > Overlay. 13. Add a Layer. Selections > Select All. 14. Edit > Paste the Misted image into Selection. 15. Layers > Properties > Blend mode > Screen and opacity on 50. 16. Selections > Select None. 17. Add a layer. Fill with white. 18. Open Narah_Mask_1330. 19. Layers > New mask layer > From an image and select Narah_Mask_1330. 20. Click on OK. 21. Click on Copy of Raster 2 et dupliquer. 22. Apply Mura's Meister > Perspective Tiling
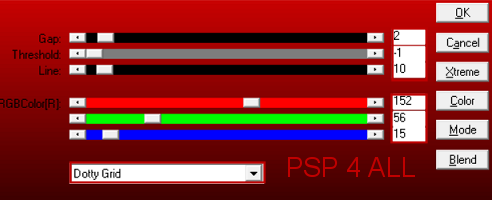
23. Apply Drop Shadow : 0, 0, 100, 25 - color = #000000. 24. Selections > Select All. 25. Selections > Float the Selections > Defloat. 26. Click on the layer with the misted image (Raster 3). 27. On your keyboard, click on Delete. 28. Selections > Select none. 29. Click on Raster (2) of Raster 2 ( Perspective Tiling layer) 30. Layers > Arrange > Move up. 31. Click on the layer at the top of the pile. STEP 2 - Selections 32. Layers > Add a layer. 33. Selections > Load/Save selection > Load selection from disk and select PSP4ALL_MF_AutumnW_Sel1_mf26. 34. Fill with White and set the Blend mode on Soft Light. 35. Apply AP01 > SilverLining > Dotty Grid.
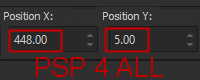
36. Edit > Repeat Lines > SilverLining. 37. Selections > Select None. 38. Add a Drop Shadow: 0, 0, 100, 25 - color #a1310f. 39. Duplicate. 40. I do the same steps - from 32 to 39 inc for the following selections: 41. PSP4ALL_MF_AutumnW_Sel2_mf26 42. PSP4ALL_MF_AutumnW_Sel3_mf26 43. PSP4ALL_MF_AutumnW_Sel4_mf26. Sélections > Load/ Save Selection and select Sel4 and fill with white. 44. Selections > Select None. 45. PSP4ALL_MF_AutumnW_Sel5_mf26. Sélections > Load/ Save Selection and selectSel5 and fill with white. 46. Opacity 35%. 47. Selection > Select None. STEP 3 - Texts & Tubes 48. My Cloud Word - Copy Paste top right above Narah Mask. 49. Blend Mode on Overlay. 50. Hit K on your keyboad to activate the Pick Tool and modify Position X. et Position Y.
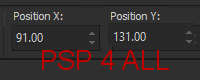
51. Hit the M key to desactivate the Pick Tool. 52. Add a layer. 53. Fall Tube - Scale = 33, Step = 200, top left in the frame. 54. Recolored with #A1310F. 55. Blend Mode on Darken. 56. Hit K on your keyboad to activate the Pick Tool and modify Position X. and Position Y.
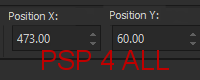
57. Hit the M key to desactivate the Pick Tool. 58. Duplicate. 59. Hello Autumn - Copy paste top right. See my tag. 60. Pick Tool (K). Position X. and Position Y.
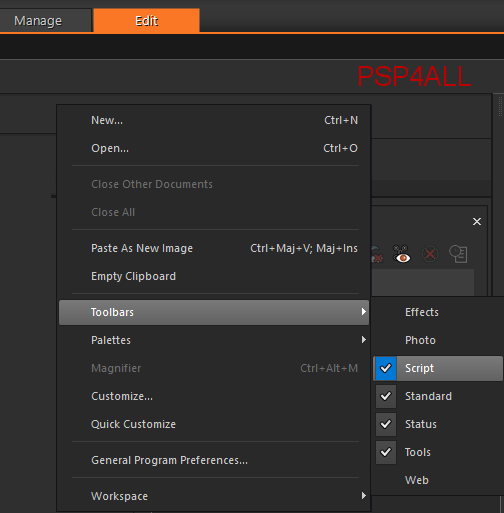
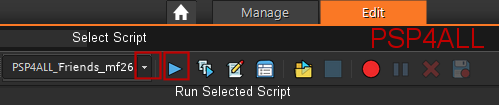
61. Desactivate (M) the Pick Tool. 62. Selections > Select None. 63. Tubes - I used 3 and added them at the bottom. STEP 4 : Borders 64. To make the borders, I used this script: PSP4ALL_AutumnW_mf26.PSPScript. 65. Take the script PSP4ALL_AutumnW_mf26.PSPScript in the supplies. 66. And place it in the Scripts-Trusted of your PSP. 67. To find this folder, have a look under File > Preferences > File Locations and then look for Scripts-Trusted. 68. Note the location and navigate to it and place my script PSP4ALL_AutumnW_mf26.PSPScript in the Scripts-Trusted.folder. 72. Let's check that the Script toolbar is visible. 69. If it isn't visible, right click in the grey area of your toolbar at the top, and select Toolbars > Script
70. Then you will have this. Click on the first arrow pointing downwards and select the script: PSP4ALL_AutumnW_mf26_mf26
71. If you are going to use my colours for the borders, check that the button Toggle Excution Mode is not pushed in. 72. If you are going to use different colours, then push in Toggle Execution Mode before starting.
74. Then click on the second arrow- the arrow pointing right, to execute the script. 75. If you prefer, or if there is a problem you can do the borders manually using the info in the txt file PSP4ALL_AutumnW_mf26_Borders_mf26, in the supplies. STEP 5 - Credits 76. Credits with a small font like Pixelette or any other small font. 77. Save.
If you have any questions, don't hesitate to contact me
|