You can do pretty much what you like with your result: create signatures with name added, extras or stats, websets.

Template: Caroline for Creative Misfits Creations. See under Holiday Templates and open Caroline-Temp1 . Mask: Vix_Christmas Mask 306 - Vix Masks and Vaybs Mask 98 at Designs by Vaybs. Filters: Tramages Tow The Line - Mura Meister Copies. Fonts: Pixelette for the credits and Bank Gothic Lt BT. You can download my E-Book which will let you work without being connected. STEP 1: Template Open in PSP and close the original. The template is rather wide so if you prefer your tags with a width around 600, then resize it now. Mine is 85% of the original. Click on the "background" layer and fill with this red: #460606- it's the color I will use on the Results page. Drop Shadow used throughout
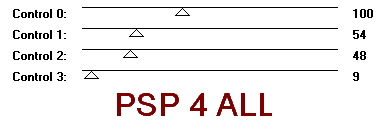
STEP 2: Ornaments layer Close all the layers and merge visible the Ornament back and Ornament layers. Then select one of the two elements and copy paste as a new layer. Delete the original. You should now have 2 ornaments but on different layers so you can position them exactly where you want on your finished tag later on. Open all the layers except the credits layer right at the top. STEP 3: Masks Mask 1: Add a layer and fill with white. Apply Vaybs Mask 98. Masks > New > From image - OK. Then Masks > Delete. In PSP 8 and above, it's under Layers > New Mask Layer > From Image. OK then Delete. Masque 2: Add a layer and fill with white. Apply Vix Mask 306. Masks > New > From image - OK. Then Masks > Delete. In PSP 8 and above, it's under Layers > New Mask Layer > From Image. OK then Delete. STEP 4: Rectangle 1 Selections > Select All > Select > Float > Select > Defloat and fill with a gradient. Mine has #C00000 in foreground and #000000 in background. Use the Fill tool with the gradient angle at 45° and Repeats at 5. Then apply Tramages > Tow The Line.
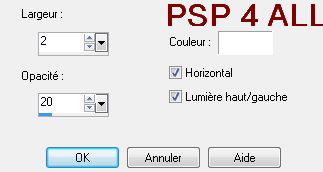
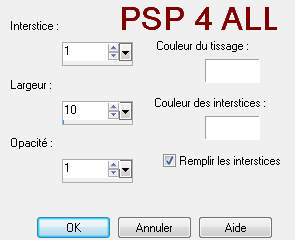
Apply drop shadow on Rectangle 1 back. STEP 5: Circle 1 Selections > Select All > Select > Float > Select > Defloat. Apply PSP Weave effect - Effects > Texture Effects
Keep the selection and paste your tube as a new layer - I used the tube close-up supplied - resize it then Image > Mirror. Click on Selections > Invert and hit Del on your keyboard. Change the mode of this layer from Normal to Screen. Selections > Select None. Apply drop shadow on Circle 1 back layer. STEP 6: Circle 2 Click on this layer and then Image > Flip and Image > Mirror. Now repeat exactly what you have done in STEP 5 but this time do not mirror the tube. Selections > Select None. Apply the same drop shadow on Circle 2 back layer. STEP 7: Pixel Words There's a typo so I have redone them. Delete the Pixel Words layer. Click on the Text tool, Vector, size 10 and Visitor TT2 BRK font. Colour=#000000. Then click on Objects and choose Align > Center in Canvas. Click on Layers > Convert to Raster Layer. Apply Mura Meister > Copies. Choose Tiling in the Preset Menu on the left at the bottom - choisir Tiling. Use the default settings except for Tile Gap: enter 3 instead of 0. Click on the Circle 1 layer. S Selections > Invert and hit Del on your keyboard. Change the mode of this layer to Soft Light. Repeat these steps for the Pixel Words above Circle 2. STEP 8: Rectangle 2. Click on the layer then Image > Rotate left 7° to straighten the rectangle. Selections > Select All > Select > Float > Select > Defloat and fill with the gradient we have used before. Apply PSP Weave effect - Effects > Texture effects > Weave
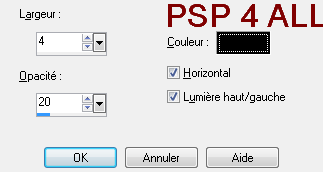
Selections > Select All. Image > Rotate right 7° to position the rectangle back where it was. Adjust > Sharpen > sharpen. Apply drop shadow on Rectangle 2 back layer. STEP 9: Your tube. Apply same drop shadow. STEP 10: Rectangle 3 Selections > Select All > Select > Float > Select > Defloat and fill with the gradient we have used before. Apply PSP Blinds effect - Effects > Texture effects
Apply drop shadow on Rectangle 3 back layer. STEP 11: Ornaments See my tag or where you would like. STEP 12: Credits. Choose a small font like Pixelette in size 6. STEP 13: Optional Select some of the snow-flakes on the mask layer and copy paste them where you want on the mask layer. STEP 14: Save your work as a .jpg, using the optimizer. Martine 5 December 2010 If you have any questions, don't hesitate to contact me |


