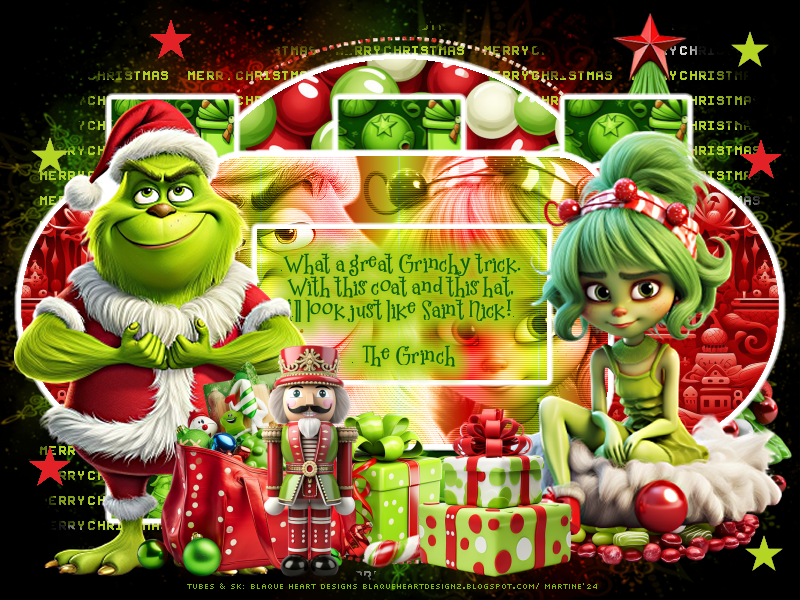
 My image : PSP 4ALL Christmas Grinch_mf24. In the supplies zip with my WA. My mage has all the Alpha selections needed to complete my tutorial. Scrapkit: Grinch Please, IA scrapkit by Blake Heart sur son site Blaque Heart Designz. Plugins : Eye Candy 4000 > Gradient Glow Mura's Meister > Copies penta.com > VTR Mask: RD_Mask828 by Rachel - Rachel Designs. Supplies:
Fonts: 2 Peas Mister Giggles et Pixelette for the credits ****************************** Reminder: *** Depending on the colors & tube you are going to use, feel free to change the mode and opacity of the layers. *** I work from the bottom to the top. STEP 1 - Template 1. Open my image: MF_XmasG_mf24. It's the image we will work on. It contains the Alpha Selections needed to complete this tutorial. They are not visible and we will load them as we go alo,ng, later by layer. 2. Shift+D to duplicate. PSP 4ALL Christmas Grinch_mf24. We work on the copy. 3. Delete the Credits layer right at the top: PSP 4ALL Christmas Grinch_mf24. 4. bkg. Leave black. 5. Layer 1 - Selections > Load/ Save Selection > Load selection from Alpha Channel
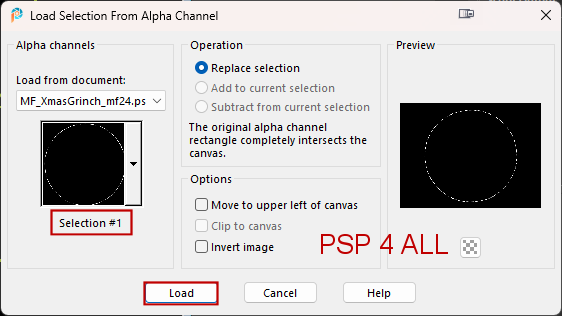
6. Choose Selection #1
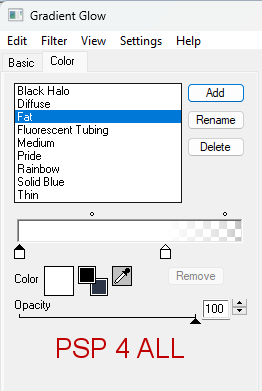
7. Fill with a linear gradient rmade of the 2 colours red #C00000 and white #FFFFFF with the angle on 90Ḟ and Repeat on 5. 8. Selections > Select None. 9. Layer 2 - In the Layers palette, click on Layer 2. 10. Selections and load Alpha Selection #2. 11. Resize BHD_GP-Paper (5) to 55% and paste as a new layer. 12. Selections > Invert > Delete. 13. Selections > Select None. 14. Apply Eye Candy 4000 > Gradient Glow .
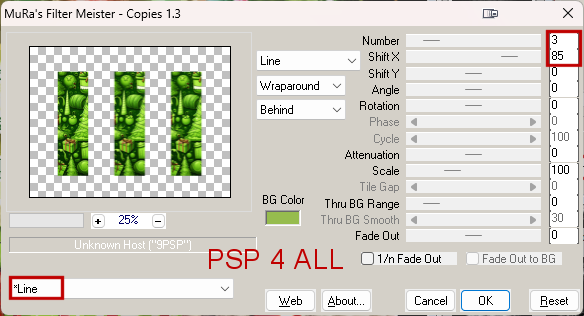
15. Layer 3 - In the Layers palette, click on Layer 3. 16. Selections and load Alpha Selection #3. 17. Resize BHD_GP-Paper (28) to 55% and paste as new layer. 18. Selections > Invert > Delete. 19. Selections > Select None. 20. Apply the same Eye Candy 4000 > Gradient Glow. 21. Mura's Meister > Copies > Line
22. Layer 4 - In the Layers palette, click on Layer 4. 23. Selections and load Alpha Selection #4. 24. Resize BHD_GP-Paper (29) to 55% and paste as new layer. 25. Selections > Invert > Delete. 26. Selections > Select None. 27. Apply the same Eye Candy 4000 > Gradient Glow. 28. Layers > Duplicate. 29. On your keyboard, hit the K key to activate the Pick tool.
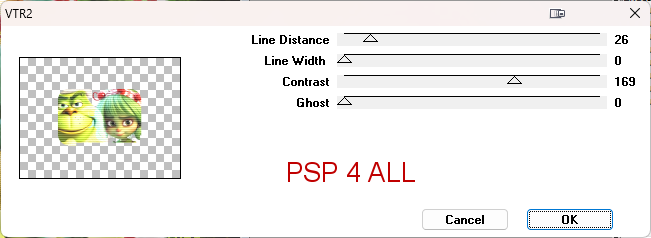
30. Press the M key to disable the Pick tool. 31. Layer 5 - Selections and load Alpha Selection #5. 32. Fill with a linear gradient rmade of the 2 colours red #C00000 and green #B4D524, angle at 90Ḟ and Repeat 5. 33. Selections > Select None 34. Apply the same Eye Candy 4000 > Gradient Glow. 35. Load the Alpha Selection #5 again 36. Add 2 close-ups of your tubes, one on the left, one on the right. 37. Layers > Merge down. 38. Selections > Invert. 39. Selections > Select None. 40. Set this layer on Luminance(Legacy) or the Blend mode that suits you. 41. Apply penta.com > VTR2 - default configuration.
42. Layer 6 - Click on the layer below the 2 tubes, the layer filled with the gradient. 43. Load Alpha Selection #6. 44. Selection > Promote selection to layer. 45. Layers > Arrange > Move up. 46. Apply penta.com > VTR2 - configuration par défaut. 47. Selections > Float > Defloat > Selections > Modify > Select Slections Borders.
48. Fill with white. 49. Selections > Select None. STEP 2 - Mask 50. Activate bkg. 51. Add a calque and remplir with a linear gradient red #C00000 and green #B4D524, angle on 90 and Repeat 5. 52. Open RD_Mask828. 53. Layers > New mask layer > From an image and choose RD_Mask828. 54. Click on OK. 55. Image > Resize110%. STEP 3 - Text and Elements 56. Back to the top of the pile ana add the text. 57. I wrote mine in green #206B0D with 2 Peas Mister Giggles. 58. I applied Eye Candy > Gradient Glow: Fat, in green #B4D524 for the 2 colous, Glow Width=5.16 59. Add the tubes. 60. BHD_GP-El (112) - 35%. Left. 61. BHD_GP-El (121) - 25%. Middle. 62. BHD_GP-El (59) -25%. Rotate 20Ḟ right. 63. BHD_GP-El (18) -25%. 64. BHD_GP-El (49) -25%. Under the tube on the right. *** Stars *** 65. Selections > Load/ Save Selection > Load selection from Alpha Channel. Choose selection #7. 66. Fill with green: #B4D524. 67. Selections > Select None. 68. Duplicate a couple of times and add here and there. 69. Load the 2nd star: selection #8. 70. Fill with red: #E32228. 71. Selections > Select None. 72. Duplicate and add here and there. STEP 4 - Credits 73. with a small pixel font like Pixelette or any other small font 74. Save. Martine 10 December 2024 If you have any questions, don't hesitate to contact me |