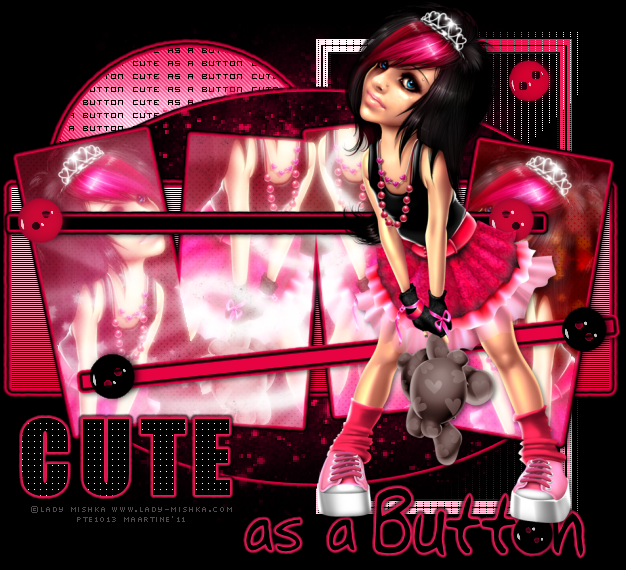
You can do pretty much what you like with your result: create signatures with name added, extras or stats, websets.
 Tube of your choice, free or not, but in either case, credit must be given on
the tag. I used a tube ©Lady Mishka -
www.lady-mishka.com.
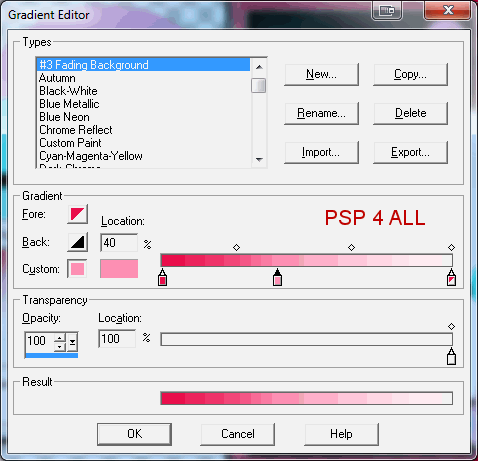
Fonts: Impact, Visitor TT2 BRK and Pixelette for the credits.You can download my E-Book which will let you work without being connected. STEP 1: Template Open the template. Duplicate and close the oiginal. Fill the background layer with #000000 for the results page. Delete the Crédits layer. Choose one colour of your tube as the main colour you will use throughout this tut. I chose #E70241. STEP 2: Multicolor Frame Select the white rectangle with your magic wand. Add a layer and fill with black #000000. click back on the original layer and select both the pink nd turquoise borders. Move back up onto the black layer and fill the selection with a gradient. I used my main colour #E70241, #FD8DB2 towards the middle and white at the end.
Click back on the original layer and select the black border. Go back to your new layer and fill the selection with black. Delete the original layer. Selections > Select none. Duplicate this new layer and on the bottom layer, apply Tramages > Tow The Line
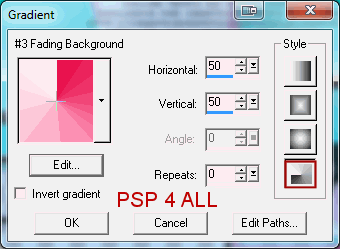
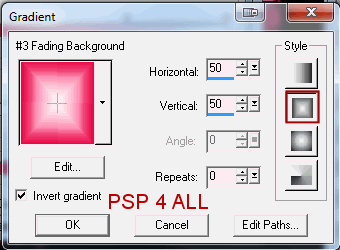
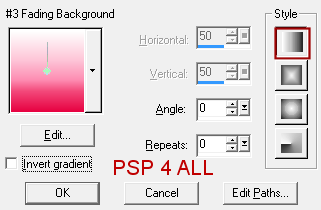
And on the top layer, the copy, apply Filters Unlimited - Video > Interlace. Check both Odd Scanlines and Include Alpha Channel. STEP 3: Pink Circle Select with the magic wand. Fill with your gradient but this style
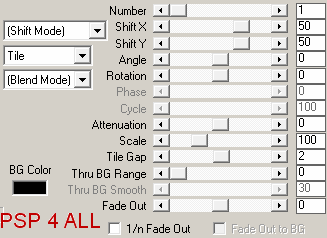
Delete the original layer. Keep selected. Open a new image, transparent, 500x500. Text: Click on the text tool, colour black, Vector, size 10 and font Visitor TT2 BRK. Type Cute As A Button or a text of your choice. Then click on Objects and choose Align > Center in canvas. Then click on Layer > Convert to raster Layer. Apply Mura Meister > Copies. Preset Menu bottom left - choose Tiling. Use the default settings except for Tile Gap, replace 0 by 2
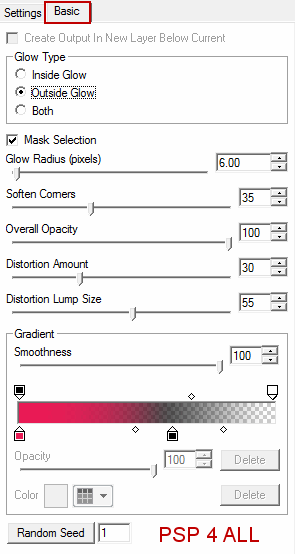
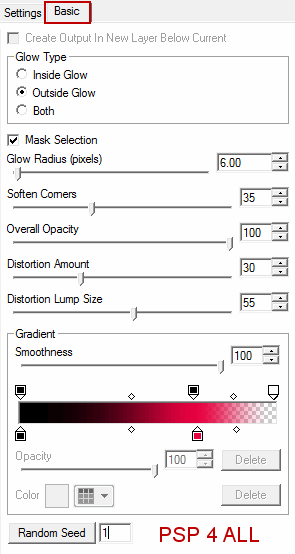
Copy paste as a new layer. Selections > Invert and hit Delete on your keyboard. Selections > Select None. Activate the circle layer and apply Eye Candy 5: Impact > Gradient Glow. Under Settings cliqck on Factory Default and under Basic, use these settings
OK! Then re-apply this same Gradient Glow a second time.
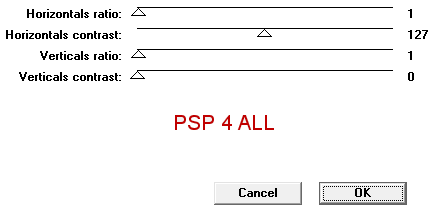
Delete the origianl layer. Apply Van Der Lee Unplugged > Interlace .
Then the same gradient glow twice. STEP 7: Green and White Frames With the magic wand, select the first frame. Add your tube as a new layer - resize it first if you so wish and then position as you want. Selections > Invert and hit Delete on your keyboard. Selections > Select None. Repeat for the other 3 frames. Close all the layers except for the 4 tube layers. Merge them visible. And now close this new merged layer. Open the 4 frame layers, the two white frames and the two green ones and merge visible. Selections > Select All then click once with your magic wand outside your merged image to select it. Choose one of the Vix textures, one that suits your colours and your tube. She has two sets of them on her blog. I used texture 11 in set 2 and resize it to 75%. Copy paste it as a new layer on top of your merged frame layer the Selctions > Invert and Delete. Selections > Select None. Apply the same gradient Glow but only once. Open the merged tube layer. Duplicate the layer. On your Layer Palette, choose Screen for the Blend Mode for both layers. Then apply a Gaussiang Blur. Adjust > Blur > Gaussian Blur of 3. Open all the layers. STEP 8: The two black stripes Leave the top one black and apply the same gradient Glow as before. Select the bottom one and add a new layer and fill with your main colour. Apply the Gradient Glow but invert the colours
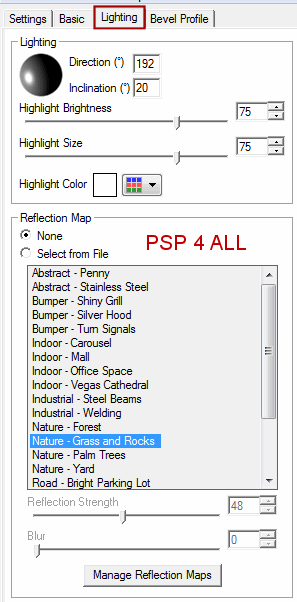
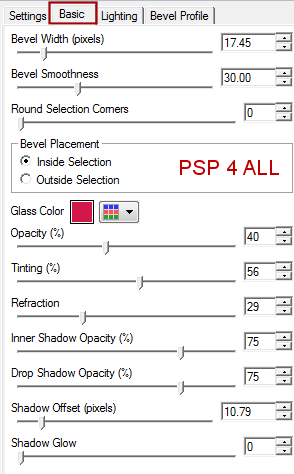
STEP 9: Buttons There are six. I coloured mine in black #000000 and also in my main colour #E70241. Select the button with your magic wand, add a layer and fill with the colour of your choice. Delete the original button and apply Eye Candy 5 > Impact > Glass affect on the new button. Selections > Select None.
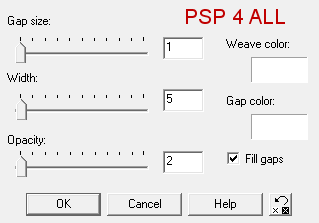
STEP 10: Wordart Cute I re-wrote it using the Impact font, in bold, in size 72. Then I deleted the original Cute on the wordart layer and on the wordart back. Apply a Textures Effect > Weave
And then apply the first Gradient Glow. STEP 11: Wordart As a button. Select, add a layer and color in black and add the same Gradient Glow. Delete the wordart and wordart back. STEP 10 : Add your tube. Apply the following drop shadow.
Apply the same drop shadow on the two stripes, the 4 merged frames et the oval.. STEP 12: Crédits Choose a small font like Pixelette in size 6, antialias off. LAST STEP: Save Optimize as a transparent png for better colours and save. Martine 24 February 2011 |
