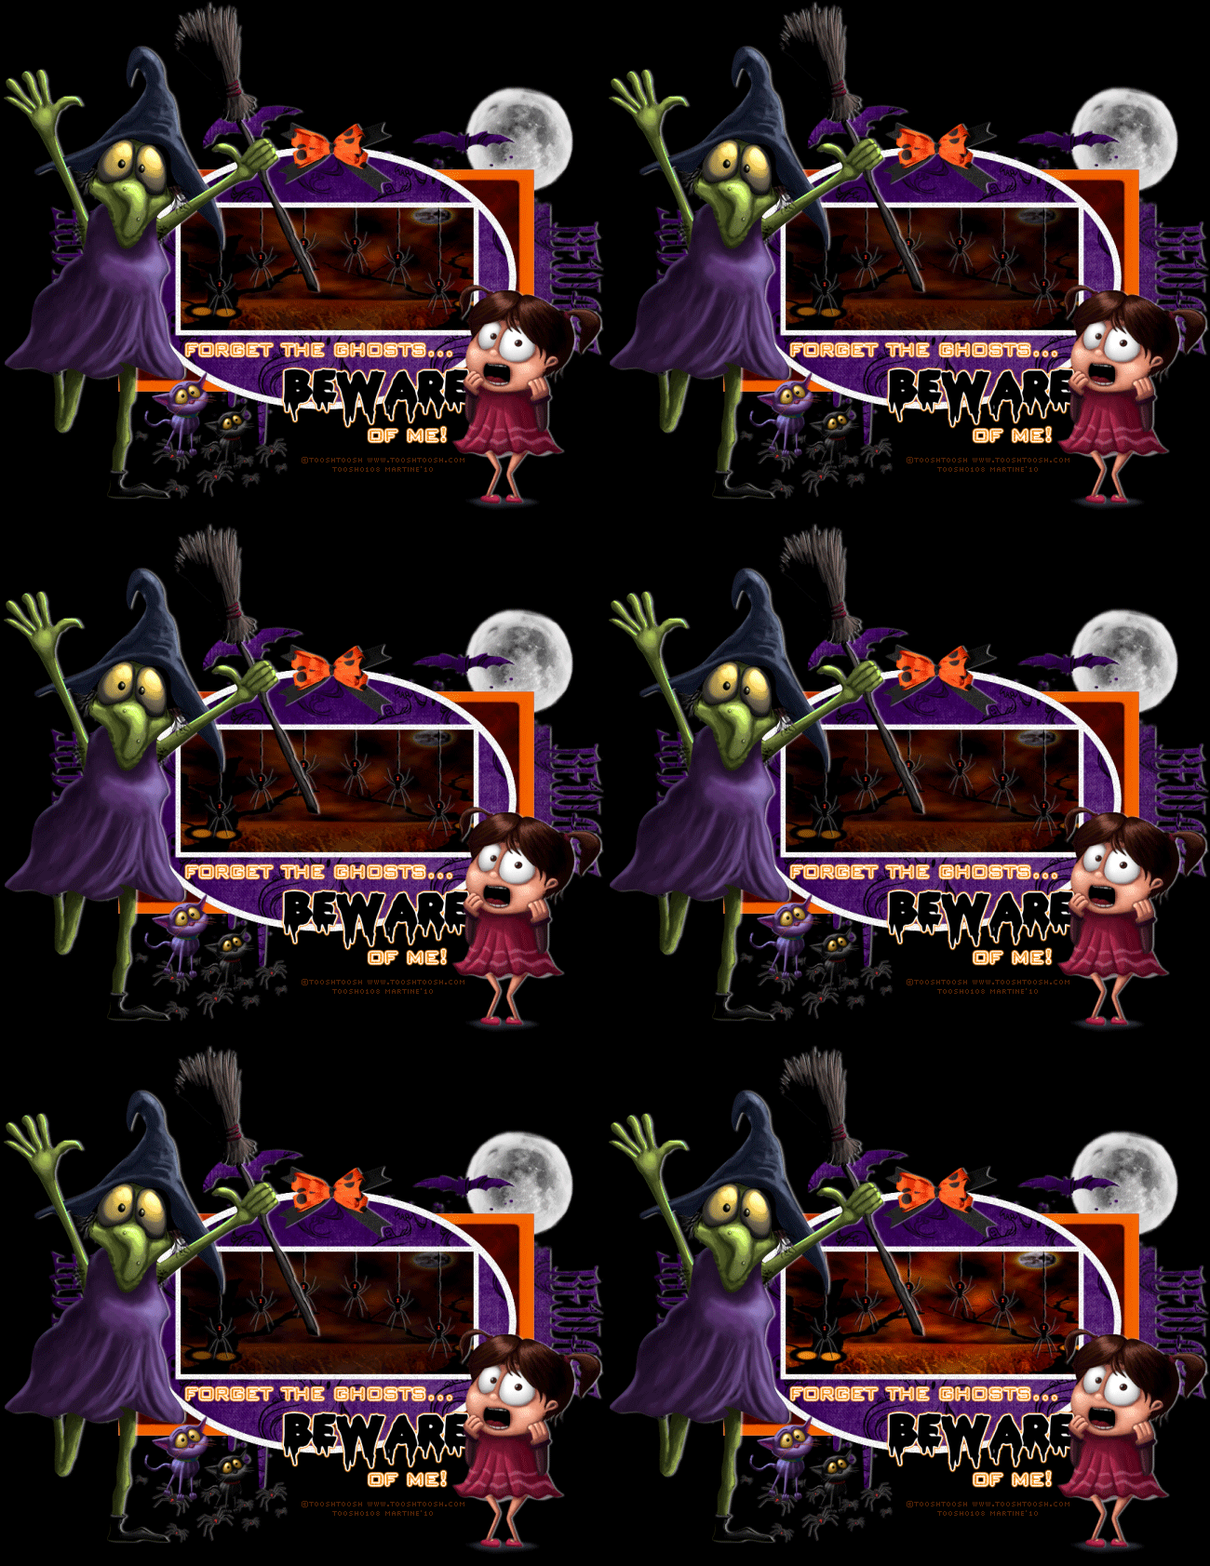
You can do pretty much what you like with your result: create signatures with name added, extras or stats, websets.

Scrapkit: by Tracy at Freebie Friends Scraps & More - Spooktacular. Template missy_tagtemplate273 at Tag templates by Missy. Mask: Vix_MaskHalloween0905 by Vix here - Vix Masks. Filters: Eye Candy 4000 (Gradient Glow) and dsb flux. Font: Pixelette for your credits. You can download my E-Book which will let you work without being connected.
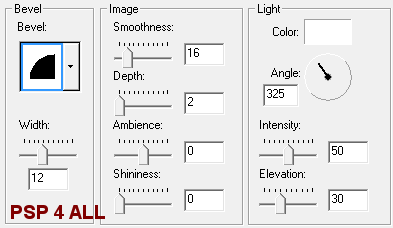
and a drop shadow - color #ffffff:
STEP 3: Rectangles Selections > Select All > Selections > Float > Selections > Defloat Copy paste Tracy.F Designz-Spooktacular.paper1 and copy paste in the selection. Selections > Select None. STEP 4: Oval Selections > Select All > Selections > Float > Selections > Defloat Selections > Select None Selections > Select All > Selections > Float > Selections > Defloat and add a layer. Fill it with white
Selections > Select None. Click inside the border. Selections > Modify > Expand by 4 pixels. Choose Tracy.F Designz-Spooktacular.paper4 and with the Fill tool, fill the selection. Selections > Select None. And move this layer under the border. STEP 5: Frame Background Selections > Select All > Selections > Float > Selections > Defloat and add a layer. Choose Tracy.F Designz-Spooktacular.paper6.png and resize to 40%. Copy paste the resized paper in the selection. Selections > Select None. Duplicate this layer with the paper so as to have 6 layers in all. Rename them Image1, Image2, Image3, Image4, Image5 and Image6. STEP 6: Elements. Lune - Tracy.F Designz-Spooktacular.moon : resize to 35% and position on the right, under the Mask layer. Dangling spiders - ATracy.F Designz-Spooktacular.danglers : resize to 40%. Position above the Image6 layer. Add a drop shadow, color #ffffff:
Walking spiders group - Tracy.F Designz-Spooktacular.spiders - resize to 30% and add the same drop shadow used for the other spiders. Position at the bottom, on the left. Bow- Tracy.F Designz-Spooktacular.bow4 - resize to 40% and position at the top above the oval border layer. Add this drop shadow, same white color:
STEP 7: Add your tubes. Then apply the same drop shadow as on the bow. STEP 8: Resize your tag now if you so wish. Mine is at 75% of the original. STEP 9: Credits. Choose a small font like Pixelette in size 6. STEP 10: Getting your animation ready Close all the layers Images except for the Image1 layer. Activate the Image1 layer. Apply an Illumination effect. Click on Effects > Illumination effects > Lights (In PSP 7, it is under Effects > Illumination Effects > Lights). Settings as below. Click on Default and then select 1. Then click on OK.
Close the Image1 layer. And click on Image2 layer. Choose Default and click on 2. Set the Intensity to 10. Close the Image2 layer. And click on Image3 layer. Choose Default and click on 3. Set the Intensity to 70. Close the Image3 layer. And click on Image4 layer. Choose Default and click on 4. Set the Intensity to 20. Close the Image4 layer. And click on Image5 layer. Choose Default and click on 5. This time, change the Darkness to 90. Leave Image6 layer as is. STEP 11: Animation Close Image2, Image3, Image4, Image5 et Image6 layers. Merge visible all the other layers and copy paste this merged image in Animation Shop. Go back to PSP. Click on the Undo arrow. This time close the Image1 layer and open the Image2 layer. Merge visible all the open layers. And copy paste this new merged image into AS, after the first frame. Rpeat for the other layers: Image3, Image4, Image5 et Image6. In Animation Shop, your finished animation should have 6 frames. Click on Edit > Select all and Animation > Frame Properties and enter 25. Click on the last frame and set this one at 32. You choose the numbers here, what suits you. To visualize your work, click on View Animation. You like what you see? Then save your work as a gif, using the optimizer. Martine 1 September 2010 If you have any questions, don't hesitate to contact me |


