|
|
(Version française ICI) |
|
|
|
|
|
|
|
You can do pretty much what you like with your result: create signatures with name added, extras or stats, websets.
|
Martine |

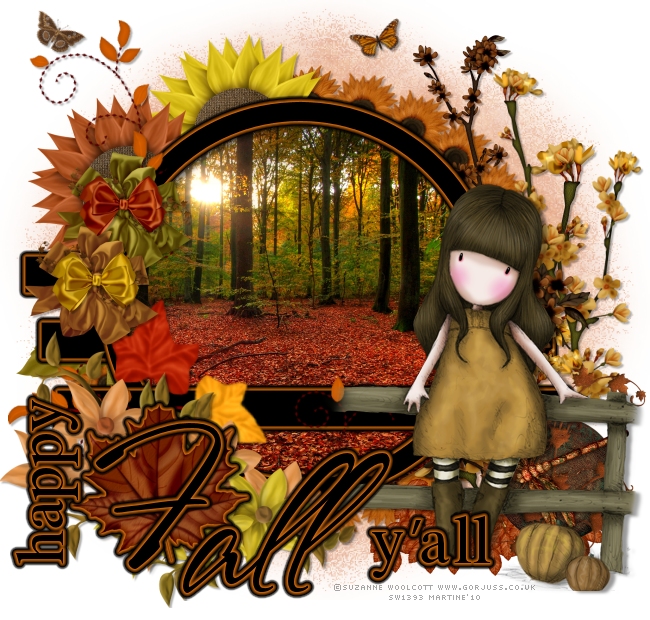
Scrapkit: by Pink Princess Scraps at Pink Princess Scraps/ - Autumn Harvest
Template 80 by Blissffully Beth
Mask: WSL Mask 119 by Chelle here Wesscotslass Creations
Filter: Eye Candy 4000 (Gradient Glow) - Mura Meister (Copies)
One image you are allowed to use. Mine comes from here : Stock.xchng. You have to join but it is free.
Wordart : Caitlin at Cupcake Sprinkles - Fall/Halloween Word Art
Fonts: Pixelette for the credits.
You can download my E-Book which will let you work without being connected.
STEP 1: Template
Open in PSP. Duplicate and close the original.
Close the redit layer at the top.
Leave the background layer white.
STEP 2: Mask
Mask: Add a layer and fill with one of the papers: AH_pp15_PPS. Apply
Chelle's mask
119. Masks > New > From image - OK. Then Masks > Delete. In PSP 8 and above, it's under Layers > New Mask Layer > From Image. OK
then Delete.
Lower this layer opacity and set it to 55%.
STEP 3: Line 1, Line 2 et Line 3
Selections > Select All > Selections > Float > Selections >
Defloat and fill with black.
Apply Eye Candy 4000: Gradient Glow with these settings
|
|
|
|
STEP 4: Circle Frame
Select the inside with the magic wand and then Selections > Modify by 8. Add your photo as a new layer. Then Selections > Invert and click on Delete.
Move this picture layer under the Circle Frame layer.
Applyr Eye Candy 4000 : Gradient Glow as above on the Circle frame.
STEP 5: Elements
AH ele3 (Flower) : resized to 15% - Then apply Mura Meister > Copies.
|
|
Move under the Circle Frame.
AH ele43&44 (Flowers): position on the left, under the Circle Frame.
AH ele60 (Leaves): resized to 75% and place on the left under the le Circle Frame.
AH ele46 & 47 (Bows): resized to 22% and position on the left above the Circle Frame.
AH ele23&24 (Bows): resized to 30%.
AH ele19&20 (Flowers): resized to 55% and Image > Flip.
AH ele18: on the right and then Image > Mirror and resize to 75%.
AH ele17 (Flowers): on the right, then select the excess at the bottom and delete.
AH ele40 (Butterfly): resized to 15%, place on the right and rotate left 20°.
AH ele26 (Butterfly): resized to 18%, place on the left and rotate right 30°.
AH ele54 (Leaf): resized to 40%. Apply the same Gradient Glow.
AH ele55 (Leaf): resized to 12%, place on the right, under the tube layer, and duplicate several times to fill the gap.
AH ele25: resized to 50% and place on the right.
STEP 5: Add your tube on the right.
STEP 6: Wordart.
Apply the same gradient Glow as before.
STEP 7: Credits
Choose a small font like Pixelette in size 6.
STEP 8: Ombre Portée
Add this drop shadow on your tube and Circle Frame:
|
V = 2 |
O = 40 |
|
H = 5 |
B = 4 |
et celle-ci sur les autres éléments:
|
V = 2 |
O = 30 |
|
H = 2 |
B = 2 |
STEP 9: Saving
Save one last time with all the layers left open. Then close the background layer and merge visible all the other layers. Copy paste this as a new image: it will remove the excess space around your result neatly. Add a layer, fill with white for the Results page and send it to the bottom. Then file > Export > JPEG optimizer. Use the wizard and choose Better image Quality.
Martine
1 September 2010
If you have any questions, don't hesitate to contact me