Please note that with the result of this tutorial, you can:
Download your supplies here:
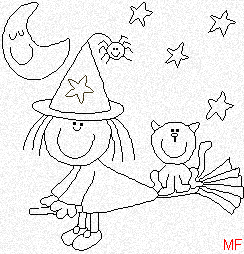
New image 270 x 280. And zoom to make it bigger. Take your paint brush, size 1 and draw the outline. This outline is also in the zip so you can have it open in PSP while working.
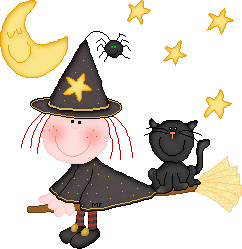
Time to choose your colours. There is a sample of mine in the zip but as always, it's better to use colours which are a bit different in shade or your own colours so the final image is not totally identical to mine. Remember, the outline colour should be darker, by at least three shades: 1. The witch:
2. Broom and cat:
3. Moon, Stars and Spiders :
We are now going to add some shading. We will apply the cut out effect on each different area of the image. So you take your magic wand, select the area > Selections > Float > Effects > 3D Effects > Cut out and and use my settings below. Each time, the shadow colour is that of the outline of the selected area. I also added some noise before deselecting but each time I'll tell you. Let's start with the witch. *The witch: Head and hands - Colours1 Outline: #FBCBC9 and fill with #FCDCDA.
Cheeks: Add a new layer and then take the paintbrush, size 15, colour: #F65A56 and put a dot on each cheek. Then go to effects and add a Gaussian blur of 5. You may have to lower the opacity of this layer if the cheeks seem too red. Just go to the Layer palette and play with the opacity. *Clothes: Colours1 Dress, Hat and shoes: Outline: #000000 and fill with #4B4343. Tights: Outline: #822222 et #000000; fill with #AC3233 et #454944 Shoes: Outline: #000000 et #4B4343; fill with #AC3233 et #DCB654
I added a new layer and some decorations to the hat and dress, using colour #DBB553. *Broom: Colours2 Outline: #693B1D and #FDCE7B; fill with #9A5C24 and #FAE7A6.
*Le chat: Couleurs2 Outline: #000000 and fill with #404040.
Moon and Stars: Colours3 Outliner: #E69E00 and fill with #FFE784.
*The spider: Colours3 Outline: #000000 and fill with #3F3939.
That's it. You have finished this little witch. Merge visible and this time save as a gif. See here to find out more about saving as a gif: Transparency. Martine |