And as always in my case, our Expert Resident colourist has added the final touch to the colouring. Thank you Vivi!
Please note that with the result of this tutorial, you can:
Dowload your supplies here:
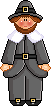
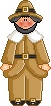
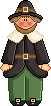
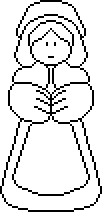
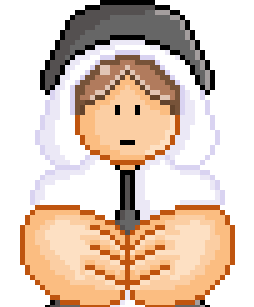
Time to colour in the doll. I used 4 different shades for the skin, 4 shades for the clothes from black to light grey. For the apron, 3 different shades of the same colour. And for the hair, 4. Use Palette Maker to create your different colours! Then colour as below.
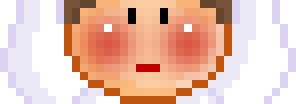
Time to do the cheeks. Use the Magic Wand to select the face, set the tolerance at 100. Then add a layer and with your paintbrush, size 6 or more, colour red, add a big blob on each cheek. Then Effects > Gaussian Blur of 2.00 and if necessary, lower the opacity of this layer on your layer palette. I actually do one cheek and then duplicate the layer and then Mirror it so my two cheeks are identical.
And that's it. The first doll is done. Save it as a PSP file in case you want to colour it again in different colours. It's very easy. You just click on one colour with your magic wand, go to selections > Modify > Select Similar and then replace the colour with another one using your Fill tool. You do this with all the colours. See I got a bit carried away and did mine in several colours! To save as a gif, open your file in Animation Shop and look at the settings here: Transparence If you fancy it, you can follow me to the next page to now do the male version of this. Martine November 2nd 2006 If you have any questions, don't hesitate to contact me |