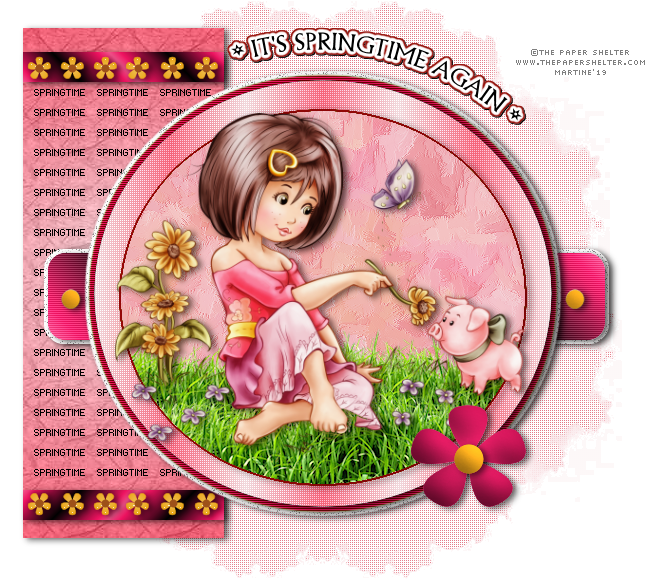
You can do pretty much what you like with your result: create signatures with name added, extras or stats, websets. Give all the credits that are required.
 Template: Creative Misfits Creations Spring Templates - download here. Choose the templates by biene. Mask: WSL_Mask425 by Weescottlass at Weescotlass Creations. Plugins: Filters Unlimited 2.0 > Japonese Paper. Mura's Meister > Copies. Unplugged Tools > Interlace. Penta.com > color dot & VTR2. Eye Candy 4000 > Gradient Glow. Supplies: my grass - download here. Police: Pixelette for the credits. Drop Shadow: 2, 4, 60, 15. You can download my E-Book which will let you work without being connected. STEP 1 Open the template. Maj D Duplicate and save the original. Click on masklayer biene and resize to 90%. Close these layers overlay and copy. Click on masklayer biene. Selections > Select All. Selections > Float. Selections > Defloat. Add a layer and fill with #C60424. Selections > Select None. Duplicate this layer. On the copy, apply Effects > Texture Effects > Blinds
Then repeat the Textures effect but do not check horizontal. Layers > Properties > Blend Mode > Click on Lighten. STEP 2 rectangle - Selections > Select All. Selections > Float. Selections > Defloat. Add a layer and fill with this gradient
Apply Filters Unlimited > Paper Textures > Japonese Paper with the default configurations. Selections > Select None. Add a Drop Shadow. STEP 3 pixelwords - Color in black. Adjust > Color > Channel Mixer. Red, Green, Blue and Constant at 0%, Monochrome checked. STEP 4 gradient stripe top & gradient stripe bottom. - Coloriser. Réglage > Teinte et Saturation > Coloriser avec la Teinte ŕ 240 et la Saturation ŕ 220. Add a Drop Shadow. STEP 5 glasflowers top & glasflowers bottom - Colorize with the Hue at 29 and Saturation at 211. Add a Drop Shadow. STEP 6 sm circles top & - sm circles bottom - Selections > Select All. Selections > Float. Selections > Defloat. Add a layer and fill with #9D5119. Selections > Select None. Apply Effects > 3D Effects > Inner Bevel.
Add a Drop Shadow. Delete the original layer. STEP 7 glitter rectangle - Leave as it is but add a Drop Shadow. STEP 8 gradient rectangle - Colorize with the Hue at 240 and Saturation at 220. Apply penta.com > VTR2 - default configuration. Add a Drop Shadow. STEP 9 glitter circle - Leave as it is but add a Drop Shadow. STEP 10 green big circle - Sélections > Sélectionner tout. Sélections > Flottante. Sélections > Statique. Ajouter un calque et remplir avec #E6122FD. Appliquer Unplugged Tools > Interlace avec la configuration par défaut. Sélections > Ne rien sélectionner. Add a Drop Shadow. Delete the original layer. STEP 11 black circle - Selections > Select All. Selections > Float. Selections > Defloat. Add a layer and fill with this gradient. Colours are the same but click on Linearand set the Angle at 90° and Repeats on 5.
Apply penta.com > color dot, default configuration. Selections > Select None. Add a Drop Shadow. Delete the original layer. STEP 12 green circle small - Selections > Selectionner All. Selections > Float. Selections > Defloat. Add a layer and fill with #960808. Selections > Modify > Contract by 2 pixels. Click on Delete. Add a layer and fill with #EFB1BA. Add the tube. Apply Mura's Meister > Copies. Preset menu on Wallpaper. Default configuration. Apply Effects > Art Media Effects > Brush Strokes
Layers > Properties > Blend Mode > Click on Soft Light. Delete the original layer. STEP 13 Place the grass which I supply at the bottom of the circle. See my tag. Add the tube. Duplicate the tube. On the copy, apply a Gaussian Blur of 10. Layers > Properties > Blend Mode > Click on Soft Light. Apply a Drop Shadow on the original. STEP 14 Delete Vektor1. wording springtime. Selections > Select All. Selections > Float. Selections > Defloat. Add a layer and fill with Apply Eye Candy 4000 > Gradient Glow.
Selections > Modify > Expand by 1 pixel. Add a layer and fill with #960808A. Slide this layer under the wordart. Back to the wordart. Layers > Merge down. Selections > Select None. Add a Drop Shadow 1, 1, 100, 1. ETAPE 15 buttons biene - Selections > Select All. Selections > Float. Selections > Defloat. Add a layer and fill with #E59E1B. Apply the Inner Bevel used in STEP 6. Select > Select None. Add a Drop Shadow: 2, 4, 60, 15. Delete the original layer.
STEP 17 sm circle - Repeat what you did for buttons biene in STEP 15. STEP 18 Credits: with a small font like Pixelette or any other small pixel font. Save your work. 21 March 2019 If you have any questions, don't hesitate to contact me |