Plugins: Mura's Meister : Pole Transform Filters Unlimited2 > &>Bkg Designers sf10 III > Texture Raw Canvas Carolaine and Sensibility > Halloween Night2 ECWS halftone > Diagonal4x4 Freeware Filters > Needles Pins L en K landksiteofwonders > L en K's Andreas Material: Line style, Narah's Mask, my selection and links to scrapkits with strawberry elements. Download here. Narah's Mask: Mask 0896 here. Also in the zip material file. Font: Century Gothic for the text and Pixelette for the credits. My colours: red #C71111 and green #4F7A32. Depending on the colors & tube you are going to use, feel free to change the mode and opacity of the layers. STEP 1 - Background Open an image 600x250. Fill with white. Make a linear gradient with 2 colours from your tube: green #4F7A32 and red
#C71111, angle at 90° et Repeat on 0.
Duplicate. Apply Mura's Meister > Pole Transform on the copy.
Duplicate. Original on Overlay and copy on Screen. Layers > Merge visible. Apply FU2 > &>Bkg Designers sf10 III > Texture Raw Canvas
and now apply Carolaine and Sensibility > Halloween Night2
Duplicate and apply ECWS halftone > Diagonal4x4
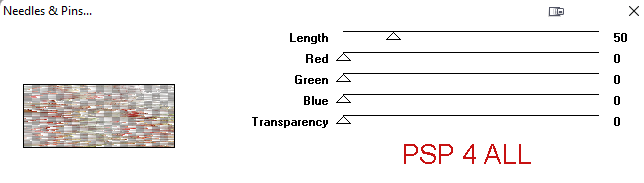
Blend Mode of this layer > Soft Light. Layers > Merge Down. Duplicate. Apply Freeware Filters >Needles Pins
Blend Mode of this layer > Overlay. Apply L en K landksiteofwonders > L en K's Andreas
Then Geométric Effects > Skew
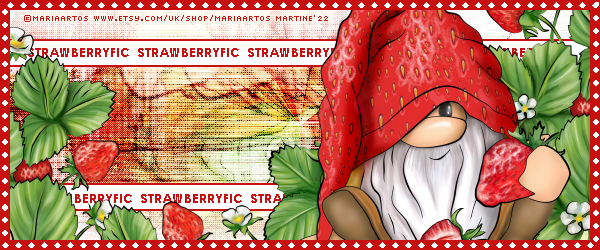
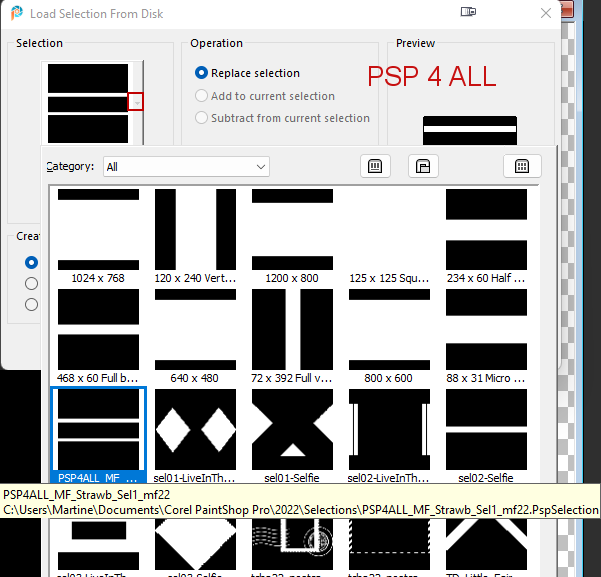
Blend Mode of this layer > Overlay. Layers > Merge Down. STEP 2 - Mask, elements and Tube Layers - Add a layer > Fill with #FFFFFF (white). Layers > New Mask Layer > From Image and choose NarahsMasks_0896. Click on OK. Layers > Merge Group. Add a layer. Selections > Load/Save Selection > Load Selection From disk. Choose PSP4ALL_MF_Strawb_Sel1_mf22.PspSelection
Fill with red (#C71111). Selections > Modify > Contract 2 pixels and fill with white. Selections > Select None. Add the text of your choice. Or mine: STRAWBERRYFIC, using Century Gothic, in rouge, bold. Objecs > Align > Horizontal Center. Duplicate and move down to place on the bottom white strip. Add your tube on the right and the elements you want to use on the left and in the middle, those in the material file or others of your choice. I have used my tube . I duplicated it and placed it on the left. Duplicated it again and apply a rotation 90° and placed it in the middle. STEP 3 - Border and Credits Border: Ajouter un calque. Selections > Modify and contract 10 pixels. RFill with red (#C71111). Selections > Delete. Selections > Select None. Add a layer. With the rectangle tool, in white, line style on Diamonds with 6 in width, draw a rectangle in the middle of the border. See my tag. Credits: with a small font like Pixelette or any other small font. Martine 21 July 2022 If you have any questions, don't hesitate to contact me |