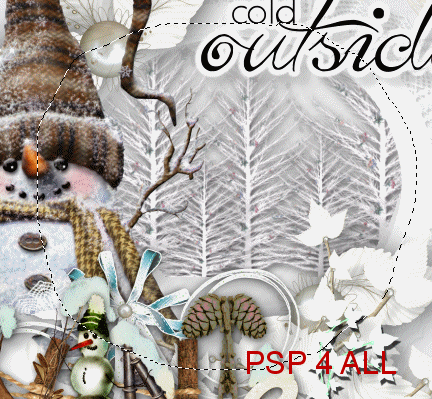
You can do pretty much what you like with your result: create signatures with name added, extras or stats, websets. Give all the credits that are required and for the tut to: Martine (http://chezmartine.com) for PSP 4 ALL (http://psp4all.com).

Le scrapkit: White Winter by Kiana Design - Download here. Word Art: Winter Time Vol.1 by Aline Korf alias JaK - Line - Download here. Plugins: Eye Candy 4000 by Alien Skin. Snowflakes by VanDerLee here. Fonts: Pixelette pour les crédits. You can download my E-Book which will let you work without being connected. STEP 1: Elements Open a transparent image 650x600 in PSP. Fill with #EAEAEC. Once each element is resized, sharpen if needed. Adjust > Sharpness > Unsharp Mask:
white winter elements5 - 30% - Drop Shadow #C0C0C0:
white winter elements5 - 30% - Drop Shadow #808080:
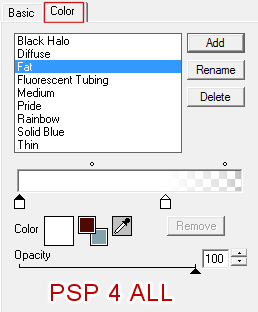
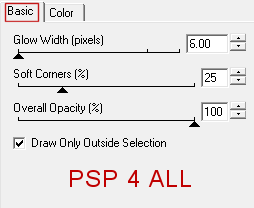
white winter elements3 - 17%. white winter elements7 - 20%. Colorize. Adjust > Hue and Saturation > Colorize with Hue at 255 and Saturation at 0. Activate the background layer #EAEAEC. Add a layer. Select 1 or 2 at a time of the white winter elements7 and copy paste them here and there around the frame. Add your tube. Drop Shadow. white winter elements9 -18%. Drop Shadow. Aline Word Art - 20%. Apply Eye Candy Gradient Glow.
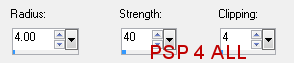
Same Drop Shadow. white winter elements10 - 15%. Click on frame layer and with the Freehand Selection tool and go around it:
Then copy paste white winter elements10 as a new layer. Selections > Invert > Click on Delete. Place this new layer under the frame. ETAPE 2 : Credits with a font like Pixelette or any other pixel font.
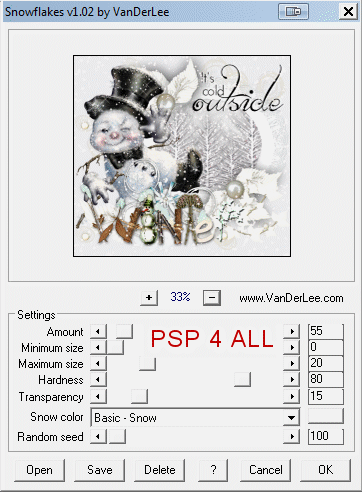
ETAPE 3 : Animation
and click on OK. Merge visible and copy paste this merged image in Animation Shop. Frame 2: Back in PSP. Click 3 times on the Undo arrow and apply the Snowflakes effect a second time. Keep the same settings except set the Random seed at 200. Click on OK. Merge visible and copy paste this merged image after the active frame in Animation Shop. Frame 3: Back in PSP. And repeat but this time set the Random Seed at 300. Paste in AS. Frame 4: And a 4th time with the Random Seed at 400 this time. Paste in AS. You now have 4 frames in your animation. Edit > Select All. Animation > Frame properties > Display Time and enter 20. Click on View Animation to check that you are happy with the speed. If you are happy, click on File and save. Martine 16 January 2012 If you have any questions, don't hesitate to contact me |