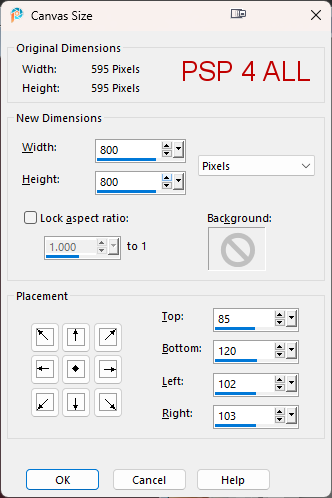
Template: Winter by Jen for the Tagger's Lounge. Download Winter templates. Mask: DD_GeoMask_10 by Dangerously Delicious Designz. Download here. Scrapkit: Cozy Winter_MTA by Linda at My Tagging Addiction. Download here. Scenery Sets: Frozen Forest Papers by Linda at My Tagging Addiction. Download ici. WA by Vix: Let it Snow. Download ici. Plugins: Mura Meister > Copies Eye Candy 4000 > Gradient Glow. VDL Adrenaline > Snowflakes Fonts: Pixelette for the credits. ****************************** Reminder: *** Method to color a layer or add a paper - To fill a layer with colour, Selections > Select All. Selections > Float > Selections > Defloat. Or click with the magic wand. Add a layer > Fill with the new colour or paper, texture. Apply plugin if needed. Selections > Select None. Delete the original layer. *** Depending on the colors & tube you are going to use, feel free to change the mode and opacity of the layers. Main colour: #2c3646. Note: I have colored or papered all the layers of the template although some of the layers will be hidden by my tube. However not all of you will use the same tube or put it where mine is so these layers may be visible. (38 ŕ 42). STEP 1 - Template and Mask 1. Open the template. Shift+D to duplcate. 2. Delete Vector 2 (Crédits). 3. Image > Resize 85% with Resize all layers checked. 4. Image > Canvas size
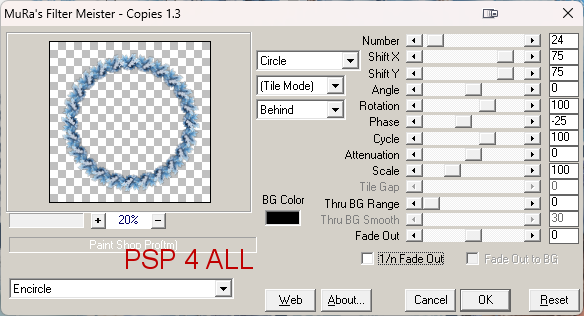
5. Close all the layers. Open them back as you go along. We work from the bottom up. 6. Bottom of the pile, right under Raster 1. Add a layer and fill with white. 7. Add a layer and fill with blue #2c3646. 8. Open mask DD_GeoMask_10. 9. Layers > New mask layer > From image and choose DD_GeoMask_10. Do not check Invert Mask data. 10. Click on OK. 11. Layers > Merge group. 12. element_11 - Resize to 28%. 13. Apply Mura Meister > Copies > Encircle.
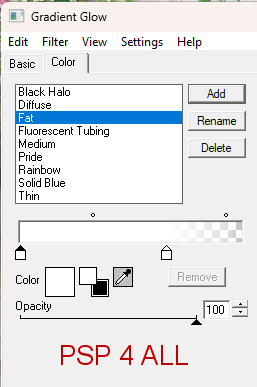
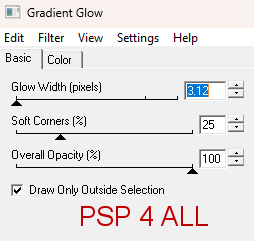
14. Element_9 - 25%. 15. Apply Mura Meister > Copies > Encircle but change Shift X and Shift Y and enter 65. STEP 2 - Template layers 16. Raster 1 and Copy of Raster 1 - Merge these 2 layers. 17. Image > Rotate 45° left. 18. Click on the circle on the left. Selections > Expand 5 pixels. 19. Add a layer and paste paper_8 in the selection. 20. Click on the circle on the right. Image > Selections > Expand 5 pixels. 21. Add a layer and paste frozen-forest-4 in the selection. 22. Copy of Raster 3 and Copy (2) of Raster 3. Merge. 23. Selections and add a layer and fill with #2c3646. 24. Apply Eye Candy 4000 > Gradient Glow > Fat
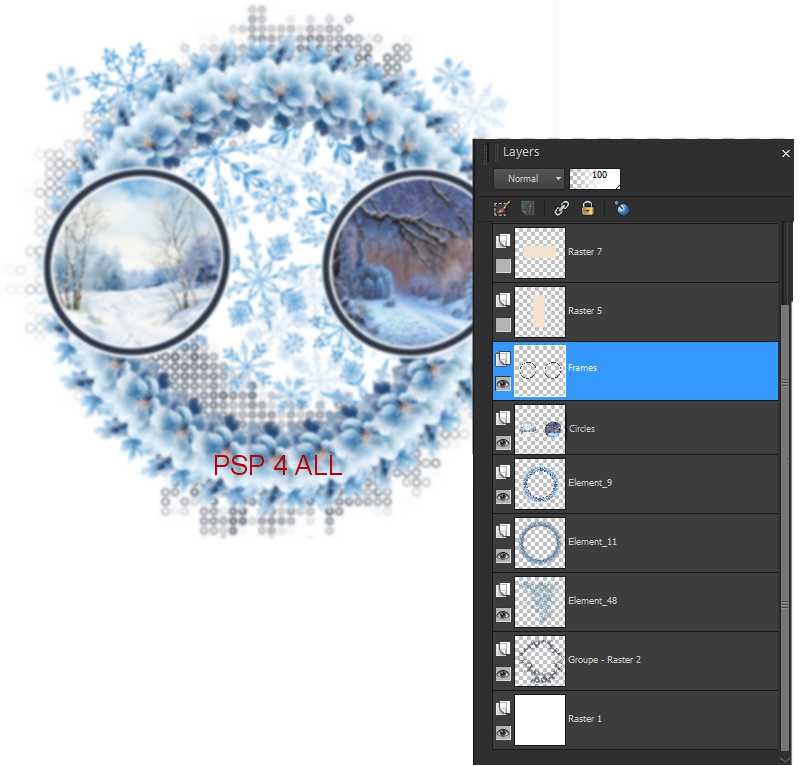
25. Image > Rotate left 45%. 26. There are 2 layers: the 2 circles with the scenery - rename this layer Circles and the 2 frames above - rename them Frames. 17. Result and Layers Palette so far
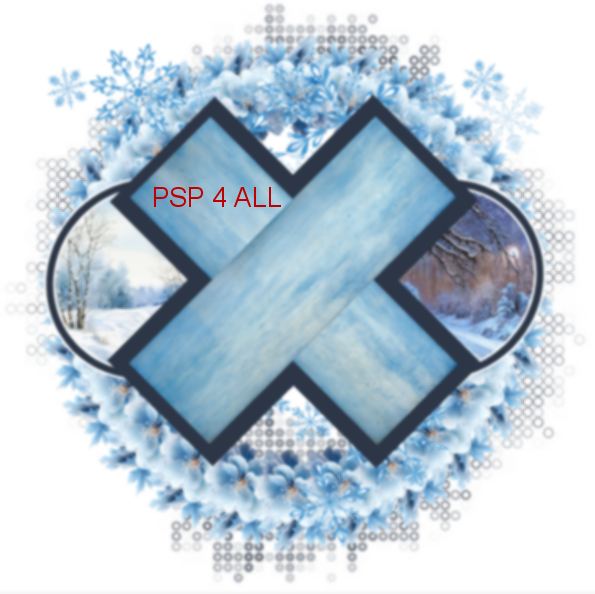
28. Raster 5 - Objects > Align > Horizontal Center. 29. Raster 5 and Raster 7. Fill with #2c3646. 30. Raster 4 - Add a layer and fill the selection with Paper_4. 31. Raster 8 - Add a layer and fill the selection with Paper_4. 32. Merge these 4 layers and rotate 45% left. 33. You should see this
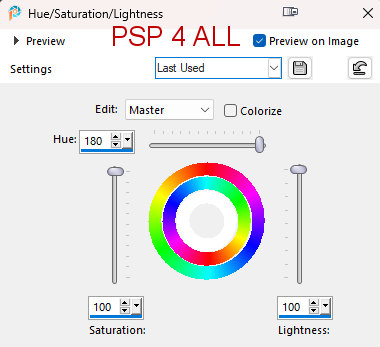
34. Raster 9 - Apply the same Gradient Glow. 35. Delete Raster 2. 36. Copy of Raster 3 - Add a layer and fill the selection with Paper_1. 37. Apply the same Gradient Glow. 38. Raster 6 and Vector 1 - Colorize in white. Adjust > Hue and Saturation > Hue/ Saturation/ Lightness.
39. Raster 2. Layer and fill with #2c3646 40. Add some noiset. Adjust > Add > Add/ Remove Noise
41. Apply Candy 4000 > Same Gradient Glow. 42. Raster 10 - Leave as it is. 43. Circles (bottom - Layers > Arrange > Bring to Top. 44. Frames (bottom) - Layers > Arrange > Bring to Top. 45. Close these 2 layers Circles and Frames. Merge them and rename Temp 1. STEP 3 - Tube and other elements at the bottom of the template 46. Check you are at the top of all the layers and add the tube. 47. Element_13 - 65%. 48. Element_47 - 70%, left. Duplicate. Image > Mirror. Place on the right. 49. Element_15 - 45%. Middle. 50. Element_7 - 45%. Middle. 51. Element_28 - 95%. Left. 52. Element_52 - 80%. Right. 53. Add the WA. Resize to 85%. Apply the same Gradient Glow. 54. Credits - with a small pixel font like Pixelette or any other small font. STEP 4 - Animation 55. Layers Temp 1 and Circles must be closed. 56. The following layers: Frames, the tube, elements from the kit, WA layer and the Credits layers must be open. 57. Merge all these layers (56) and rename Temp 2. 58. You now have 3 layers: Temp 1 at the bottom, Circles in the middle and Temp 2 at the top. 59. Activate the middle layer Circles. 60. Selections > Select All. Selections > Float. Selections > Defloat. 61. Apply VDL Adrenaline. 62. Effects > Plugins > VDL Adrenaline > Snowflakes.
63. Click on Okay. 64. Selections > Select None. 65. Edit > Copy Special > Copy Merged. 66. Open Animation Shop. 67. Paste As New Animation. 68. Back to PSP - Undo twice to remove the snow and be back to the rectangular selection. 69. Apply VDL Adrenaline but change Random Seed to 2650. 70. Click on Okay. 71. Selections > Select None. 72. Edit > Copy Special > Copy Merged. 73. In Animation Shop, Edit > Paste After Current Frame. 74. Back to PSP. 75. And Repeat. But you must change Random Seed each time. 1. 1727 2. 2650 3. 3250 4. 4380 5. 6000 6. 7850 7. 8990 8. 9970 76. You now have 8 images in Animation Shop. 77. Click on View Animation for a last check and save as a gif. Martine 23 January 2024 If you have any questions, don't hesitate to contact me |