Supplies: my selections, my colours, gradient, my script and the text version for those not wanting to use the script. All in this zip.
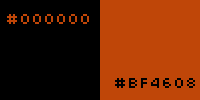
Scrapkit: Winter Wonderland, scrapkit by Kelly at Kelly's AI Artroom. Plugins: Mura's Meister > Copies. AP01 > Gritty Noise Cybia > Screenworks Eye Candy 4000 > Gradient Glow Font: Pixelette for the credits. ****************************** *** Depending on the colors & tube you are going to use, feel free to change the mode and opacity of the layers. My colours : #000000 et #BF4608.
*** Add the gradient in the Gradients folder of your PSP and the script in the Scripts-Trusted folder (See below - STEP 2). STEP 1 - Le fond 1. Open an image 850x500. 2. Add a layer and fill with my gradient PSP4All_MF_Winter_mf26, 2 colours #000000 et #BF4608 - Angle = 0 and Repeat = 1. Or use your own colours. 3. Rename Bkg 1. 4. Duplicate this layer Bkg 1 et rename the copy Bkg 2. 5. Bkg 2 - Selections > Load/ Save a selection > Load selection from the disk. 6. Choose my selection PSP4ALL_MF_Winter_Sel1_mf26. 7. Click on OK. 8. Selections > Promote Selection to Layer. 9. Selections > Modify > Contract 20 pixels. 10. Fill the selection with paper KAA WW paper 1. 11. Selections > Select None. 12. Apply Drop Shadow 0, 0, 75, 25 - black. 13. Back to Bkg 2. 14. Selections > Selections > Load/ Save a selection > Load selection from the disk. 15. Choose my selection PSP4ALL_MF_Winter_Sel2_mf26. 16. Click on OK. 17. Selections > Promote Selection to Layer. 18. Selections > Modify > Contract 20 pixels. 19. Fill the selection with paper KAA WW paper 2. 20. Selections > Select None. 21. Apply Drop Shadow 0, 0, 75, 25 - black. 22. Back to Bkg2. 23. Fill with the same gradient but change these: angle = 90 and Repeat = 5. 24. Apply Mura's Meister > Perspective Tiling
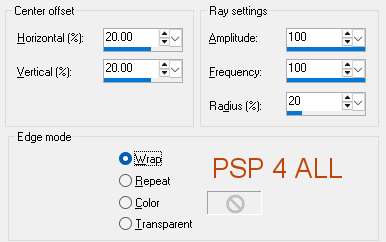
25. Back to Bkg 1. 26. On Bkg 1, apply Distortion Effects > Spiky Halo
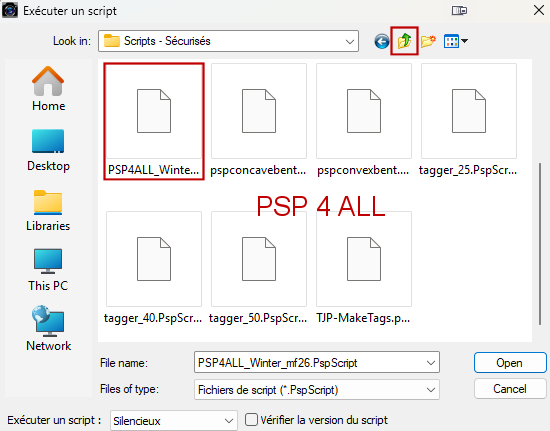
27. Apply the same drop shadow 0, 0, 75, 25 - black. 28. Add element KAA WW flowers 3, resized to 50%, on the right, at the bottom. STEP 2 - Borders 29. Do not merge before running the script. 30. To make the borders, I used this script: PSP4ALL_Winter_mf26. 31. Check that you have those 2 plugins installed: Carolaine & Sensibility et Graphics Plus. 32. Take PSP4ALL_Winter_mf26 in the supplies. 33. And place it in the Scripts-Trusted of your PSP. 34. To find this folder, have a look under File > Preferences > File Locations and then look for Scripts-Trusted. 35. Note the location and navigate to it and place my script PSP4ALL_Winter_mf26 in this folder. 36. Click on File > Script 37. A window opens. 38. Check it is the Script-Trusted folder; if not, navigate to it. 39. At the top, click on the folder with the arrow to navigate to the Script-Trusted folder, if necessary
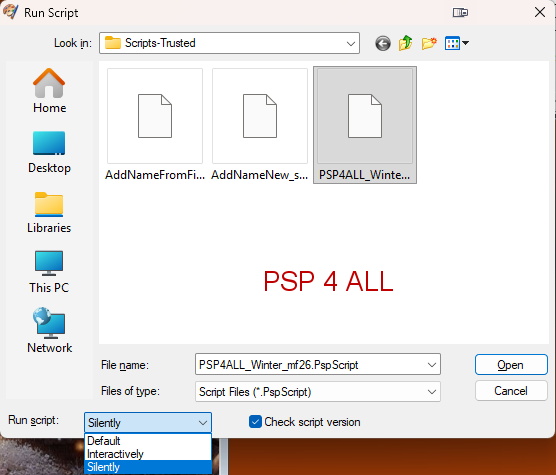
40. Select this file. 41. Open the little window, at the bottom, on the left: Run script
42. If you are using my colours, choose Silently. The script will run. 43. If you have changed the colours, choose Interactively and the script will stop regularly so you can add your own colours. 44. If you prefer, the manual option is in the supplies. STEP 3 - Tube and WA 45. Add the tube on the left. 46. Paste my text Winter (in Supplies) as a new layer. 47. Select it and paste the paper KAA WW paper 2 - resized at 50%, as a new layer. Move it so the deers are visible. 48. Selections > Invert > Delete. 49. Apply the same drop shadow. STEP 4 - Credits 50. with a font like Pixelette or any other small pixel font. 51. Save. Martine 17 September 2025 If you have any questions, don't hesitate to contact me
|